Creating a Segment
Overview
Audience segmentation lets you group users based on shared behaviors and attributes. After creating a segment, you can:
- Send personalized AIQUA campaigns by targeting each segment with messages that match their preferences—instead of sending the same campaign to everyone.
- Create AIRIS reports more quickly by using existing segments when creating the report.
In addition, unified segments are synced across both AIQUA and AIRIS instances within the same project, enabling quicker campaign execution and streamlining reporting.
- After creating unified segments in AIQUA, the segment will also be available in the AIRIS segment list.
- All AIRIS segments are unified segments by default. After creating a segment in AIRIS, it will also be available in the AIQUA segment list.
Notes and limitations
- Only the 50 most-recently used segments within the past seven days are automatically refreshed at midnight each day, based on the project's timezone. To refresh a segment, edit it or use it in a campaign or report.
- Segments can contain up to five million users. If you need segments to support more users, please contact your customer success manager.
1. Create a new unified segment
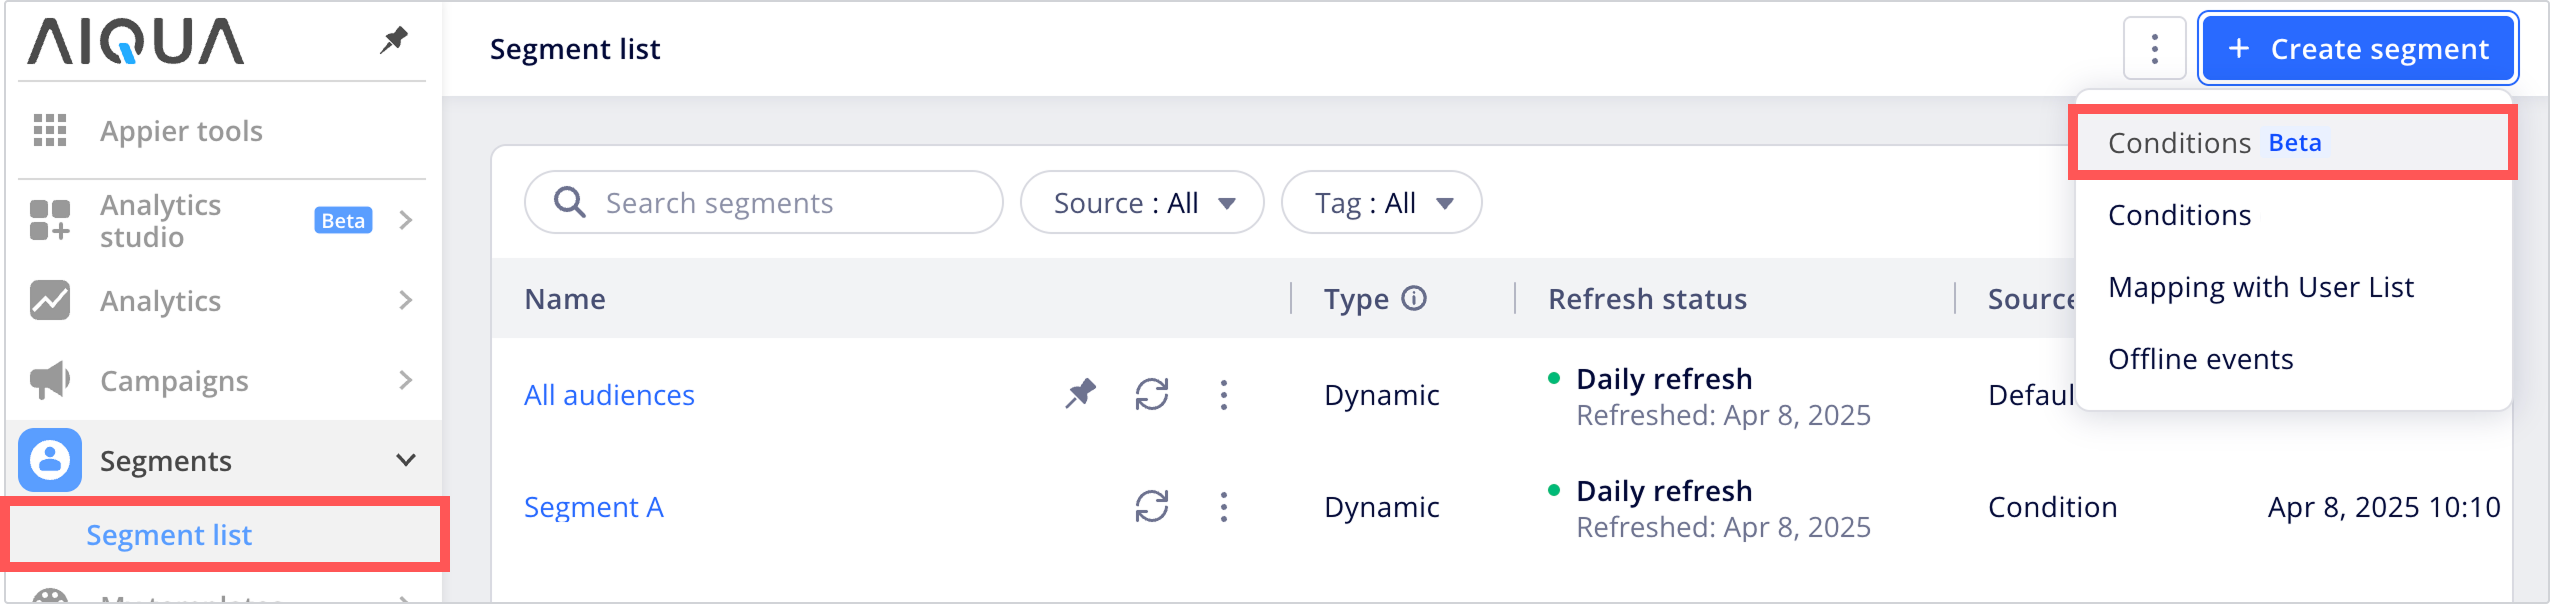
To create unified segments, open the segment creation page.
Creating a unified segment in AIQUA
Open the segment creation page by going to Segments > Segment list, then click + Create segment and select Conditions (beta).
Creating a unified segment in AIRIS
Open the segment creation page by going to Segments, then click + New Segment. All AIRIS segments are unifieid segments.
Next, create a segment by configuring segmentation conditions to target specific user groups based on their events and attributes.
2. Select an event or attribute to segment by
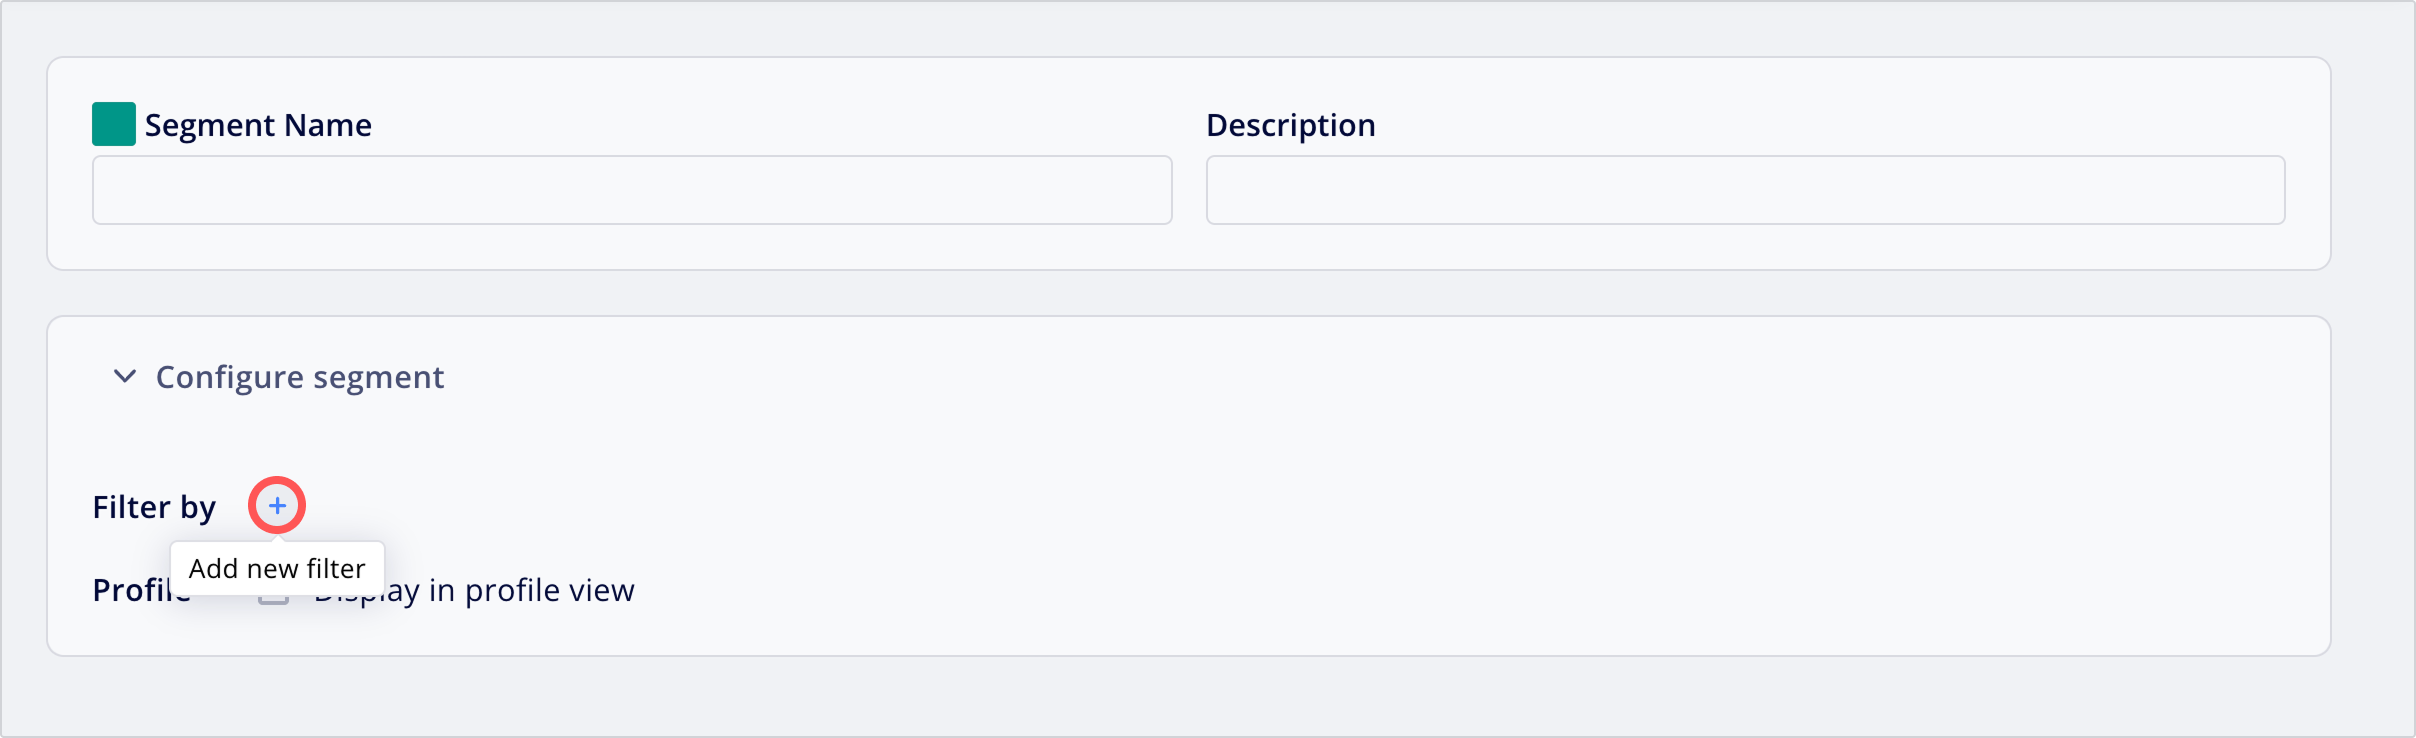
To add segmentation conditions, next to Filter by, click + and select an event or attribute to segment users by.
You can add multiple conditions and join them using the AND and OR operators. Click the operator for each condition group to switch it.
3. Configure specific filters each condition
The available filters differ depending on whether the condition is based on an event or an attribute.
Attribute filters
Select an operation from the dropdown and enter a comparison value. The available operations will differ based on the selected attribute's data type.
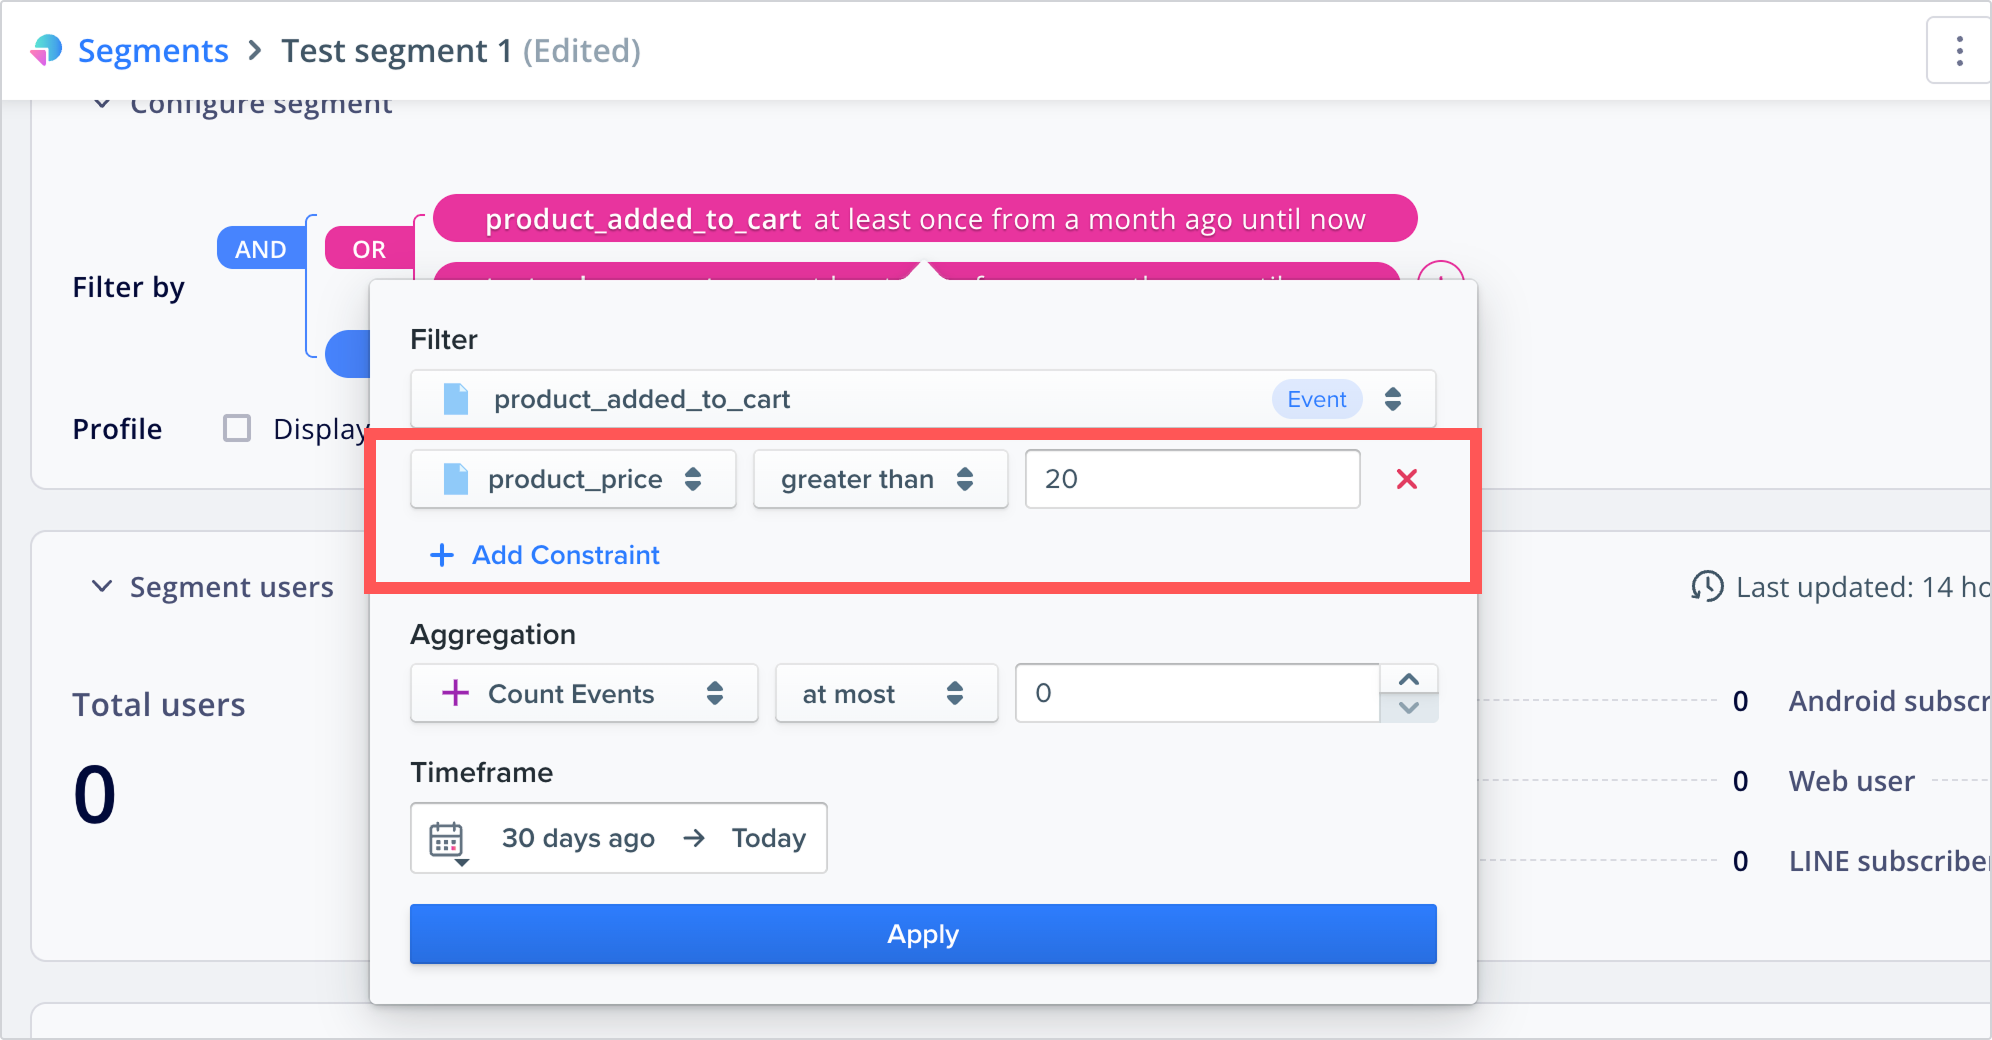
Event filters
Event filters support additional settings to enable granular filtering based on events and event properties.
Setting | Description |
|---|---|
Constraints | Constraints allow you to add filters for event properties. Select an event property from the dropdown, select an operation, and enter the comparison value. The available comparison operators will differ depending on the event property's data type.
|
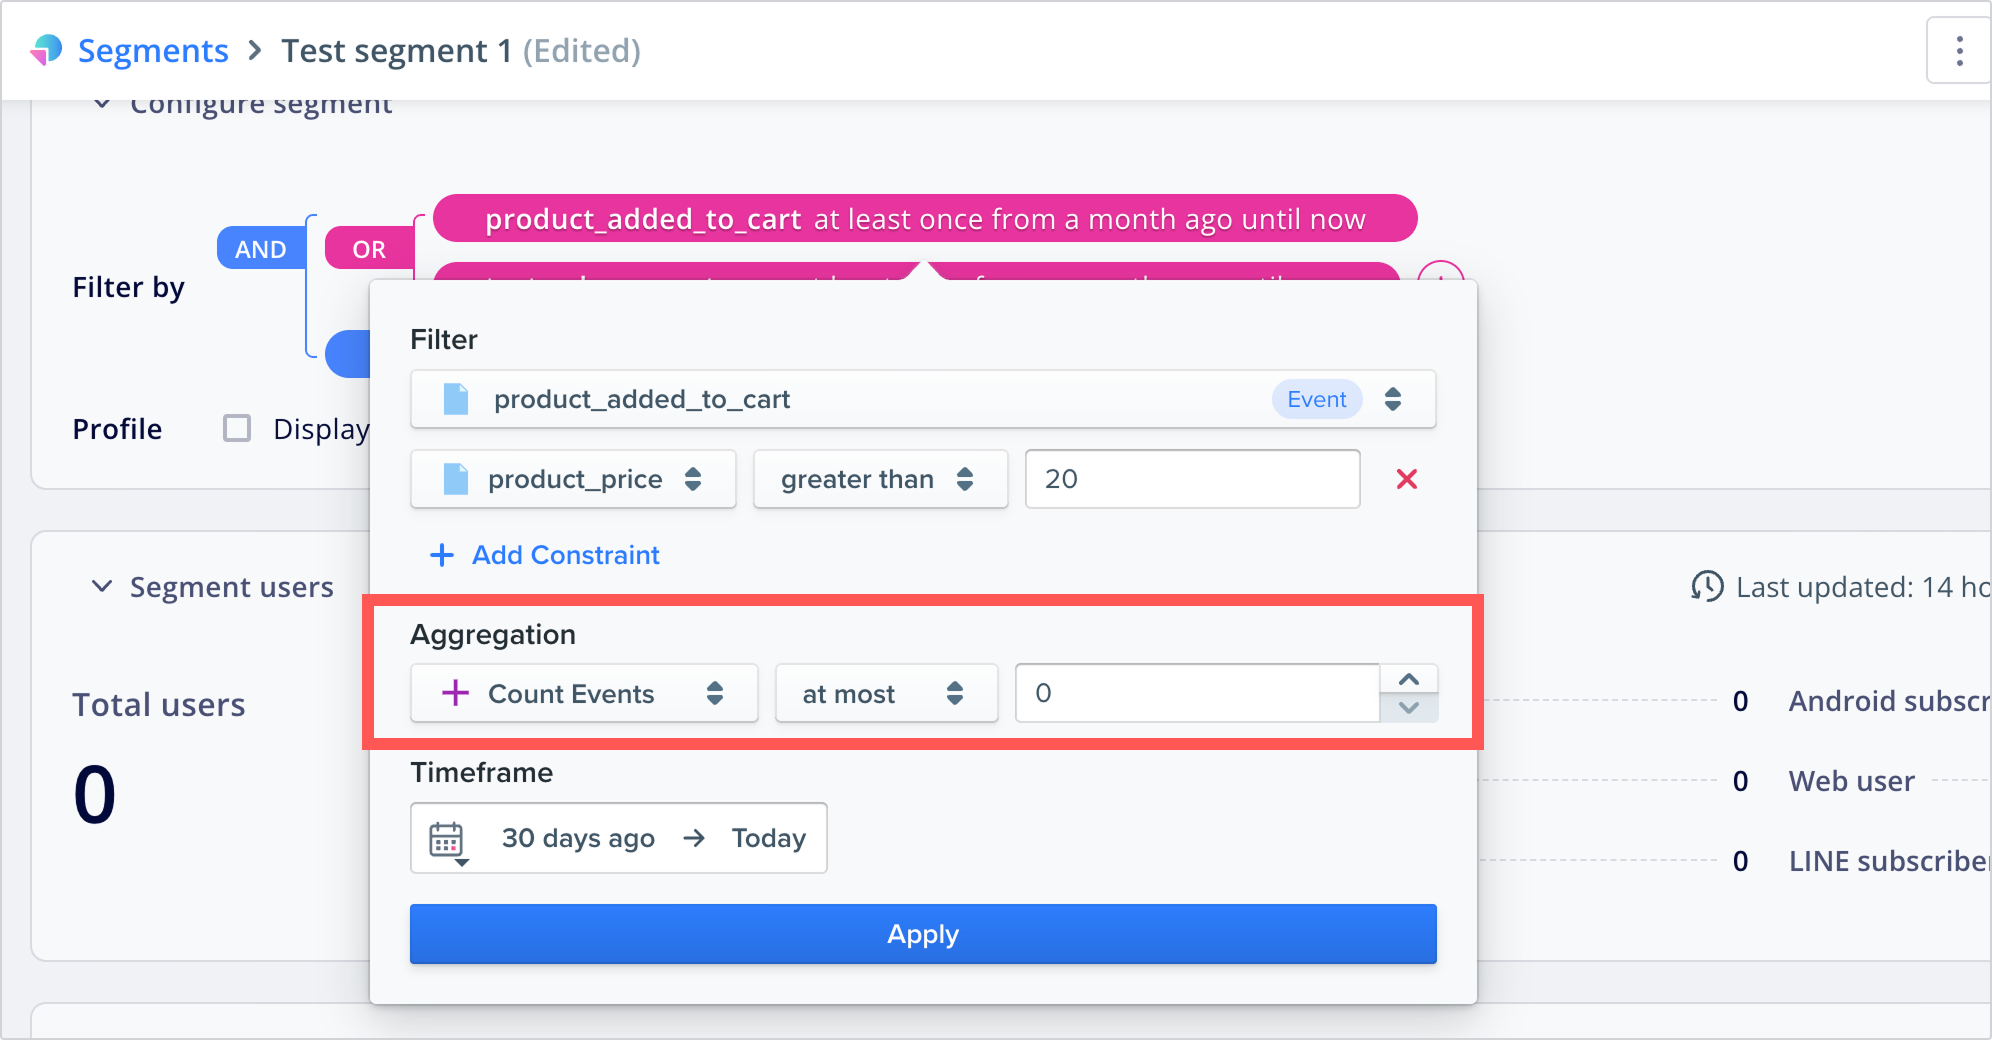
Aggregation | The aggregation type determine events or event properties will be evaluated. Select one of the following aggregation types, select an operation, then enter a comparison value. • Count: Evaluate the number of times the user has performed the selected event.
|
Timeframe | Set the range of data that should be used when evaluating this condition. There are three ways to select a timeframe: • Absolute: Select a specific date, such as "January 1st, 2023". |
4. Create and manage condition groups
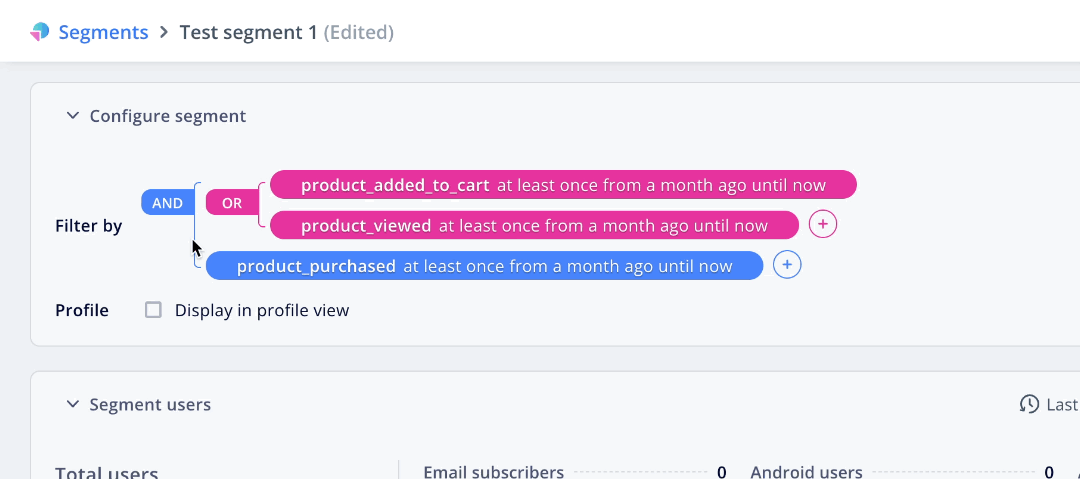
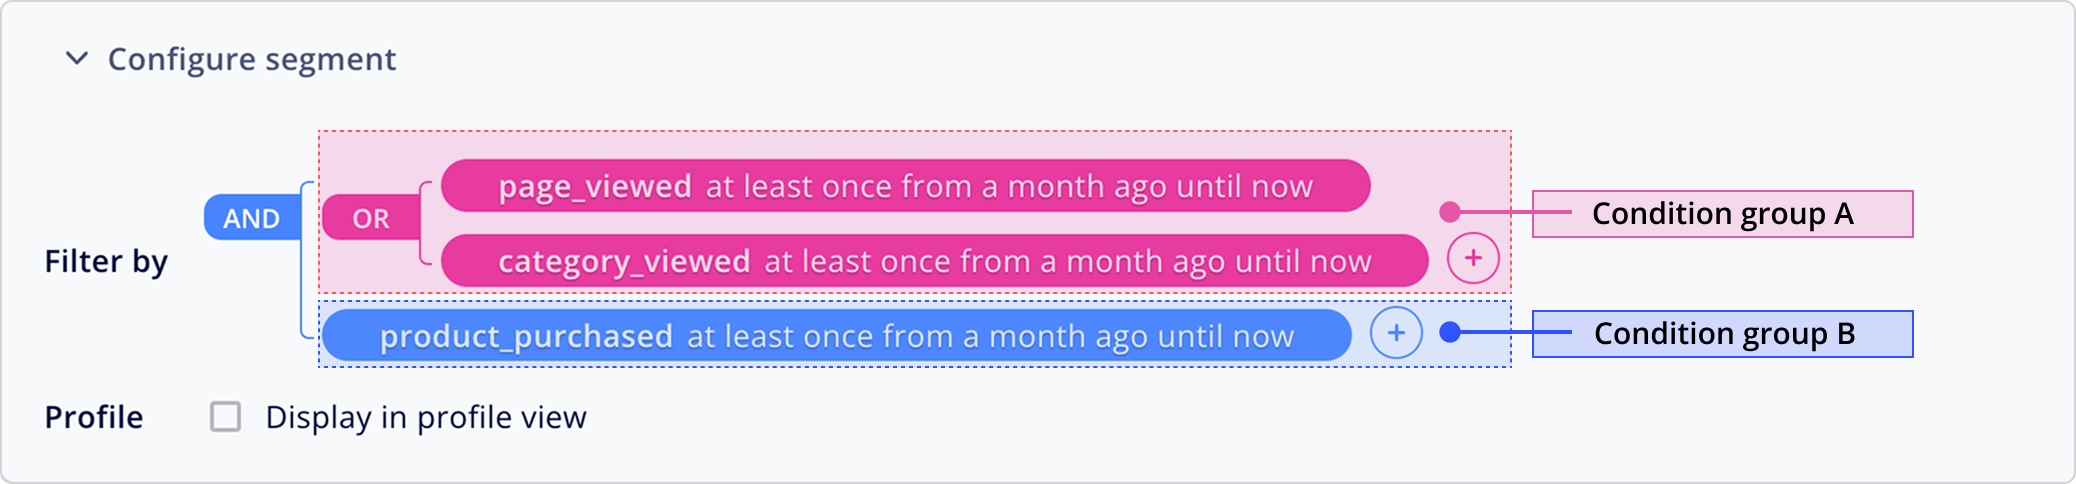
Adding multiple conditions within same level allow you to create a condition group. The following example shows a segment containing users who satisfy both Condition group A and Condition group B, where:
- Condition group A consists of users who completed at least one
page_viewedevent or at least onecategory_viewedevent in the last month. - Condition group B consists of users who completed at least one
product_purchasedevent in the last month.
You can perform the following operations to customize and manage your segmentation filter conditions:
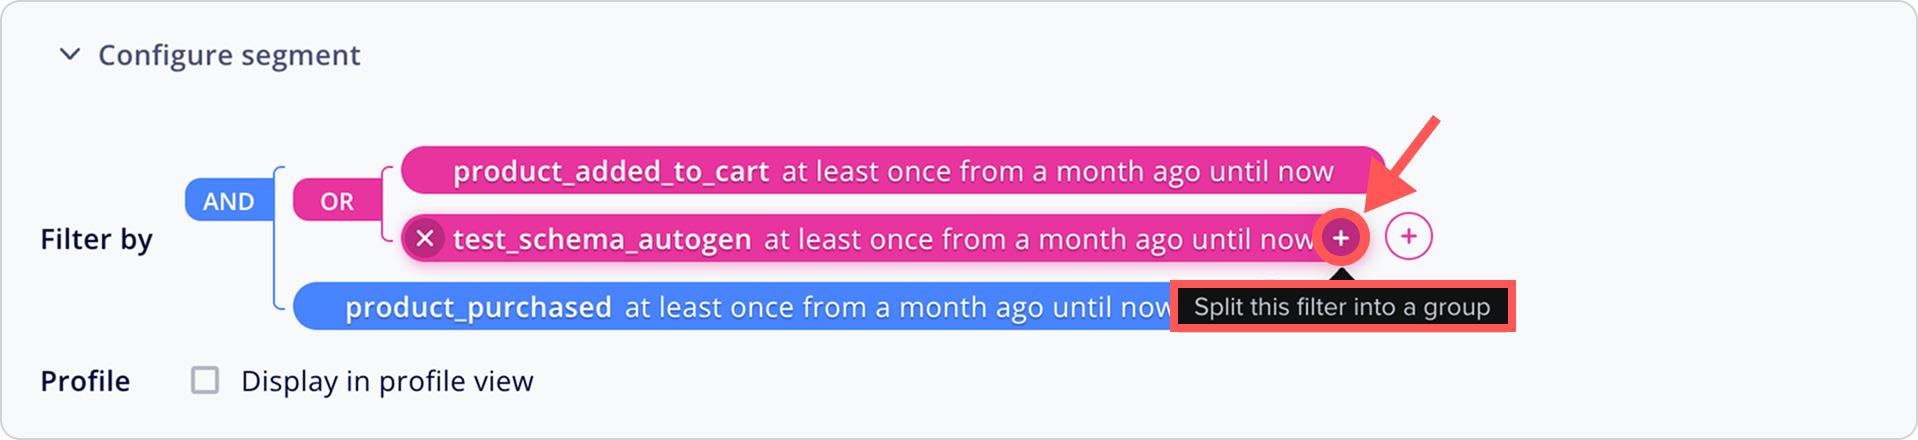
Create a new condition group
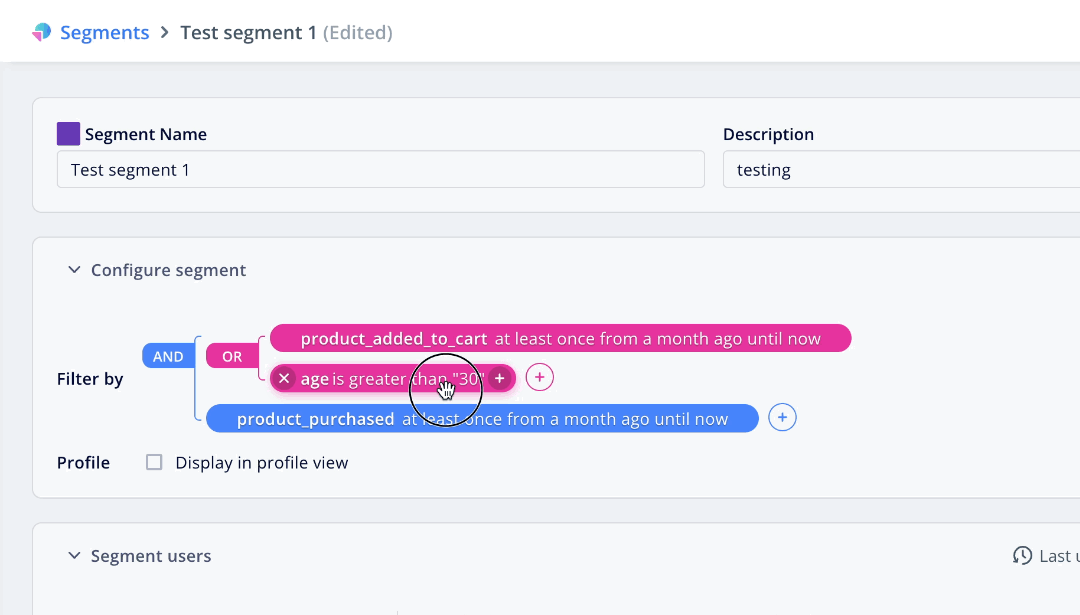
To split an existing condition into a new group, hover over the condition and click the + button that appears inside the condition block.
Add conditions to an existing condition group
To add a condition to an existing group, click the + button that appears at the end of the condition block.

Set condition group operators
Condition groups are evaluated using the operator specified in the previous (outer) level. Click the operator to switch between AND and OR.
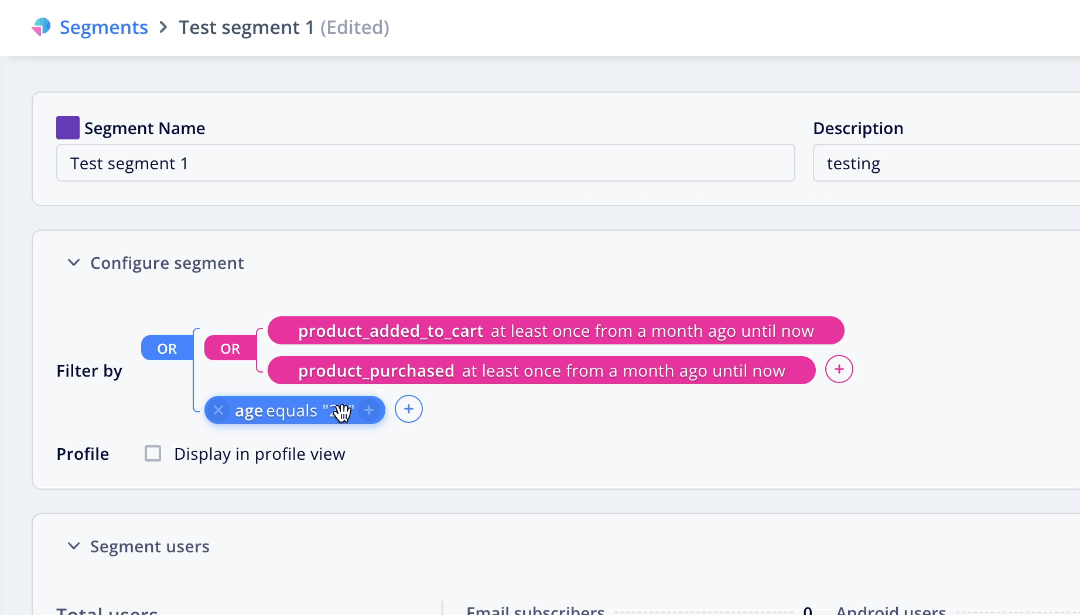
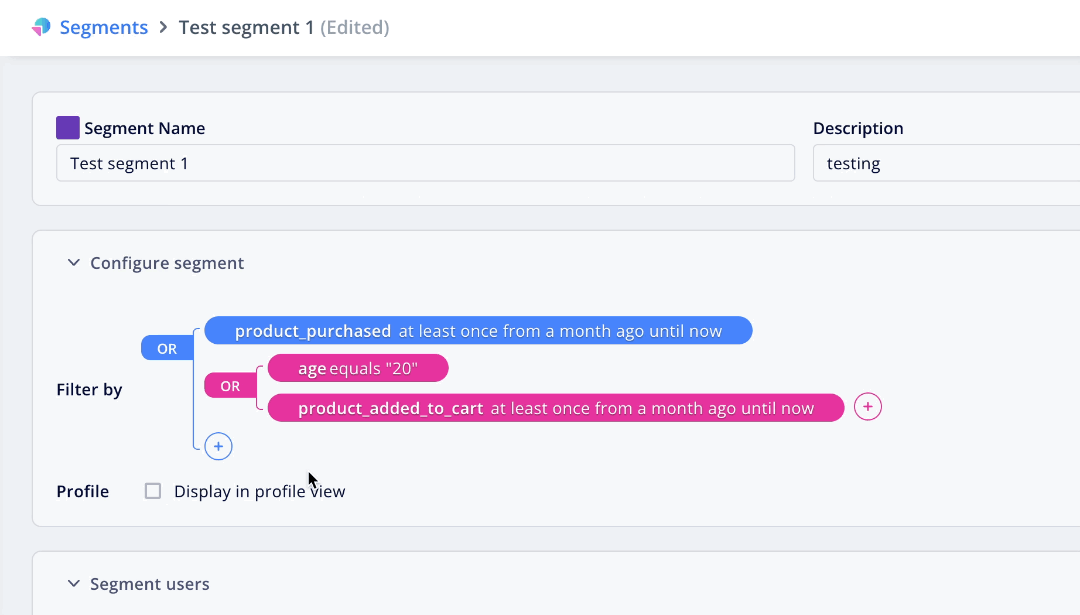
Move conditions between groups
Drag and drop individual conditions to move them to other condition groups.
Delete conditions
To delete a condition, hover over it and click X.
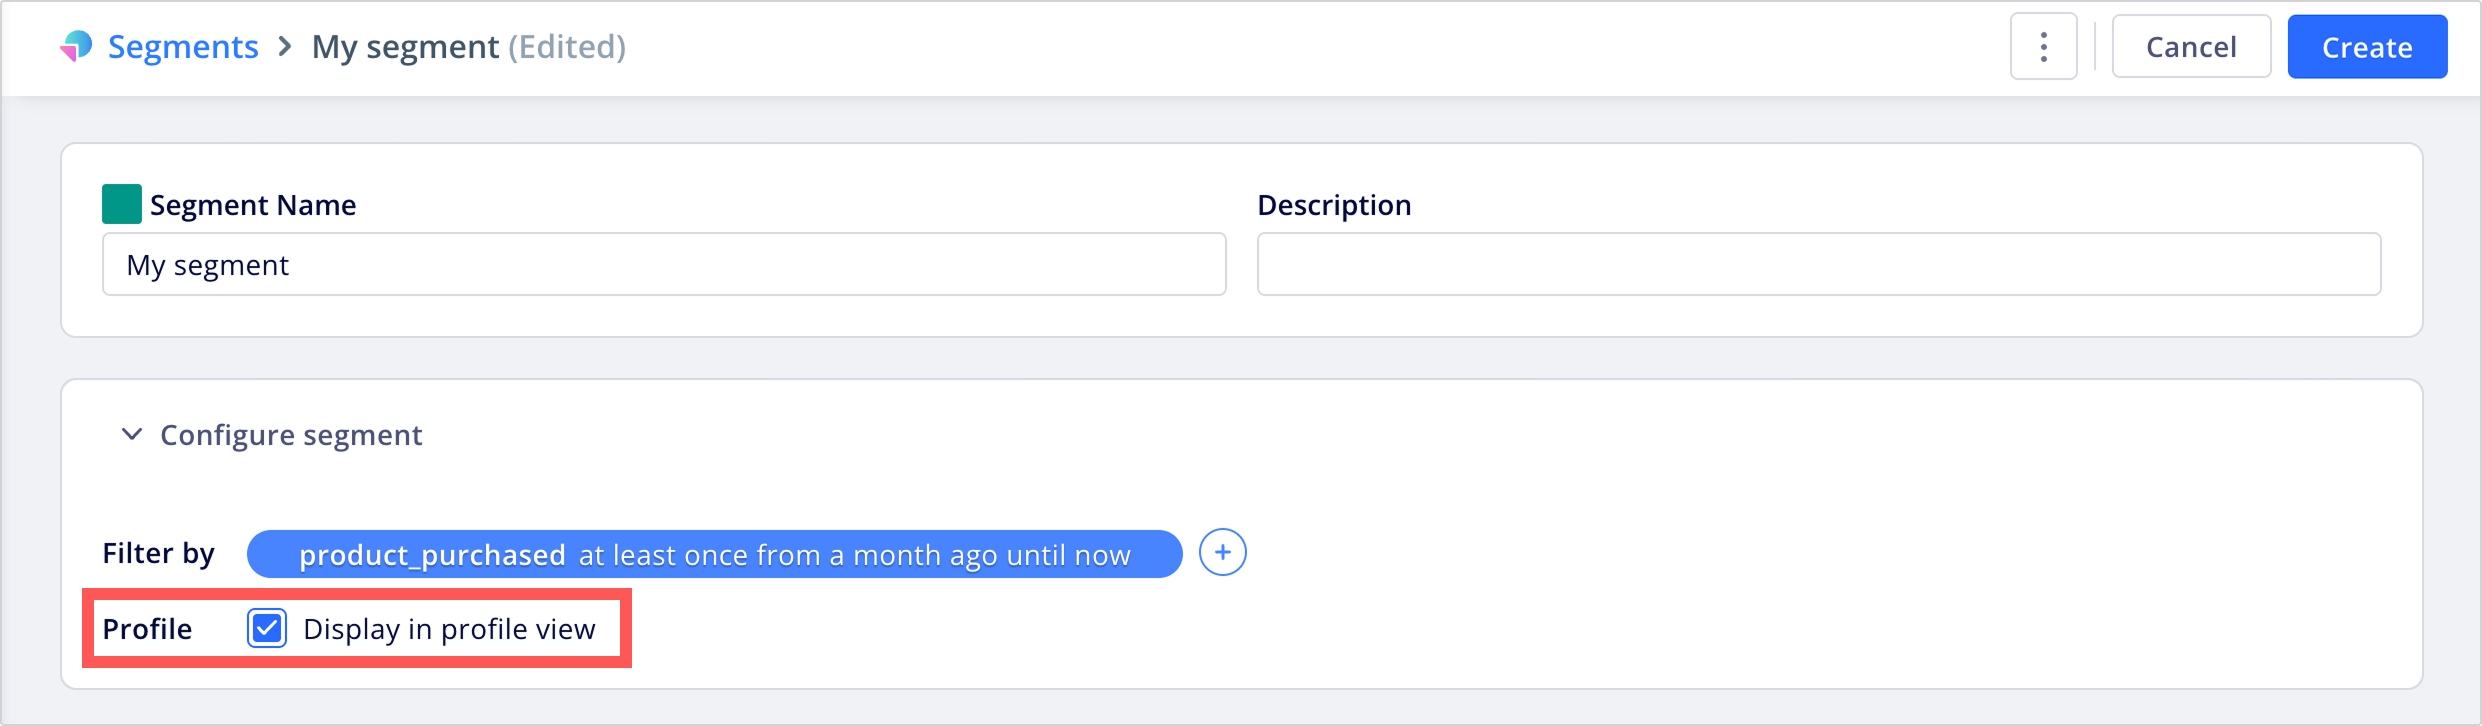
5. Set profile view settings
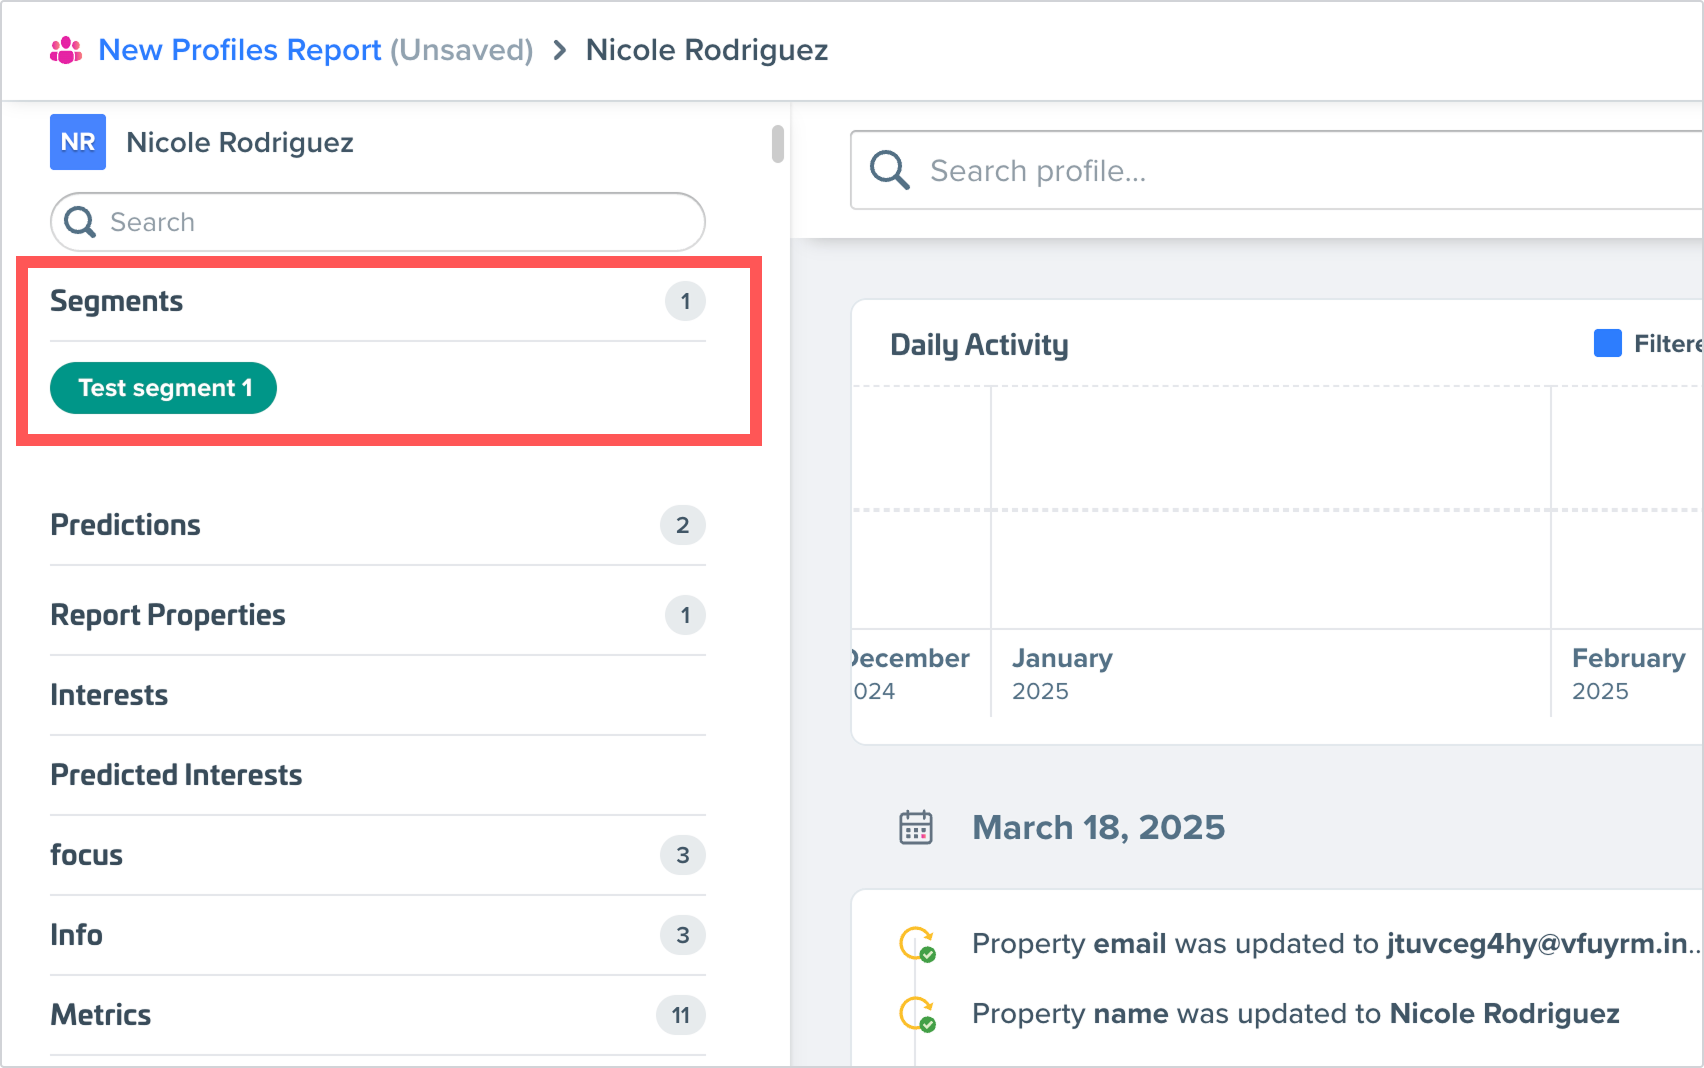
Next to Profile, check Display in profile view if you'd like to the segment to be listed in the profile page for users who are part of the segment.
After enabling this setting, you can open a user's profile to see the segments they're a part of.
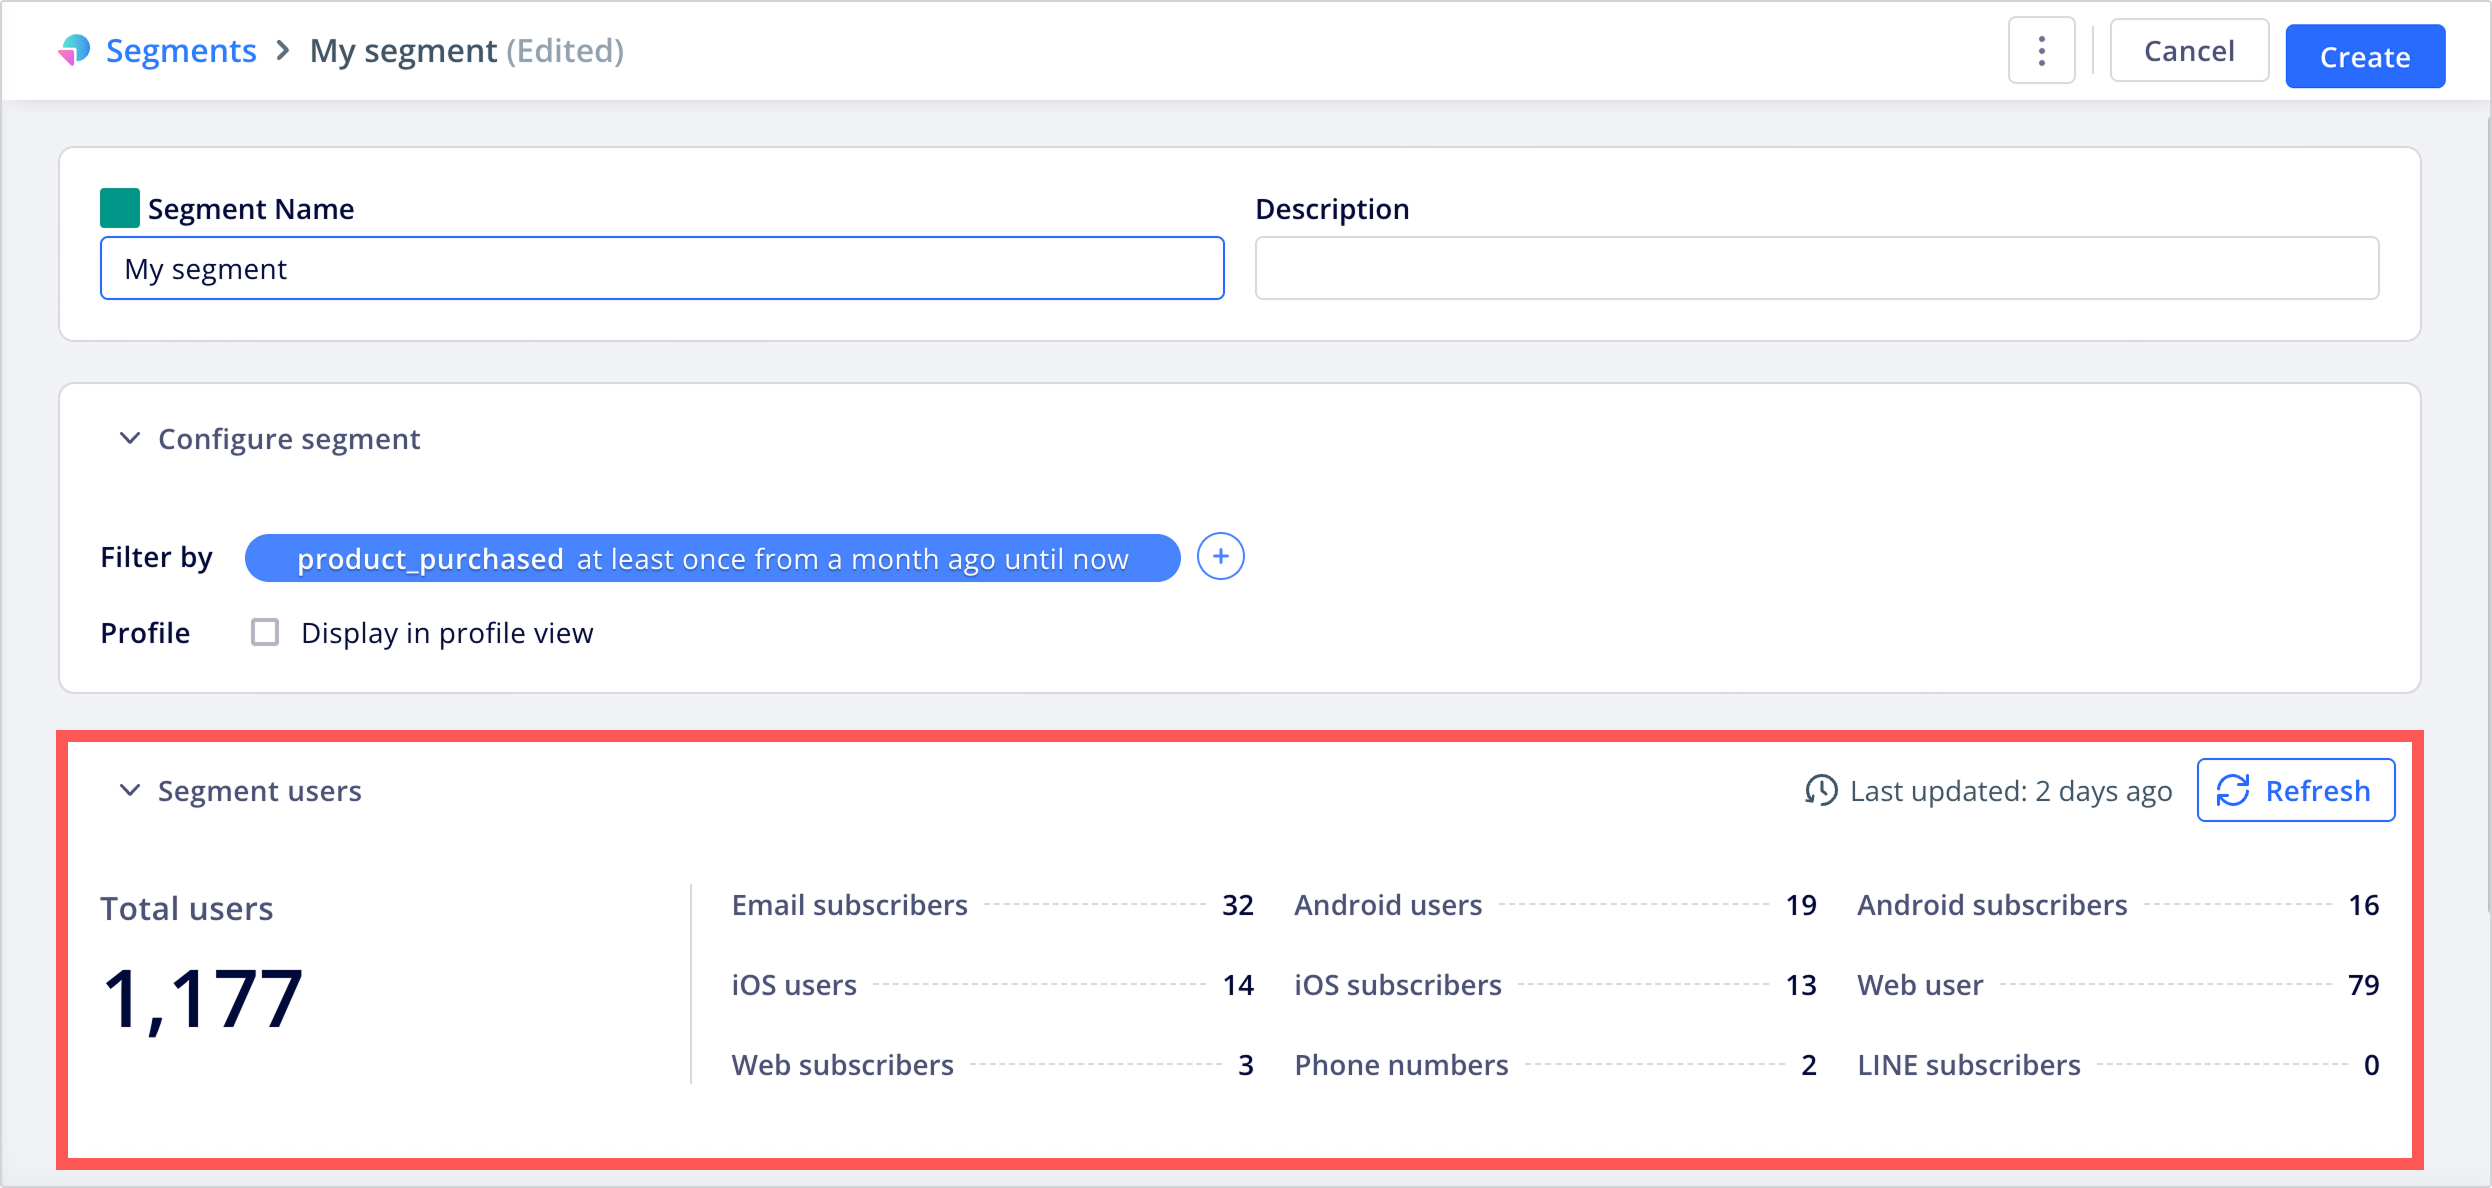
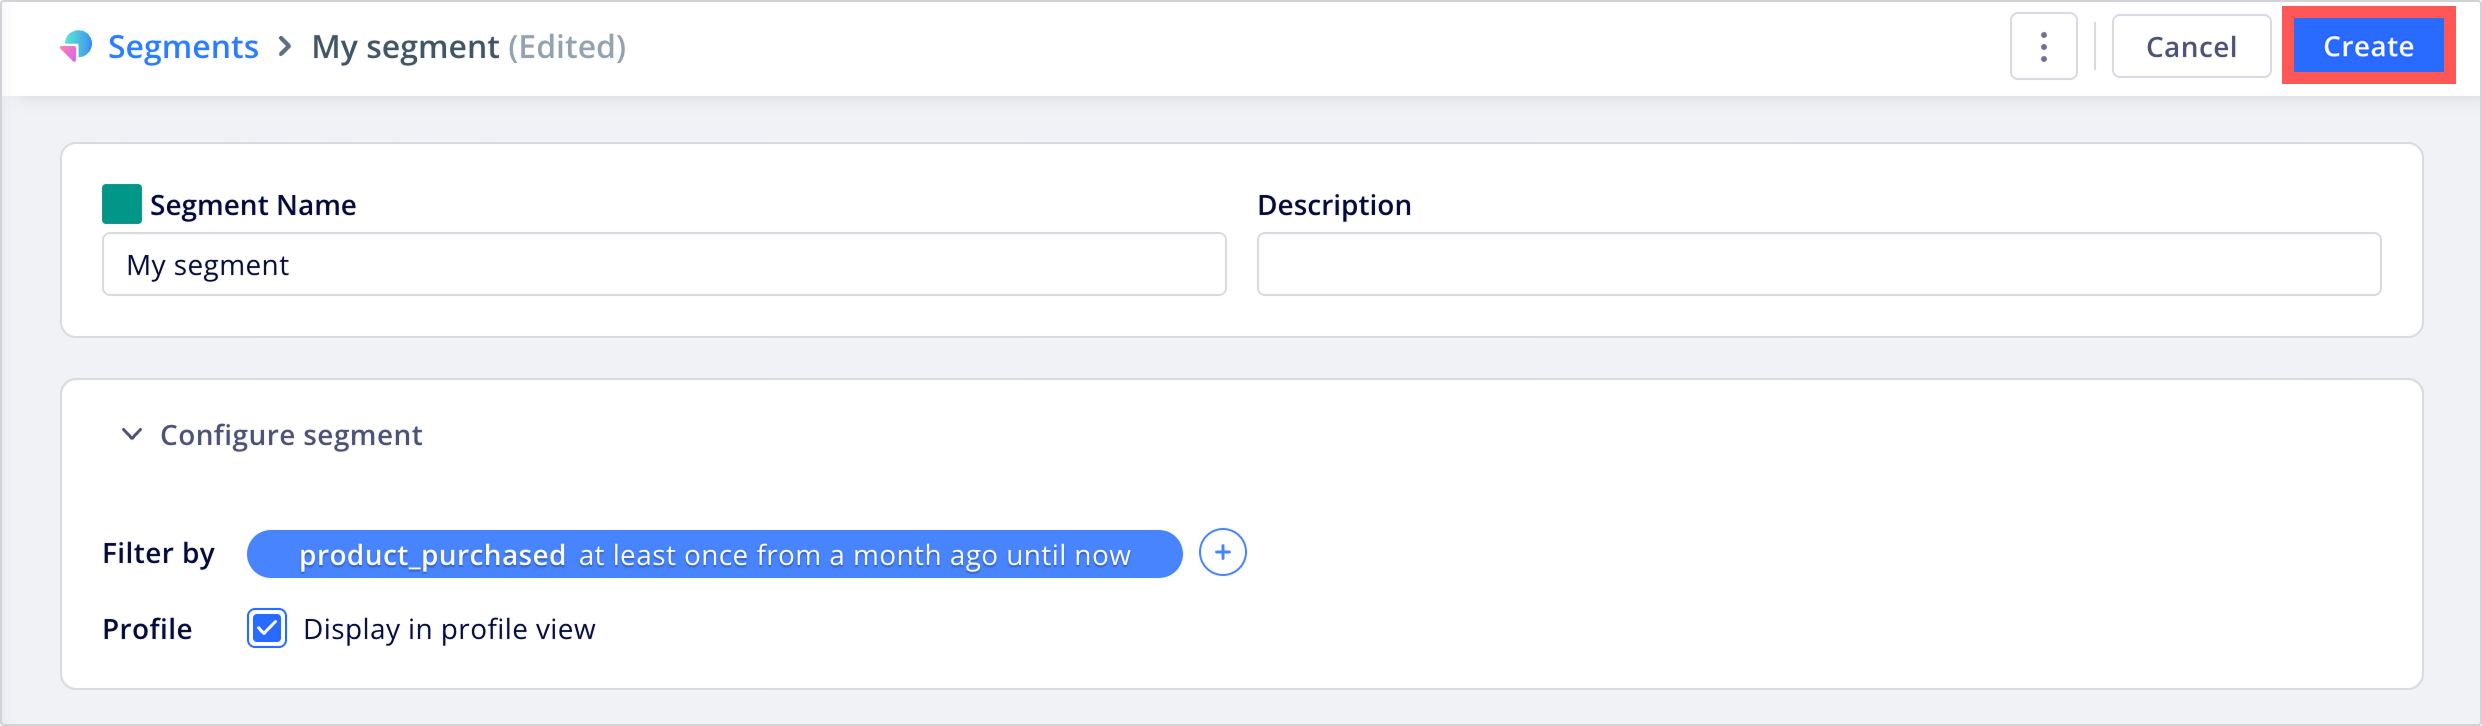
6. Save the segment and review the reachable user count
After completing all the segment settings, click Create.
To view the segment's reachable user count, open the segment's edit page from the segment list, then look under the Segment users section.