WebChat
Overview
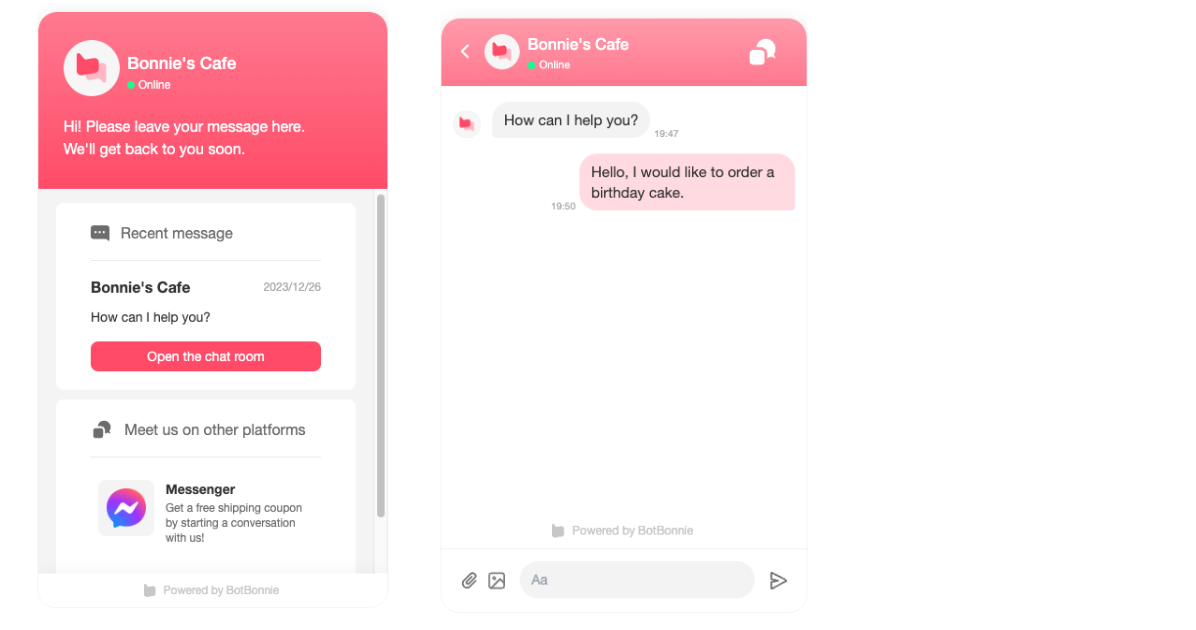
WebChat is BotBonnie's chat widget that can be installed on your website. Using WebChat, you can:
- Utilize BotBonnie features to automate customer services
- Customize the look and feel of your WebChat widget
- Control the web pages where you want the WebChat to be displayed
- Let users link to their accounts on other messaging platforms
Setting up WebChat
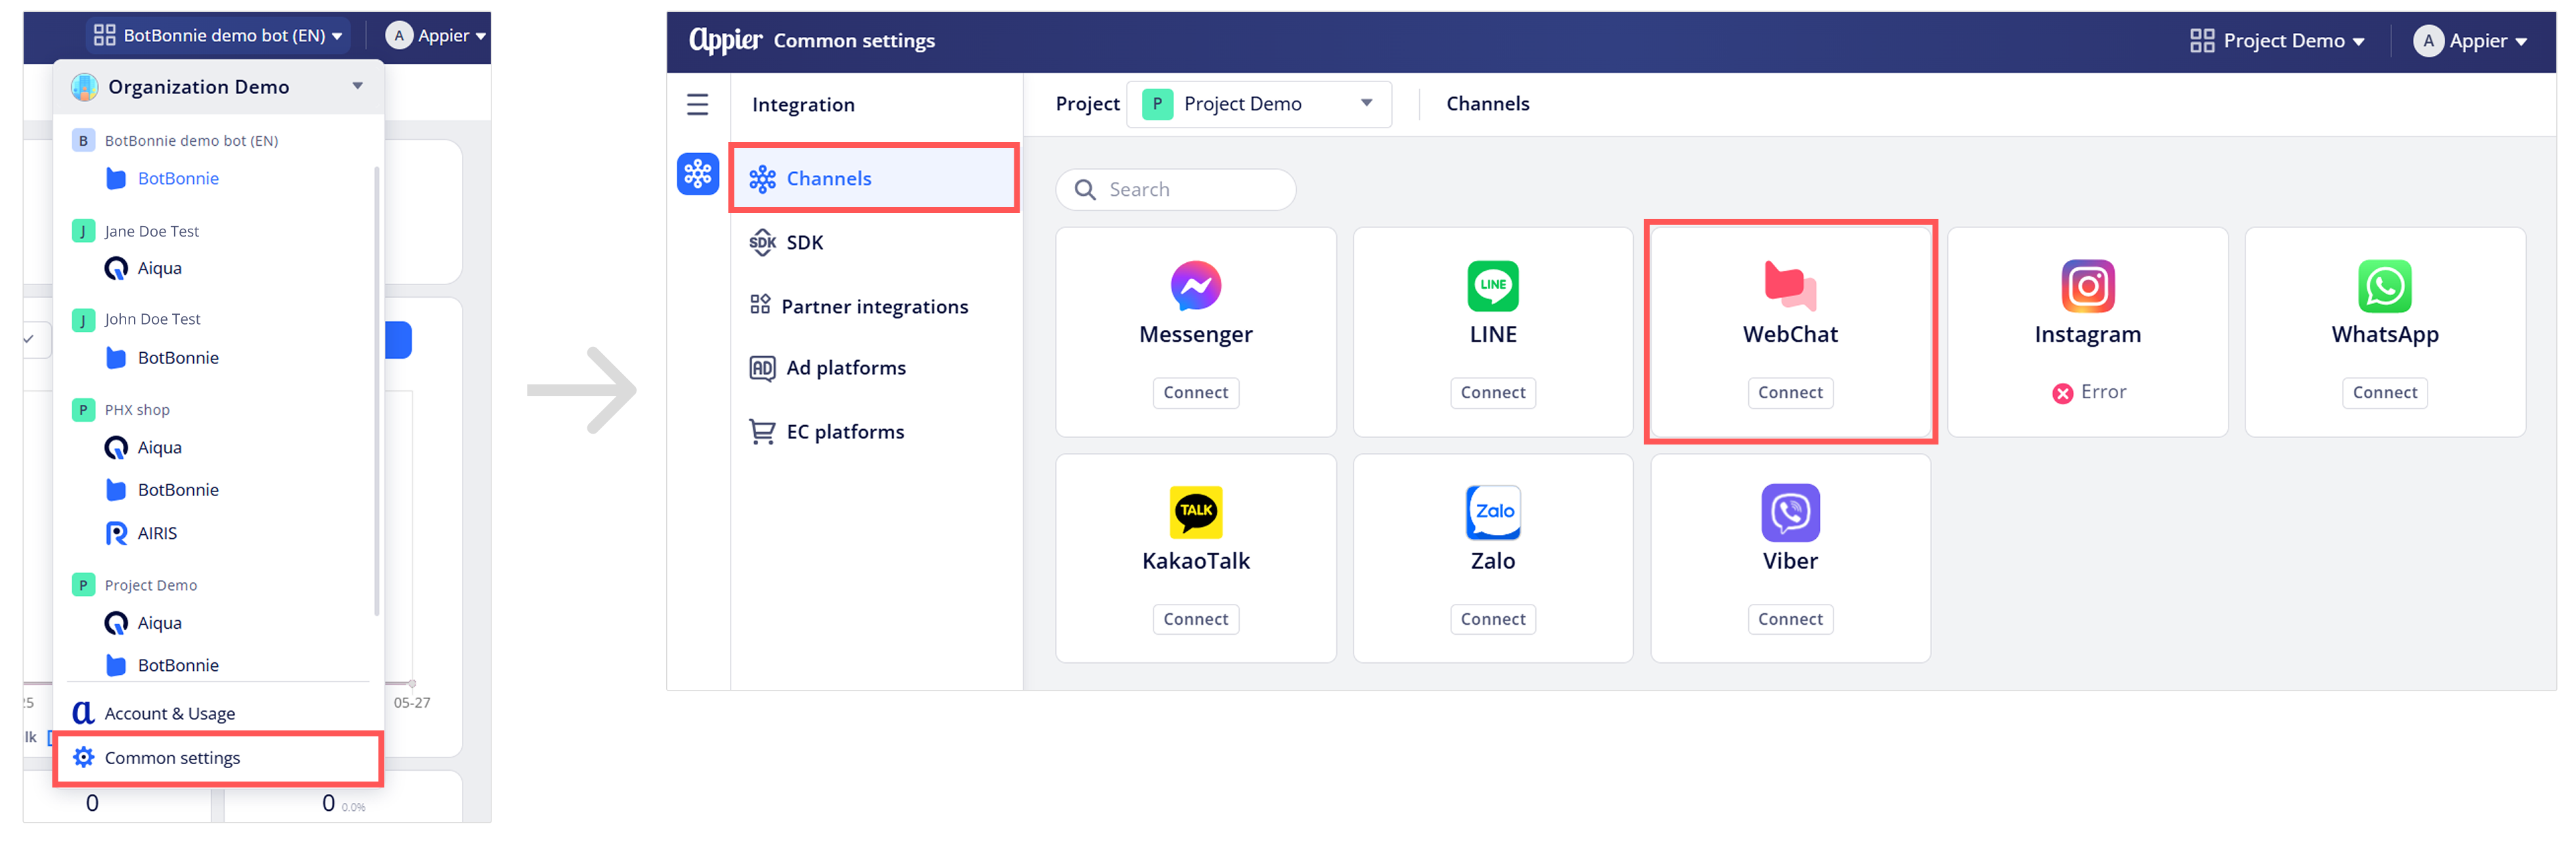
- Go to the app launcher on the top-right, then click Common settings. Go to Channels, then click the WebChat card.
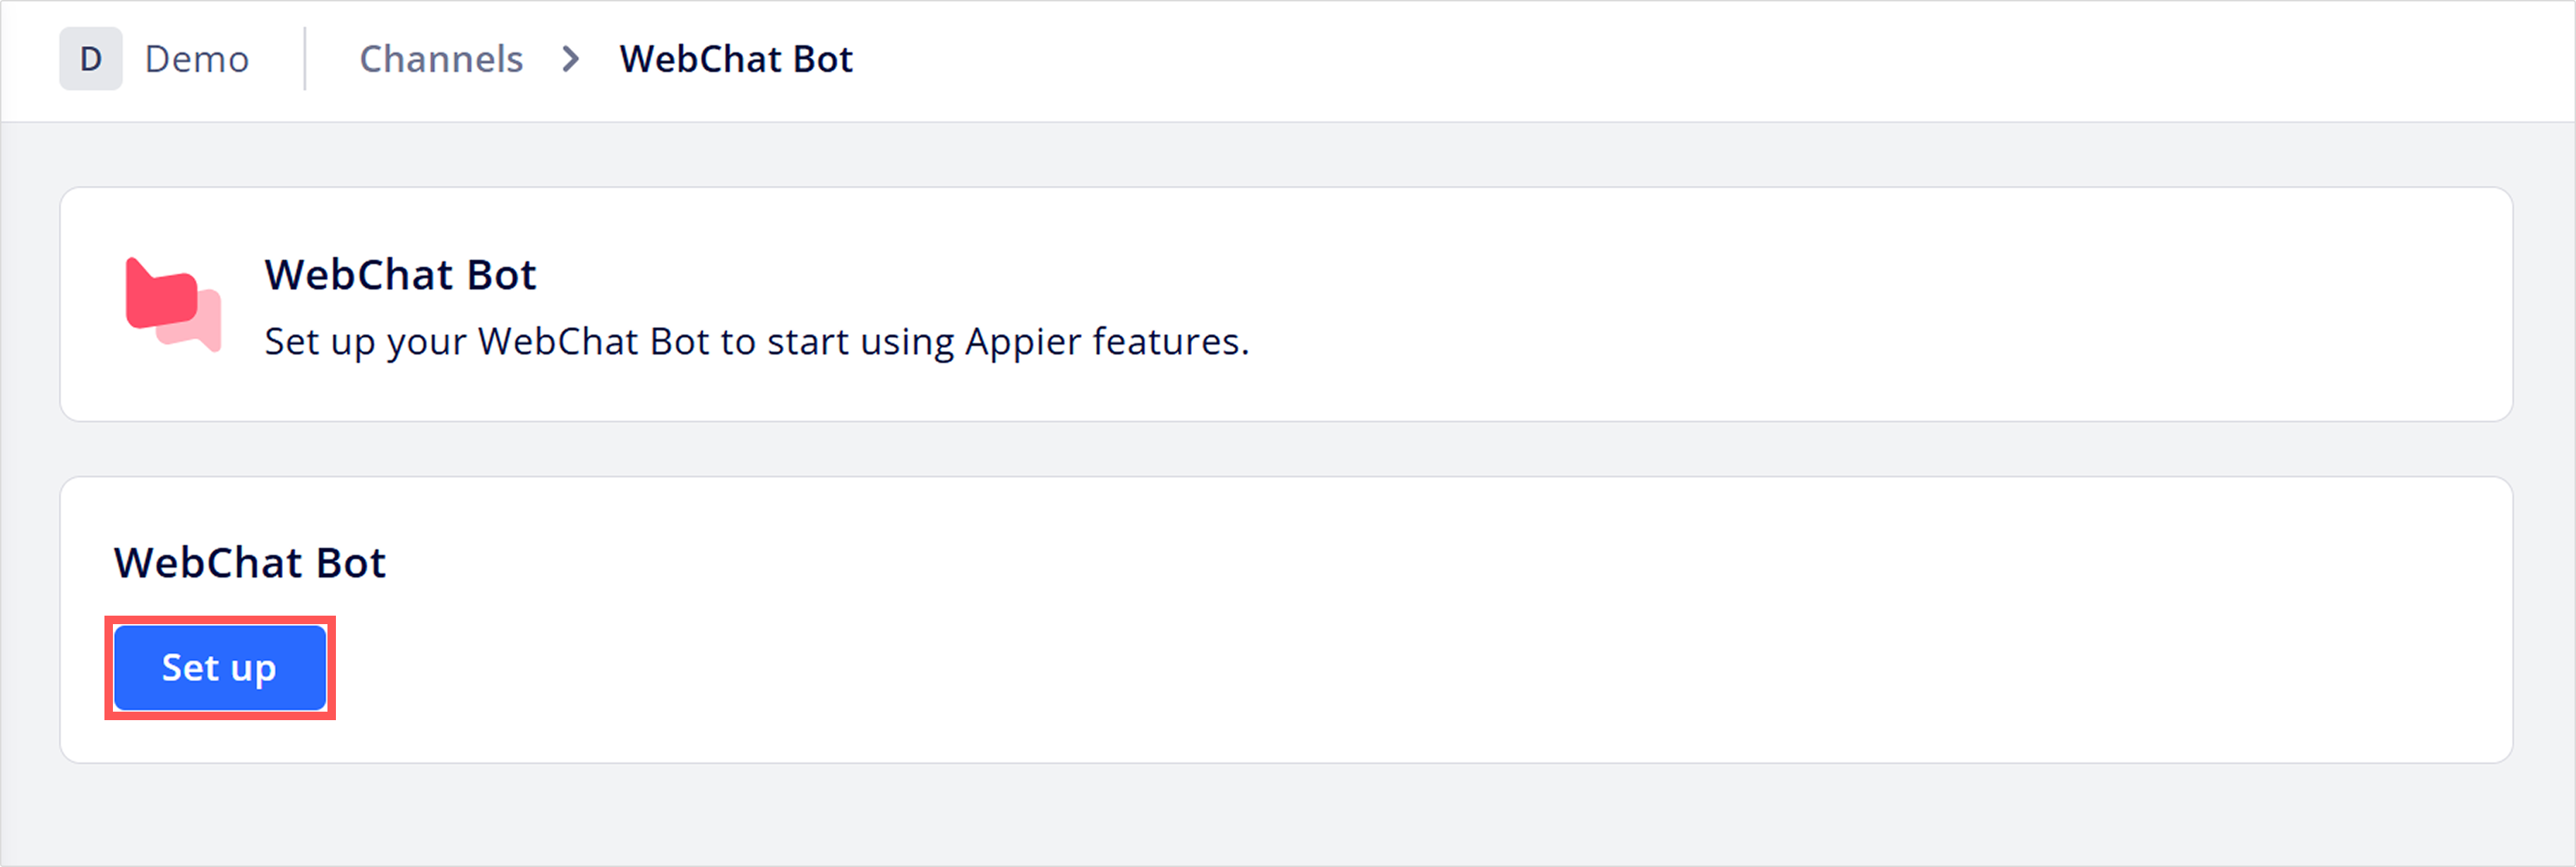
- Click Set up to start the connection flow.
You will need to set up the following sections on the console, and then install the WebChat code to your website.
- Step 1. Basic info
- Step 2. Website URL
- Step 3. Customer service slots
- Step 4. Messaging platform linking
- Step 5. Installation
Step 1. Basic info
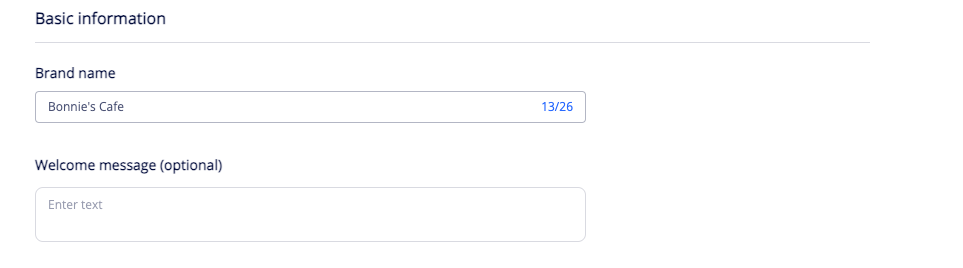
Basic information
- Brand name: Type the name of your business. This is the name that will be displayed to the user.
- Welcome message (optional): The welcome message is displayed at the top of the WebChat home page.
NoteIf you have selected a Getting Started module in Content > Greetings, this greeting message will be displayed before the user starts a conversation with you.
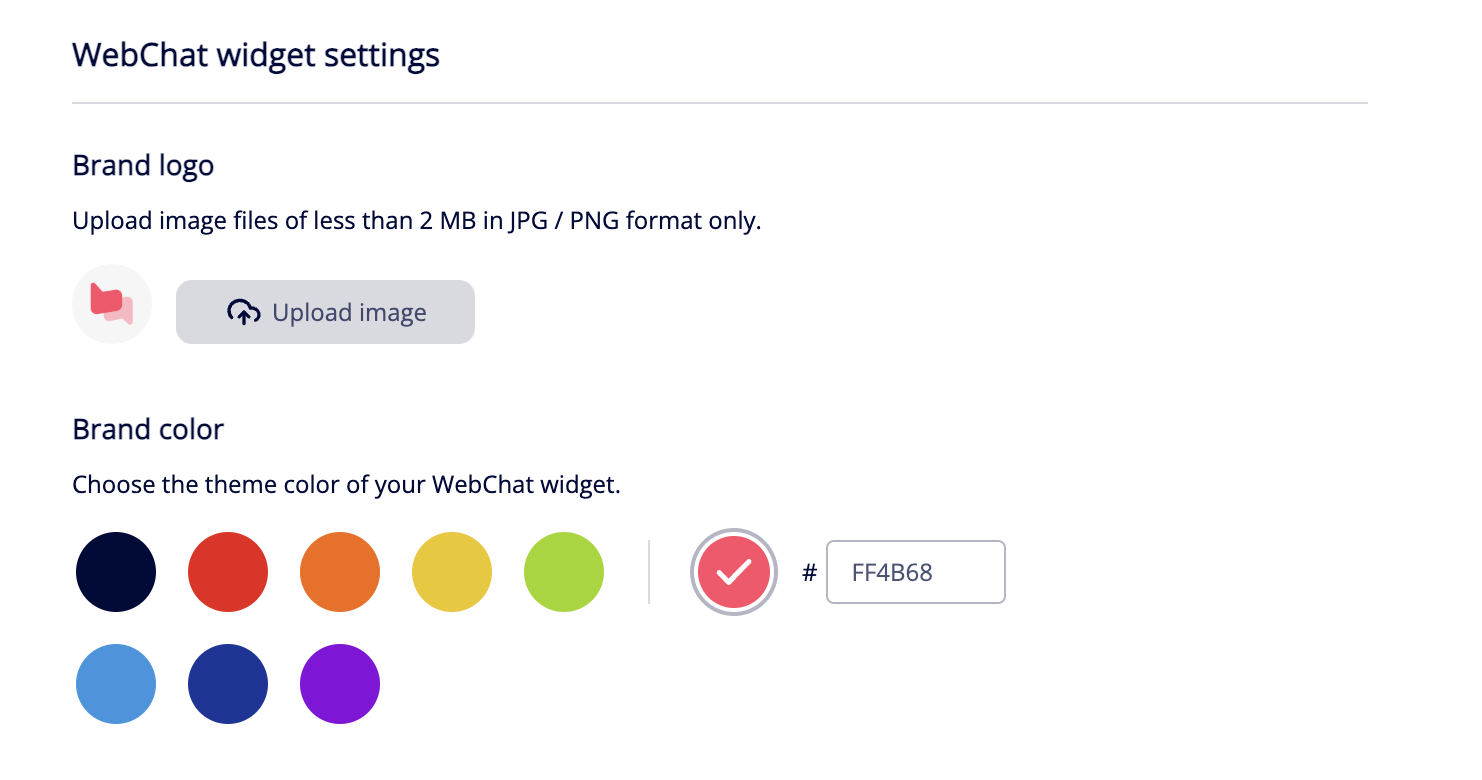
WebChat widget settings
- Brand logo: Click Upload image and upload a logo image in JPG / PNG format that's less than 2 MB.
- Brand color: Choose the theme color of your WebChat.
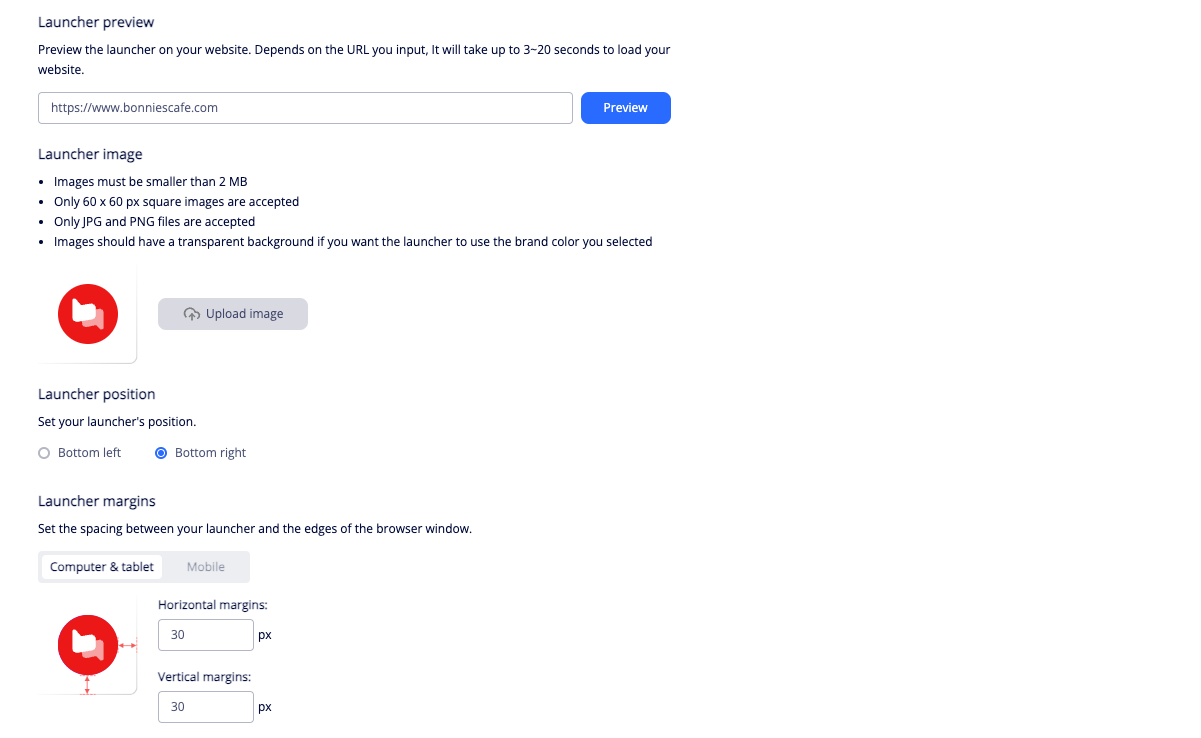
Launcher settings
Launcher is the chat icon that will be displayed on your website.
- Launcher preview: When you are setting up the launcher, you can enter the URL of your website and click Preview to see what the launcher will look like on the website. Depending on the URL you input, it will take up to 3~20 seconds to load your website.
- Launcher image: Click Upload image and upload an image that will be the chat icon shown to users.
- Launcher position: Select to align the launcher to the bottom-left or bottom-right corner of the browser window.
- Launcher margins: Set the spacing between your launcher and the edges of the browser window. You can set different margins for mobile devices. Depending on the Launcher position selected above, the bottom-left or bottom-right edges will be used for alignment.
Chat window settings
- Enable input fields in the chat window: If no agent is available, you can choose to hide input fields in the chat window.
- Skip the homepage and open the chat window directly: When enabled, the homepage will be hidden. Users will not be able to see the chat options for the social platforms set up under Messaging platform linking.

When done, click Next to proceed to the next tab.
Step 2. Website URL
You can control whether you want to display the WebChat widget on every page of the website or only on certain pages.
- Show the WebChat widget on every page: The WebChat widget will be shown on every webpage with the WebChat snippet installed.
- Only show the WebChat widget on pages matching your URL rules: The WebChat widget will be shown on web pages that match any of the URL rules you set. Click Add URL rule, select one of the operators below, and enter a URL (or part of a URL).
is: The widget will be shown if the webpage URL is an exact match of what you have entered.contains: The widget will be shown if the webpage URL contains what you have entered.
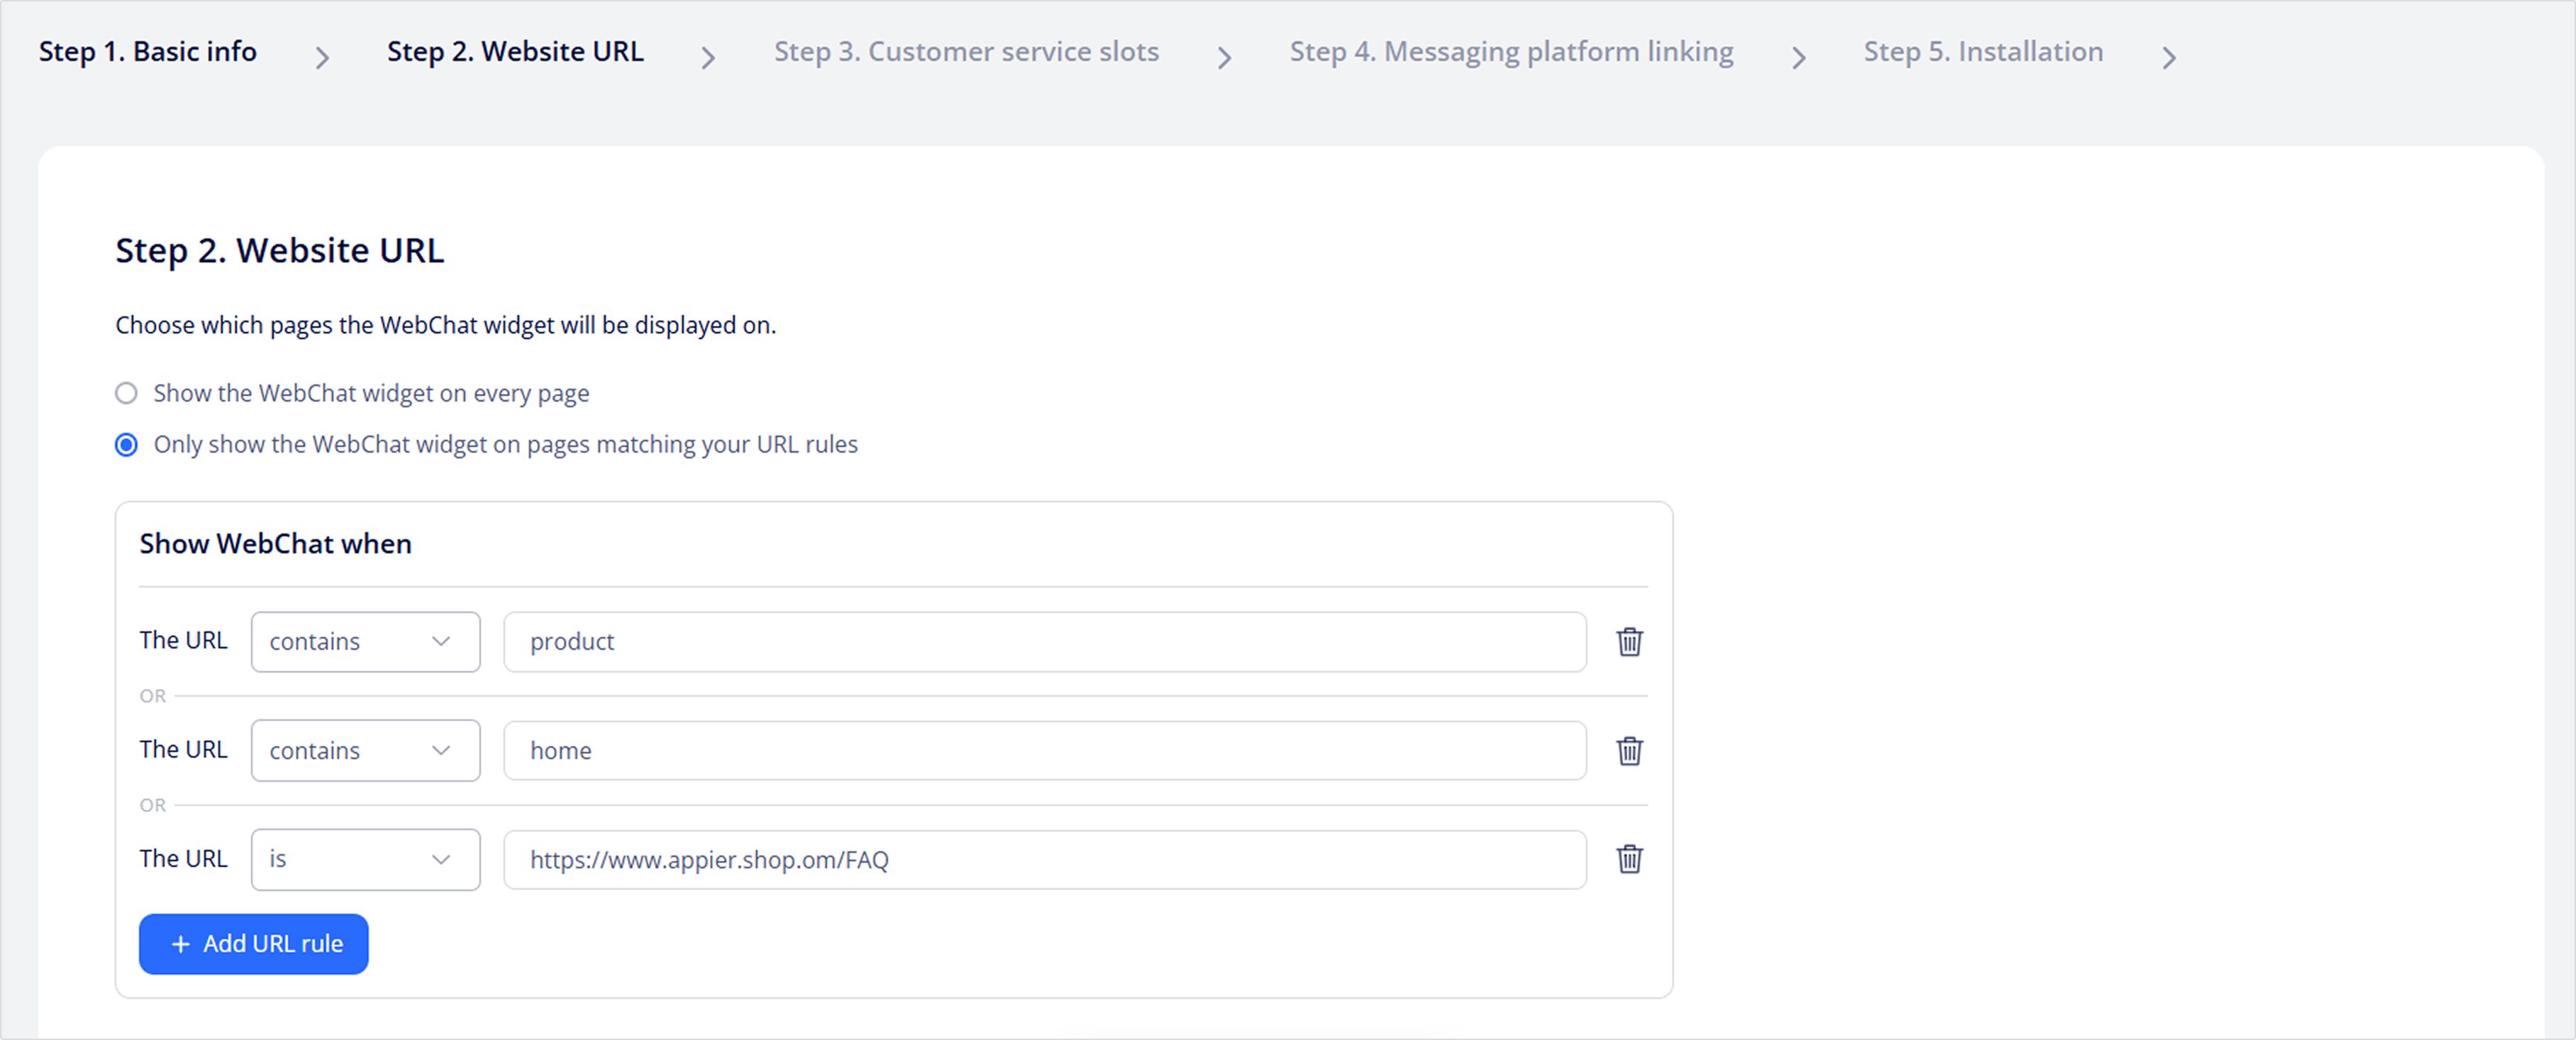
When done, click Next to proceed to the next tab.
Step 3. Customer service slots
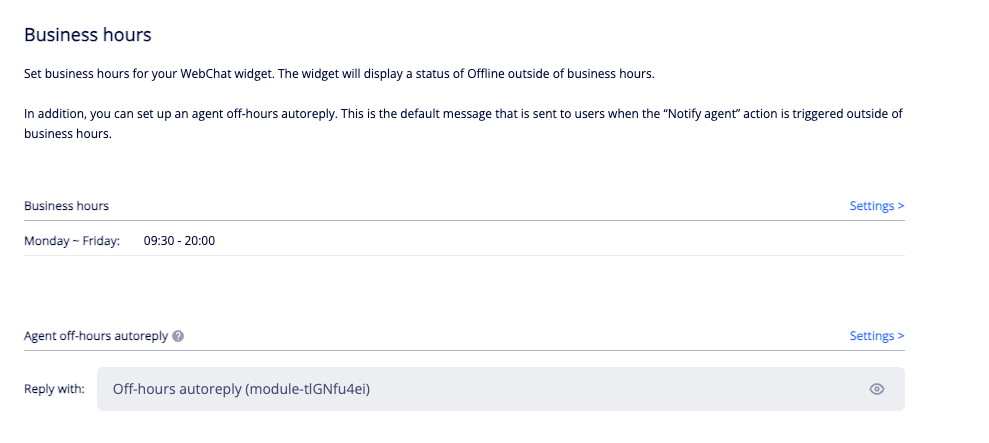
The business hours and agent off-hours configurations in the Settings page are applied to WebChat. Make sure they are set up properly.
- Business hours: To set up the business hours, click Go edit and you will be taken to the Settings > Business hours page. During business hours, an Online icon will be displayed in the WebChat. Outside of business hours, an Offline icon will be displayed.
- Agent off-hours: To set up agent off-hours and autoreply, click Go edit and you'll be taken to the Settings > Notify agent page. If enabled, when the user triggers the Notify agent outside of business hours:
- An autoreply will be sent to remind your users that agents will respond during business hours.
- Notifications through LINE Notify will be paused, while email notifications will still be sent.
When done, click Next to proceed to the next tab.
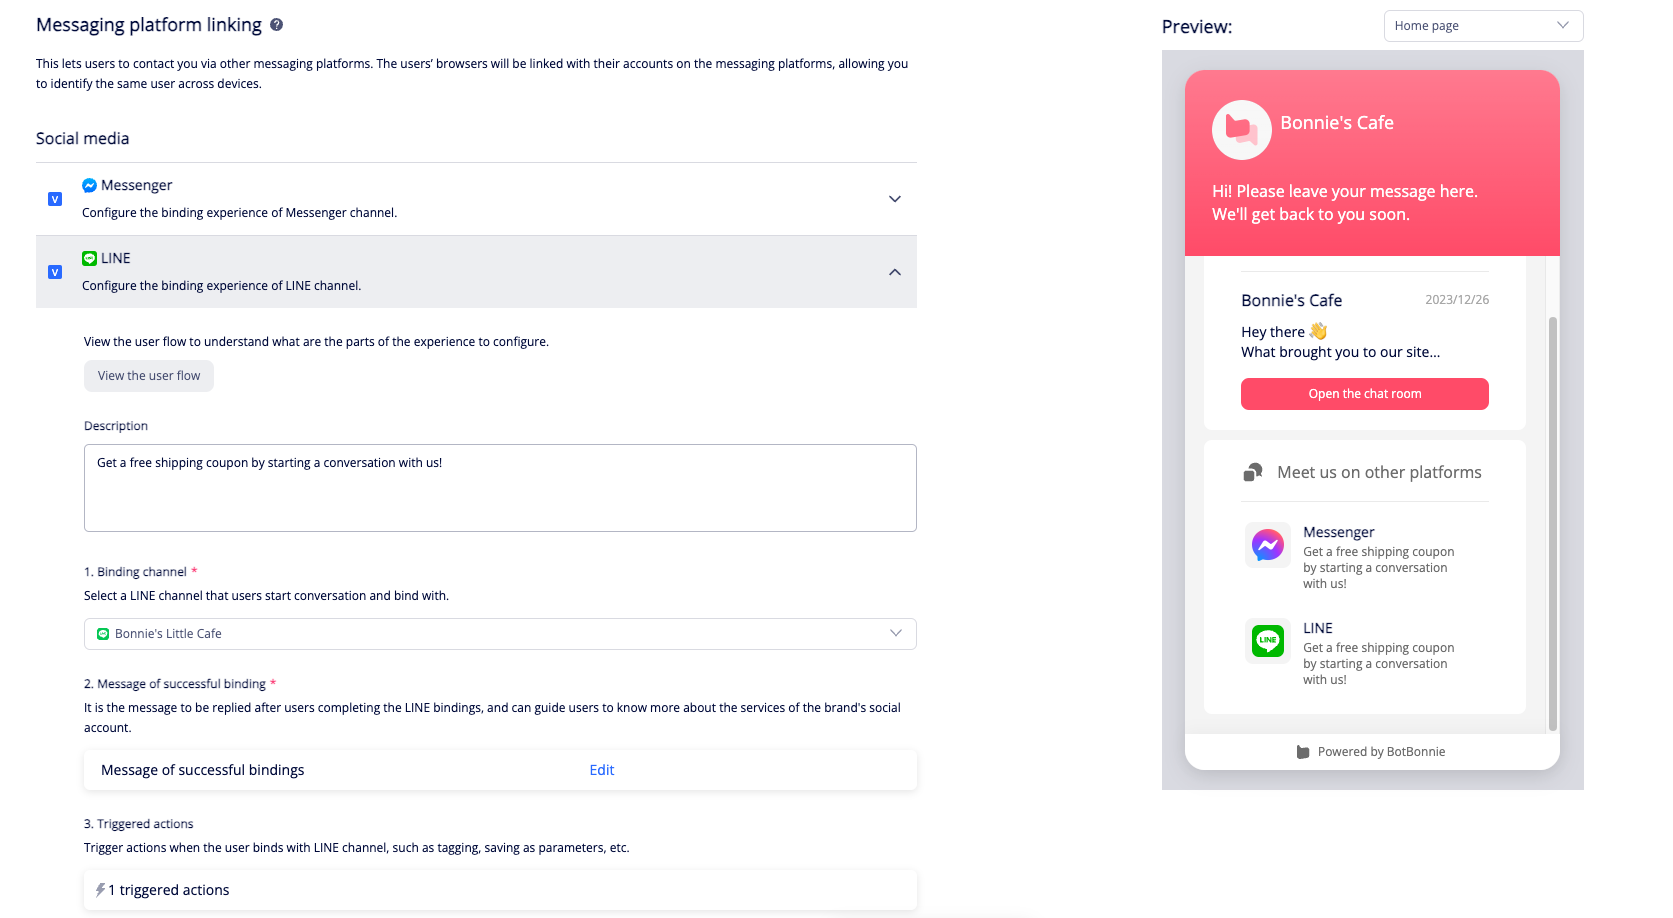
Step 4. Messaging platform linking
You can let users contact you via other messaging platforms such as Facebook Messenger, LINE, and WhatsApp. By doing so, the users’ browsers will be linked with their accounts on the messaging platforms, allowing you to identify the same user across different platforms.
When users click on the messaging platform in WebChat, they will be directed to send a message to your channel on that platform. Upon successful linking, a success message will be sent to the users.

To set up, select the messaging platforms you want to enable and complete the following settings.
- Description: Enter a short sentence to let users know that they can chat with you through this platform. You can also provide incentives to encourage users to complete linking.
- Channel: Select the channel to link to.
- Message of successful linking: Set the module that will be sent to the users upon successful linking. You can use this to introduce the services available on the platform or to provide the incentives you have offered to users.
- Triggered actions: Select any actions you want to trigger upon successful linking.
Click Next to proceed to the next tab.
Step 5. Installation
Under the Installation tab, click Done.
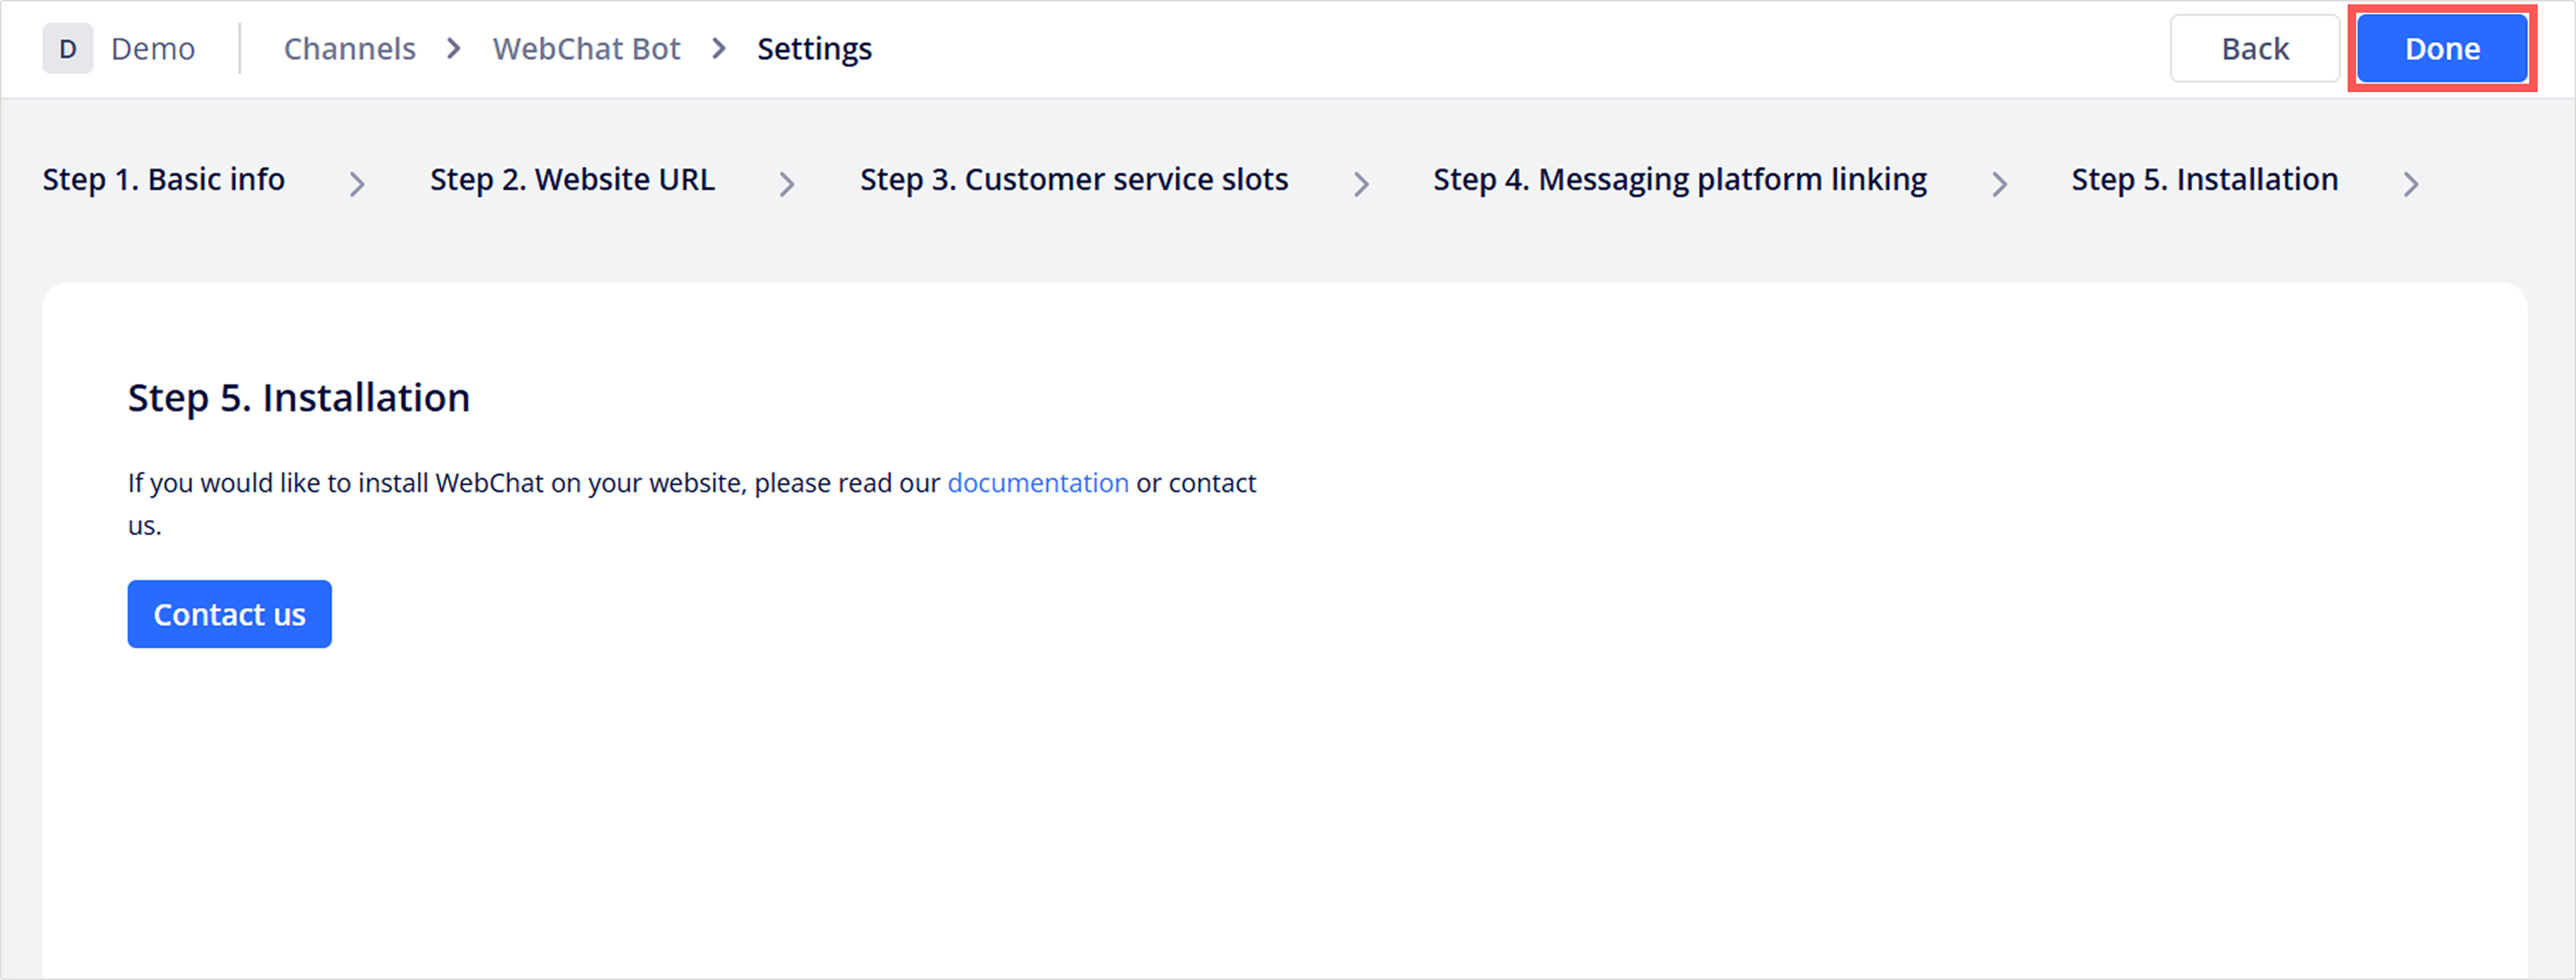
You will see the page ID of the WebChat shown on the console. In the next section, you will use this page ID to install the WebChat code snippet to your website.

Installing the WebChat code
Now you need to install the WebChat code snippet to every page of your website. In the instructions below, we will use Google Tag Manager to complete the installation.
- Copy the page ID of your WebChat bot.
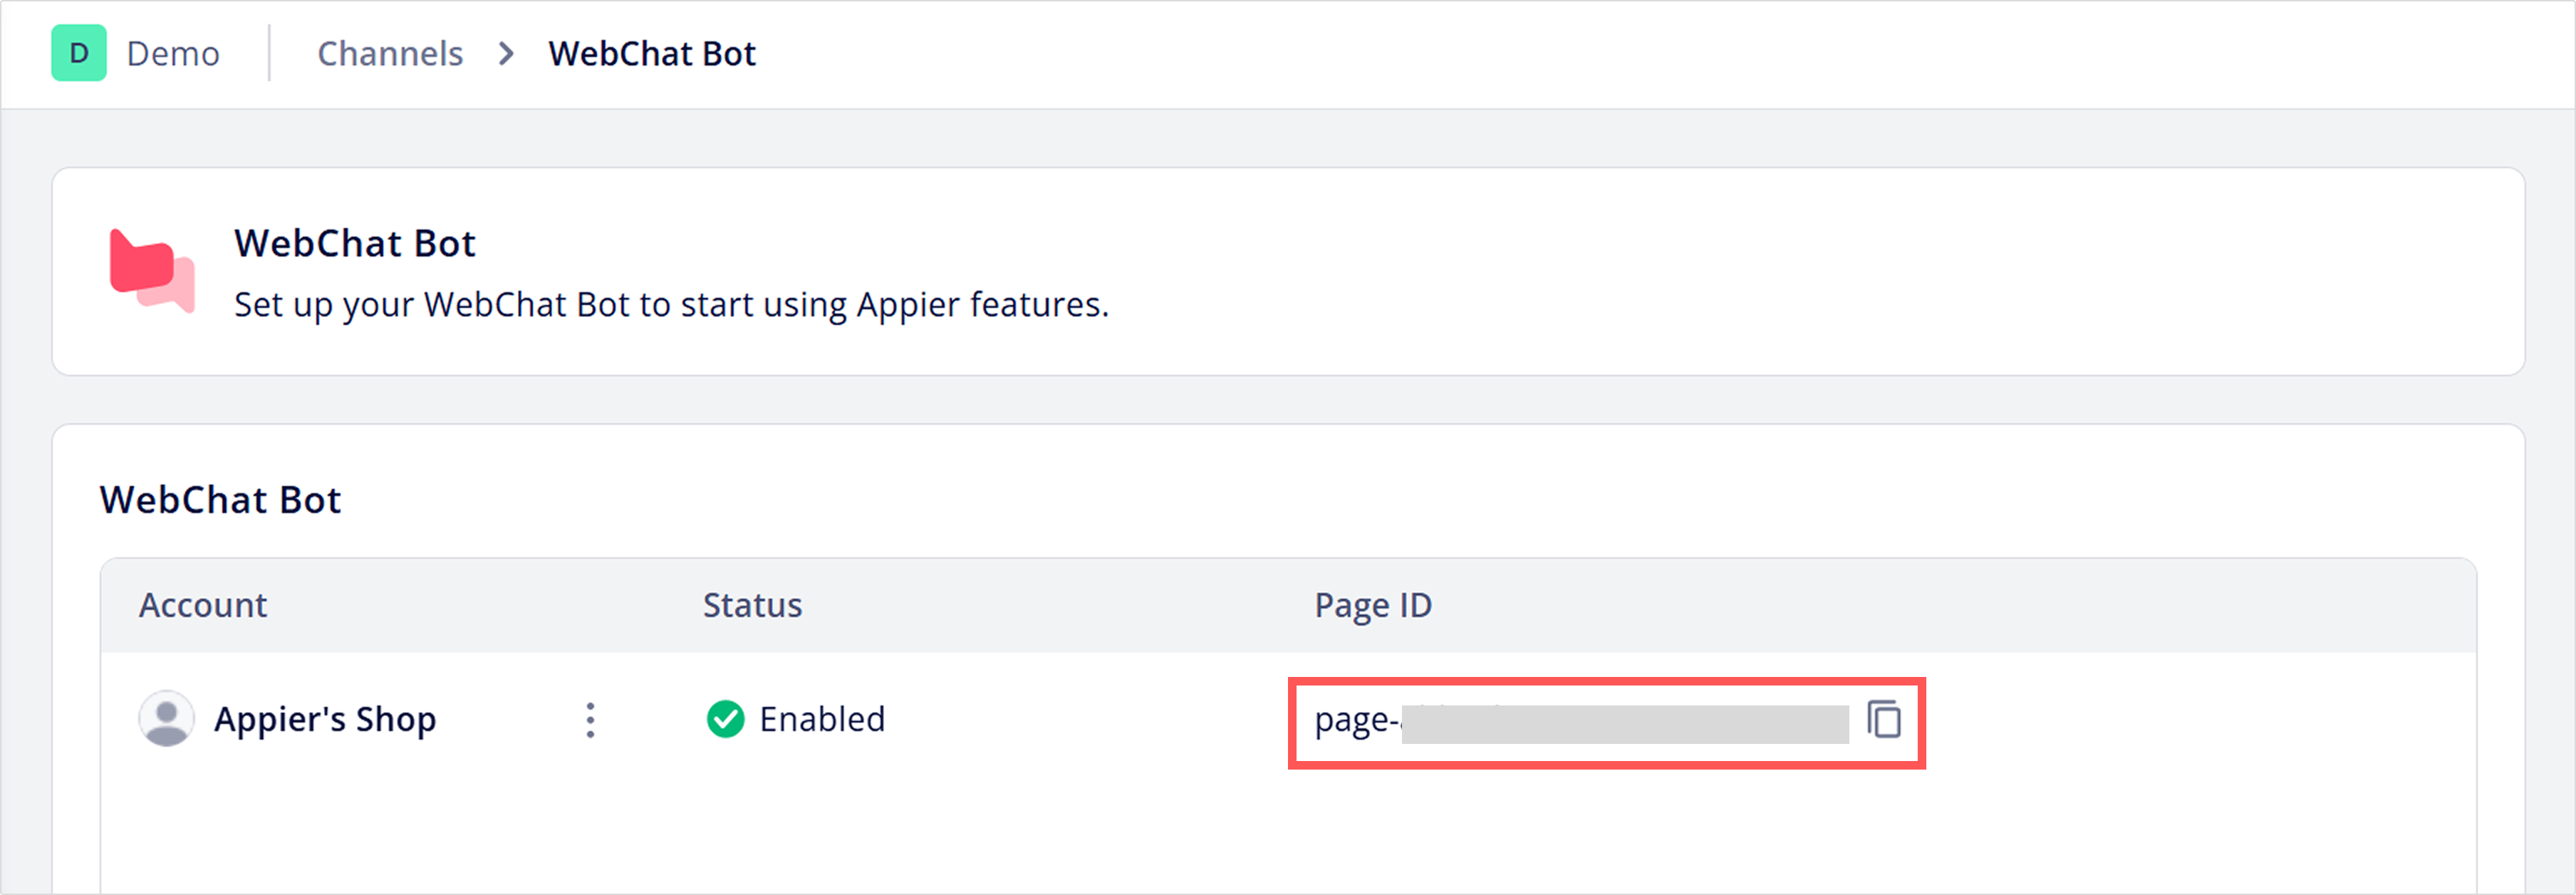
- Use the copied page ID to replace the
<YOUR_WEBCHAT_PAGEID>part in the code snippets below.
<script>
  window.BBAsyncInit = function() {
    BB.init({
      appId: "<YOUR_WEBCHAT_PAGEID>"
    });
  };
</script>
<script async type="text/javascript" src="https://asset.botbonnie.com/sdk/sdk.js"></script>
NoteIf you are not using Google Tag Manager, skip the steps below and add the code snippet before the end of the
</body>tag on every page of your website.
- Log into your Google Tag Manager account, click Tags, and click New to create a new tag.
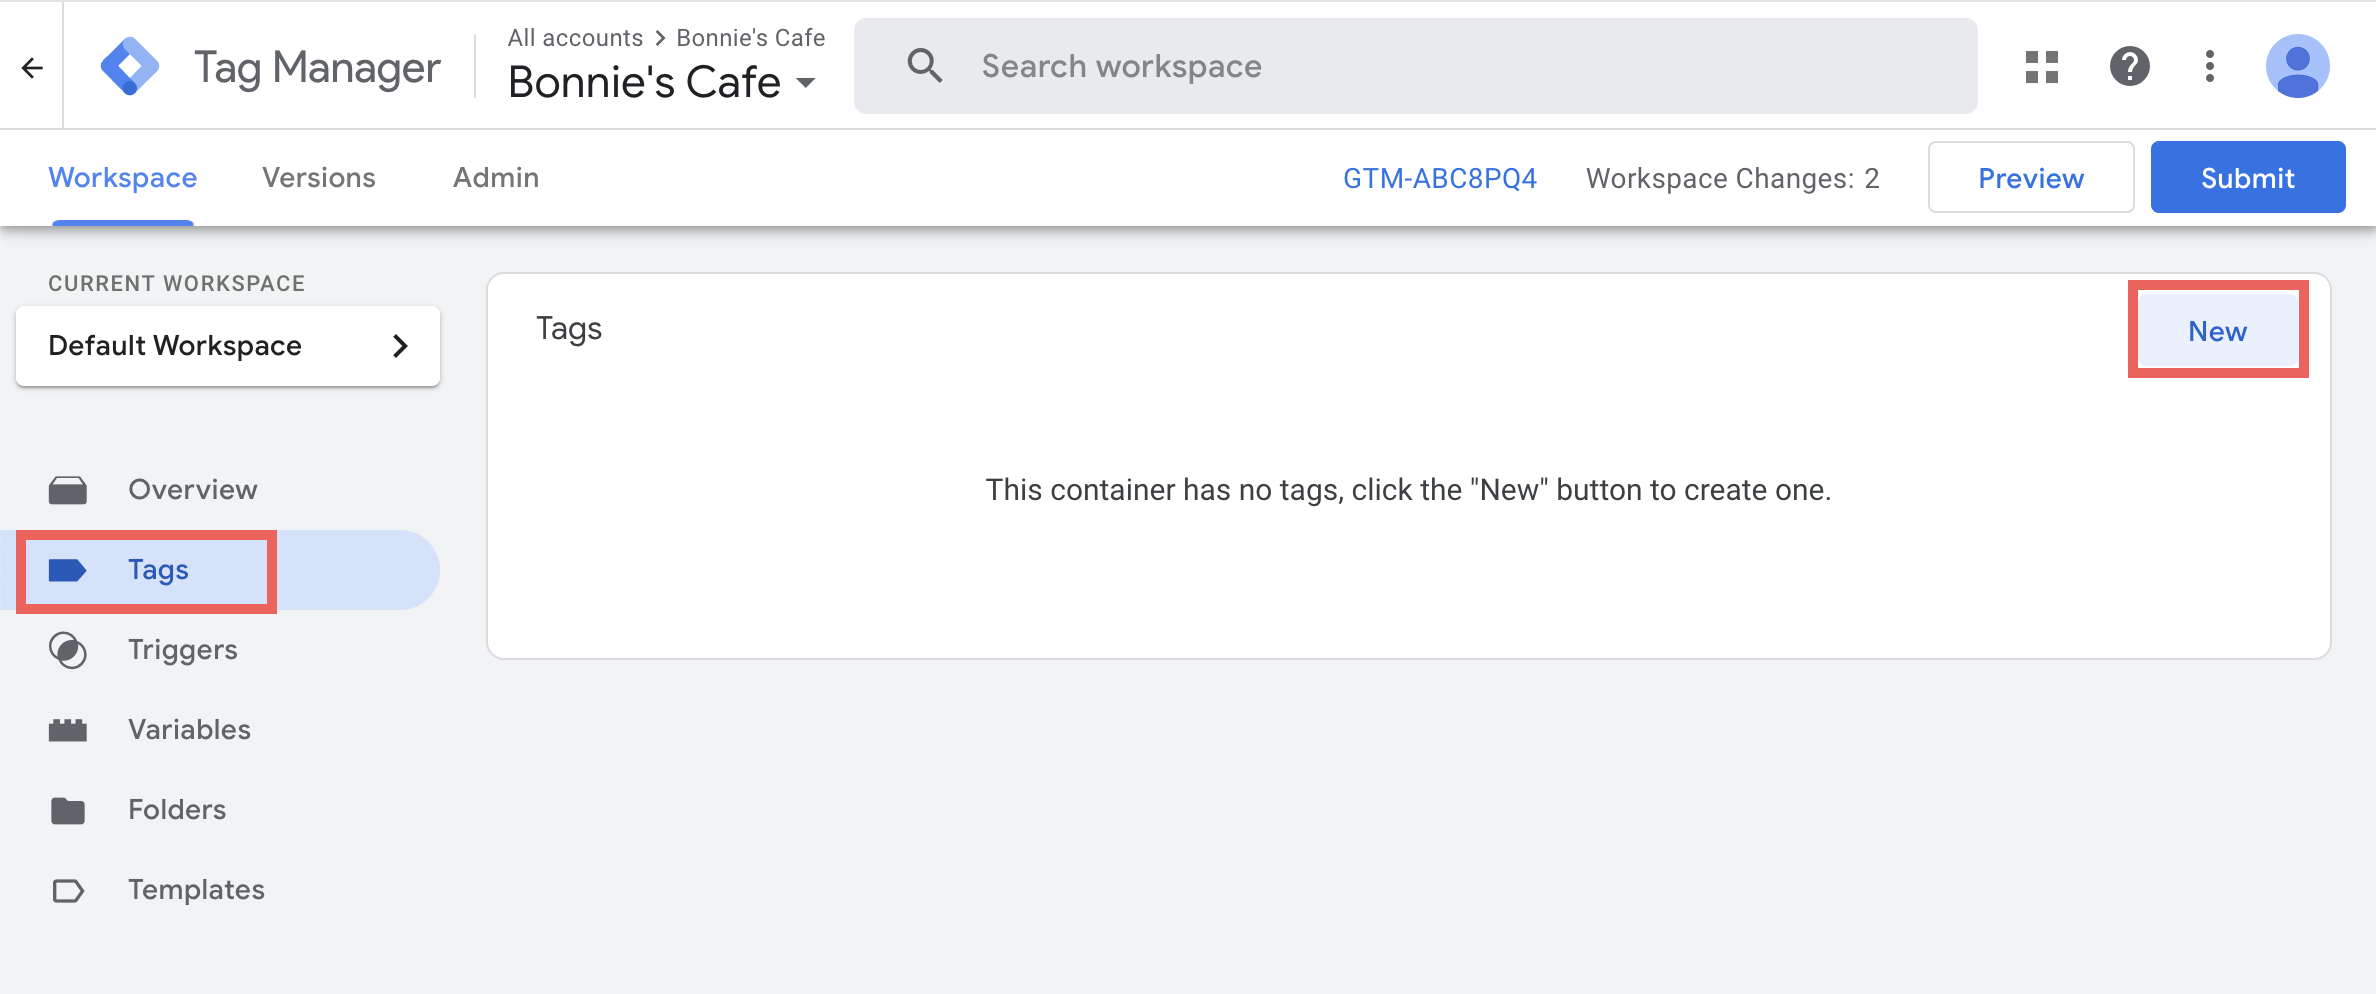
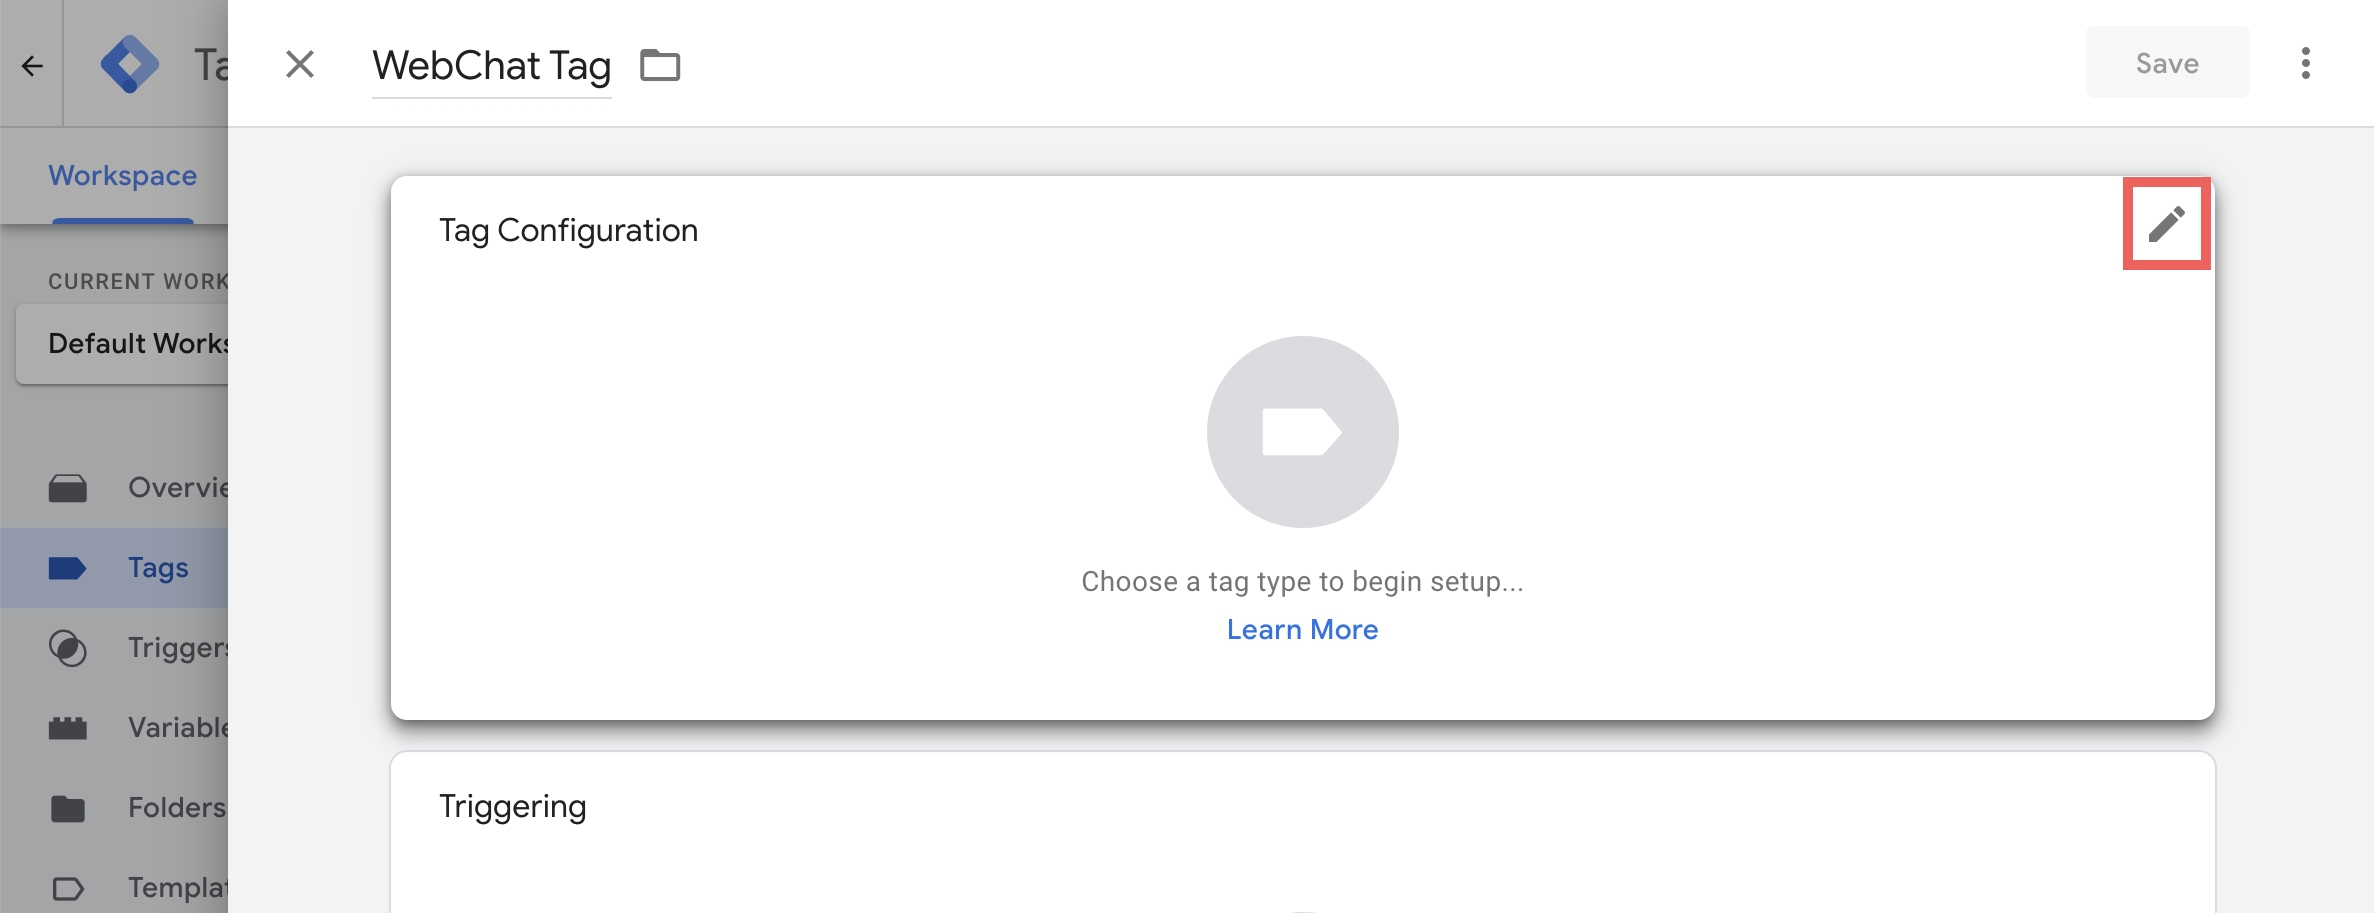
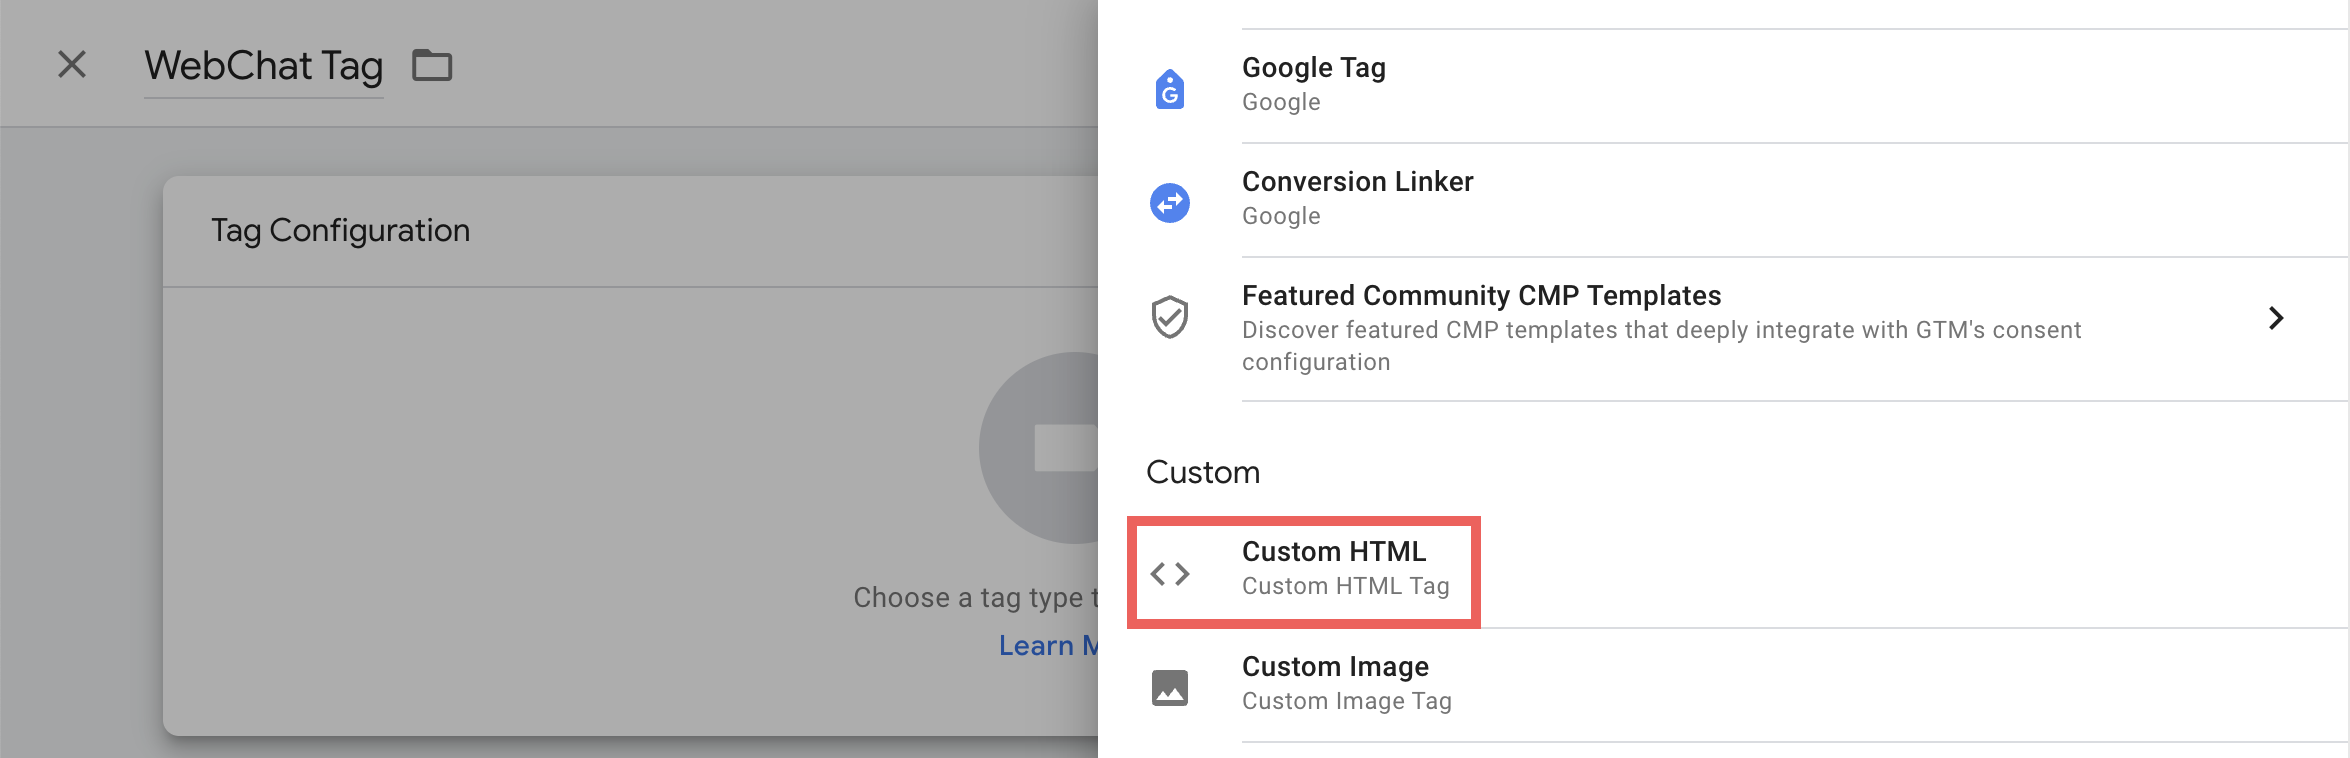
- Rename the tag (for example, WebChat Tag), click the pencil icon in Tag Configuration, and select Custom HTML.
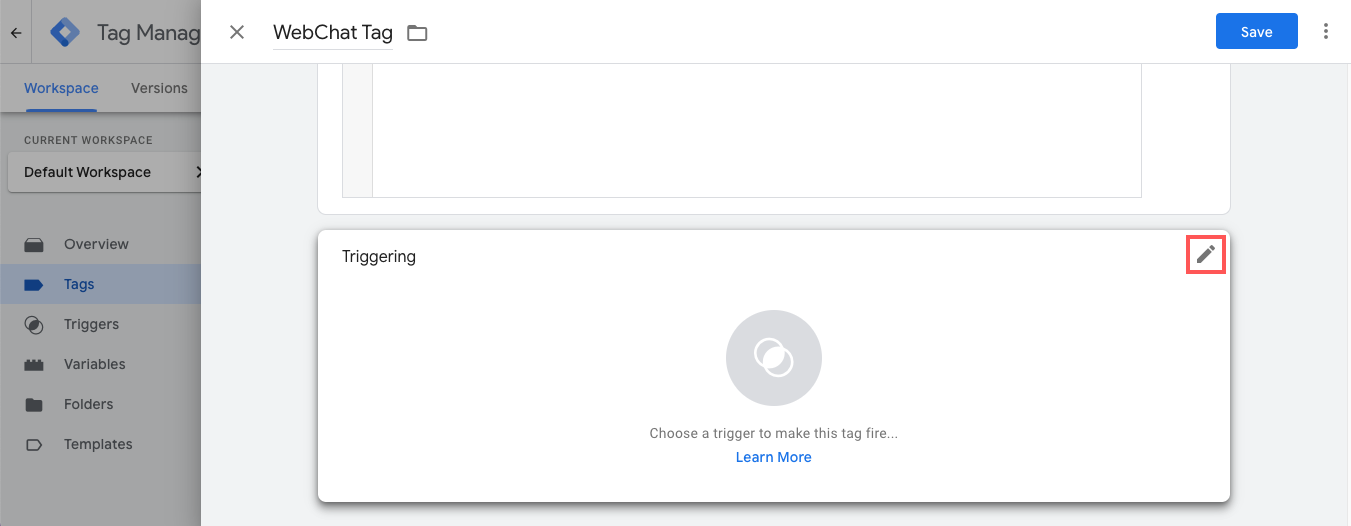
- Under HTML, paste the code snippet from step 2.
TipMake sure you have replaced the page ID.

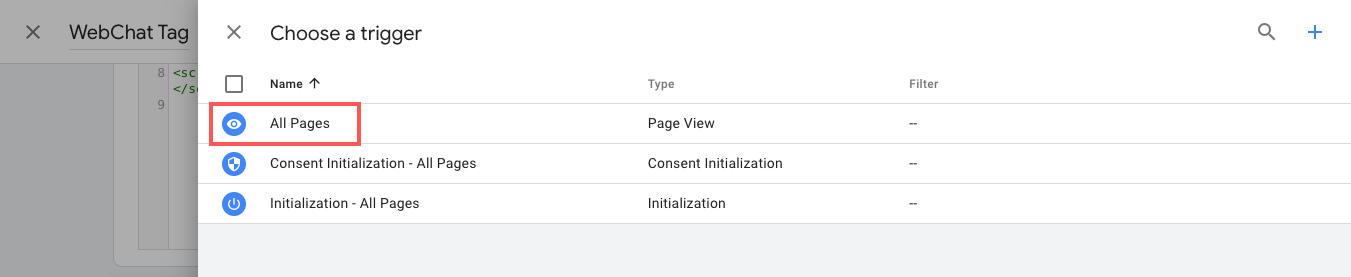
- Click the edit icon in Triggering, select All Pages, and click Save.
- Click Preview and enter your website URL.
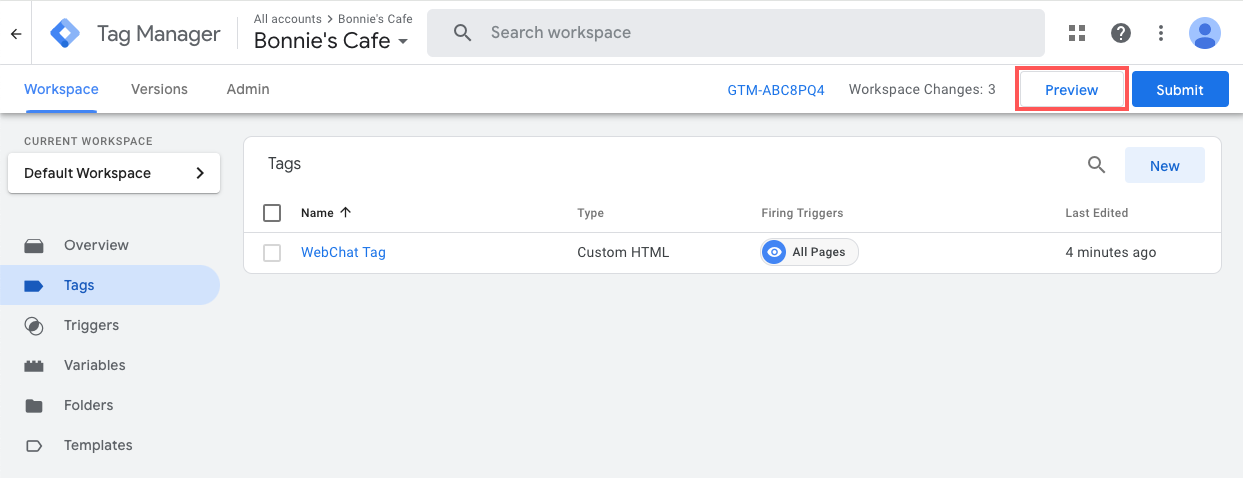
Make sure the WebChat tag you created is firing properly.
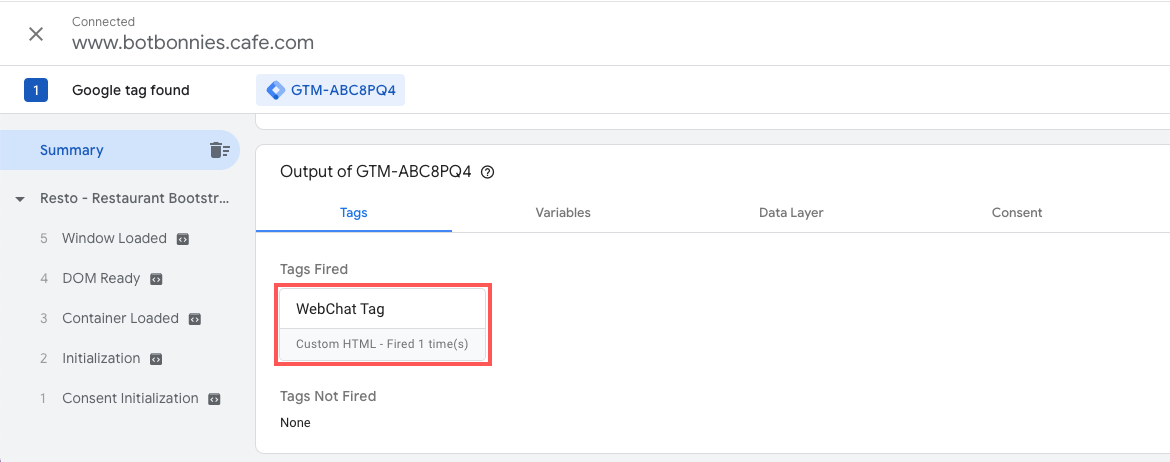
- When you’re done checking, click Submit > Publish.

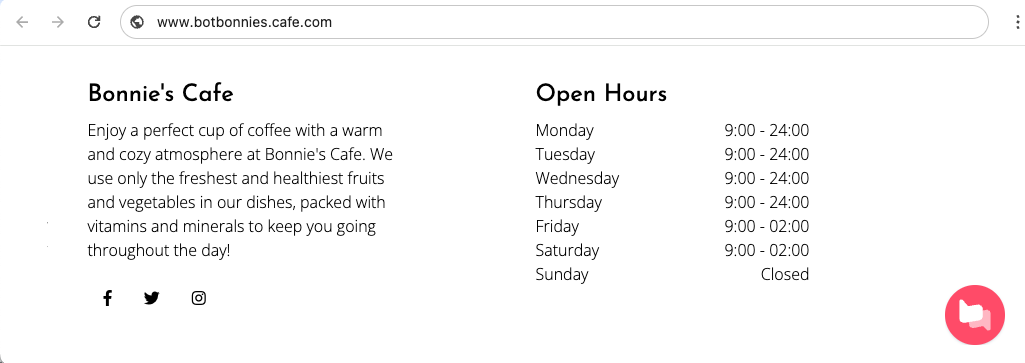
You should see the WebChat widget on your website.
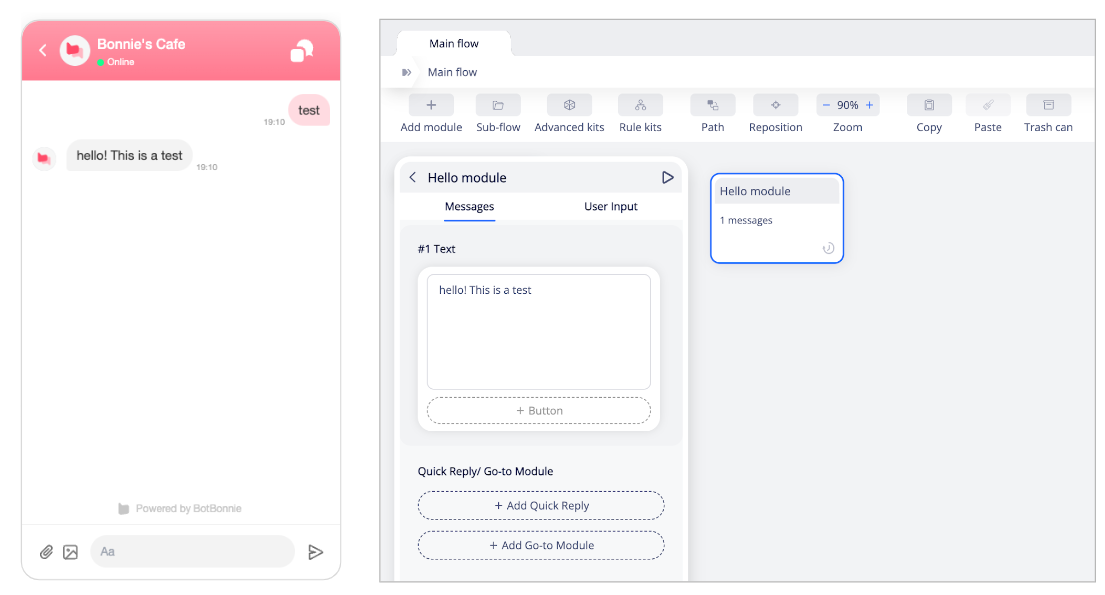
Test your integration
From the left menu, go to Content > AI rules, then click + Add AI Rule.
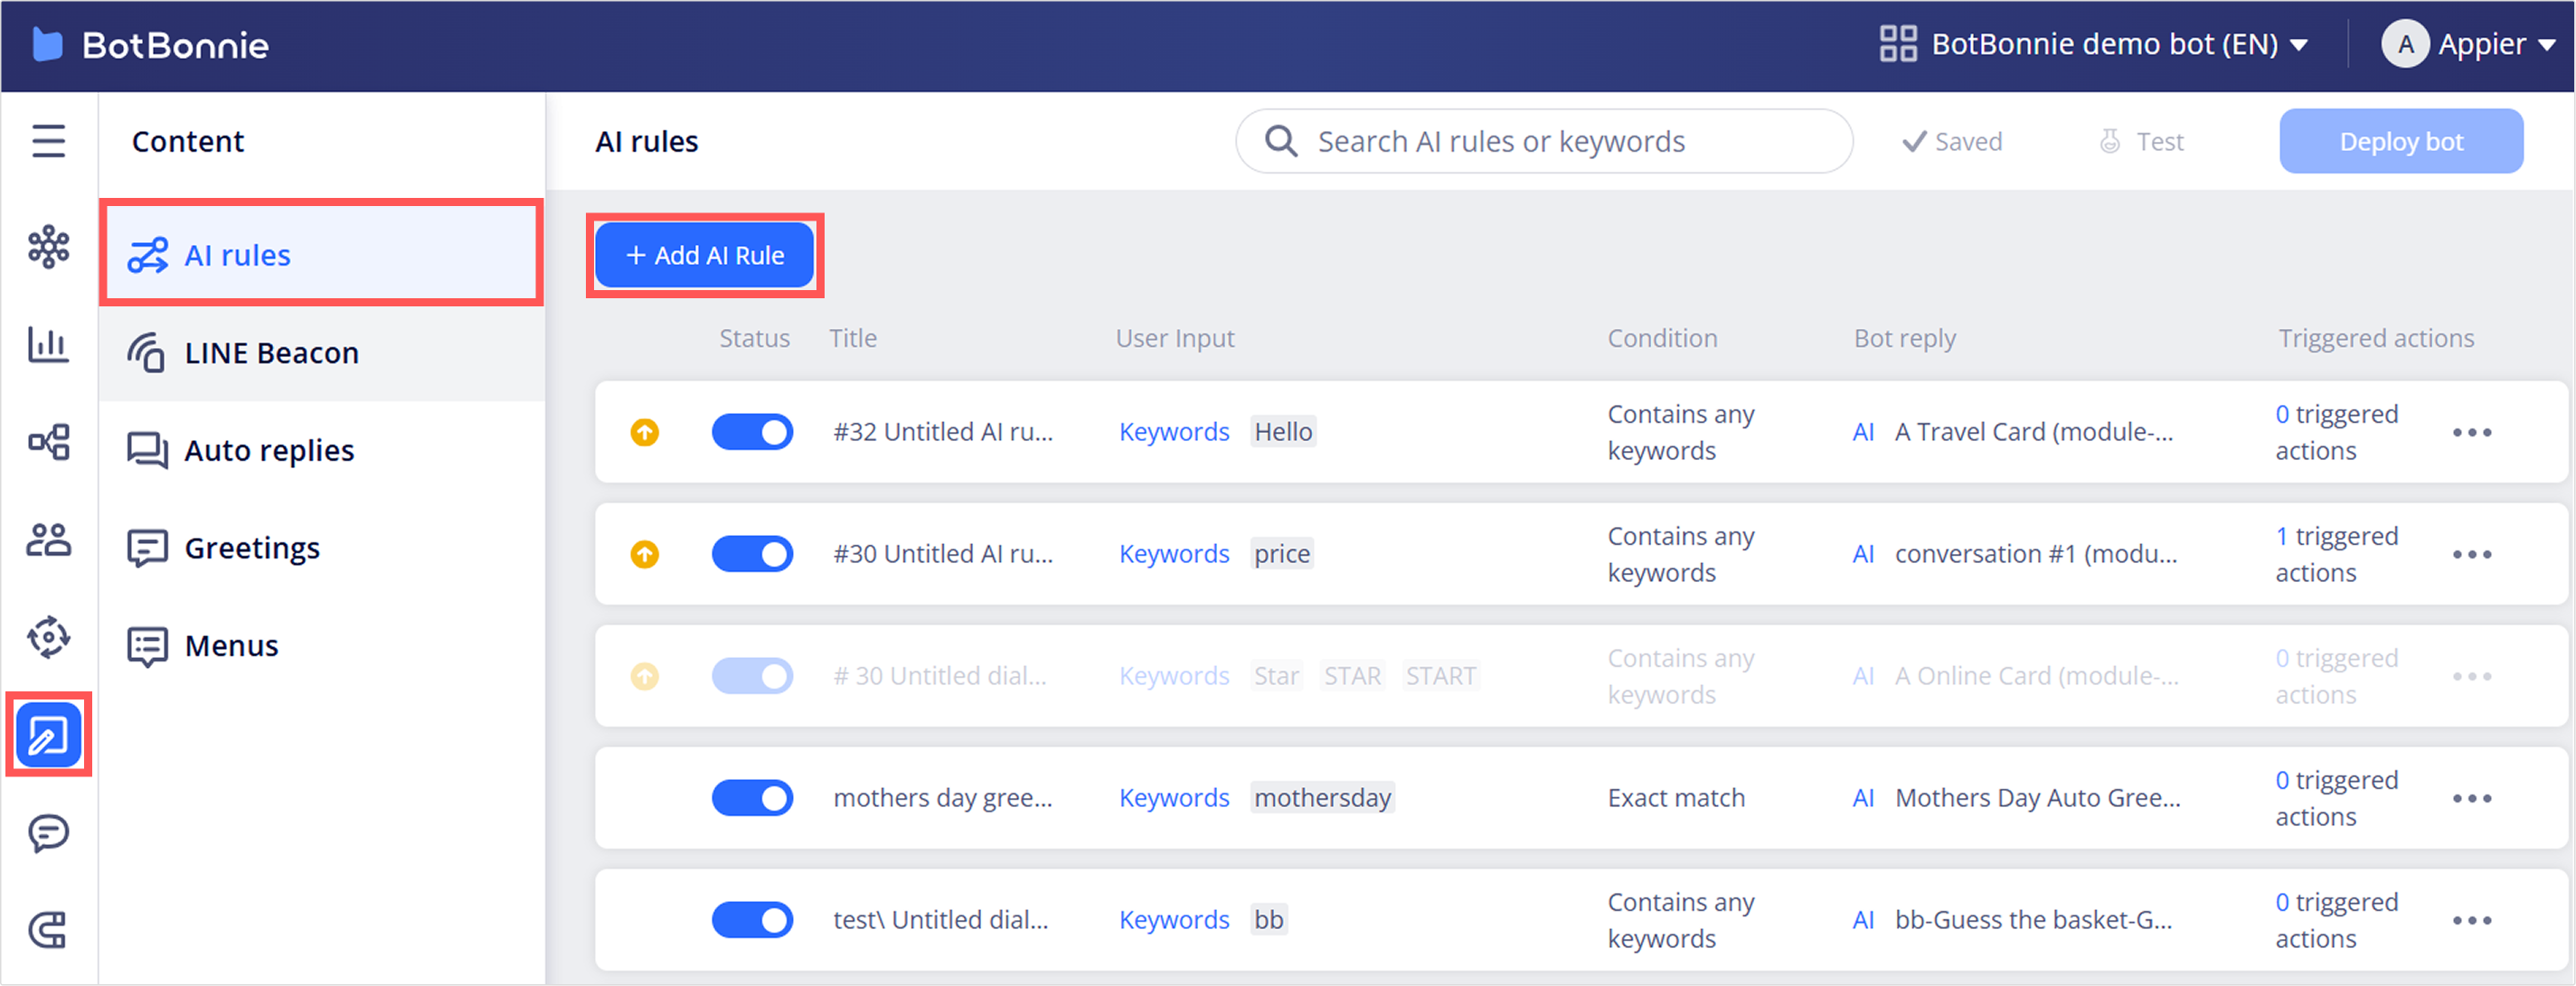
Expand the new AI rule, enter a keyword under User input (for example, test), select Exact match, select a module to be the Bot reply, and click Deploy bot. The keyword should be something your users are unlikely to enter when they send a message to you.

Send a message to your WebChat that exactly matches the keyword in the AI rule, and you should see the module you selected as the reply.
Updated 3 months ago