LINE
Connect your LINE Official Account (OA) to BotBonnie to engage with users through automated chatbot interactions. This integration allows you to automate responses, manage conversations, and enhance customer engagement on LINE.
To connect your LINE OA:
- Ensure you have admin access to your LINE OA and LINE Developers console.
- Set up Messaging API and LINE Login channels.
You can also enable live agent chatroom to seamlessly switch between automated and human customer agent support.
Connect a LINE OA to BotBonnie
-
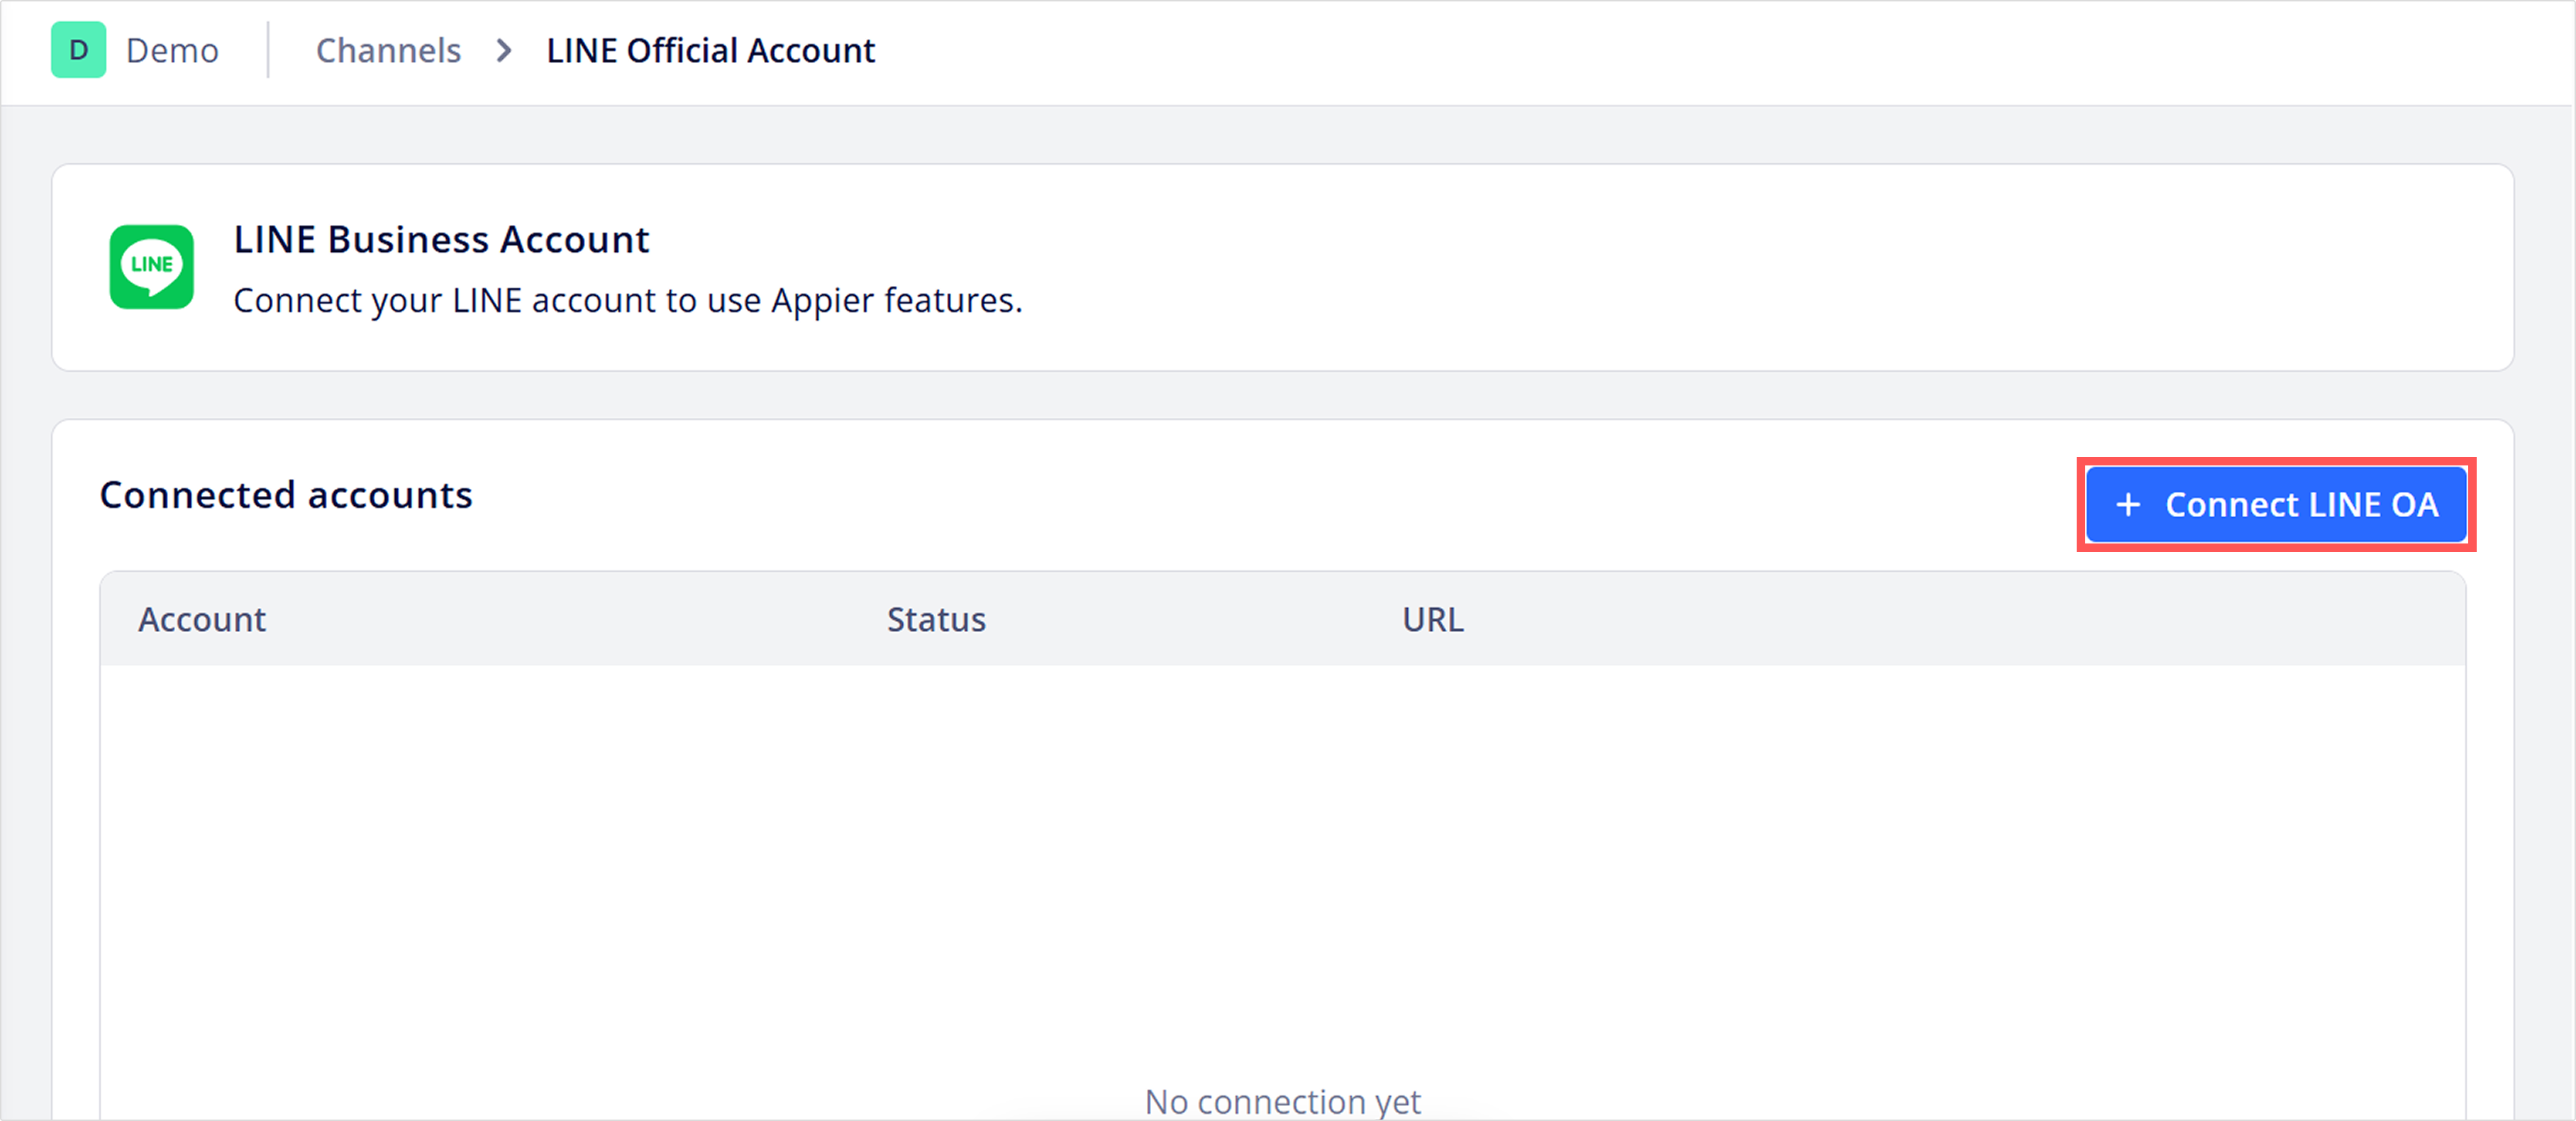
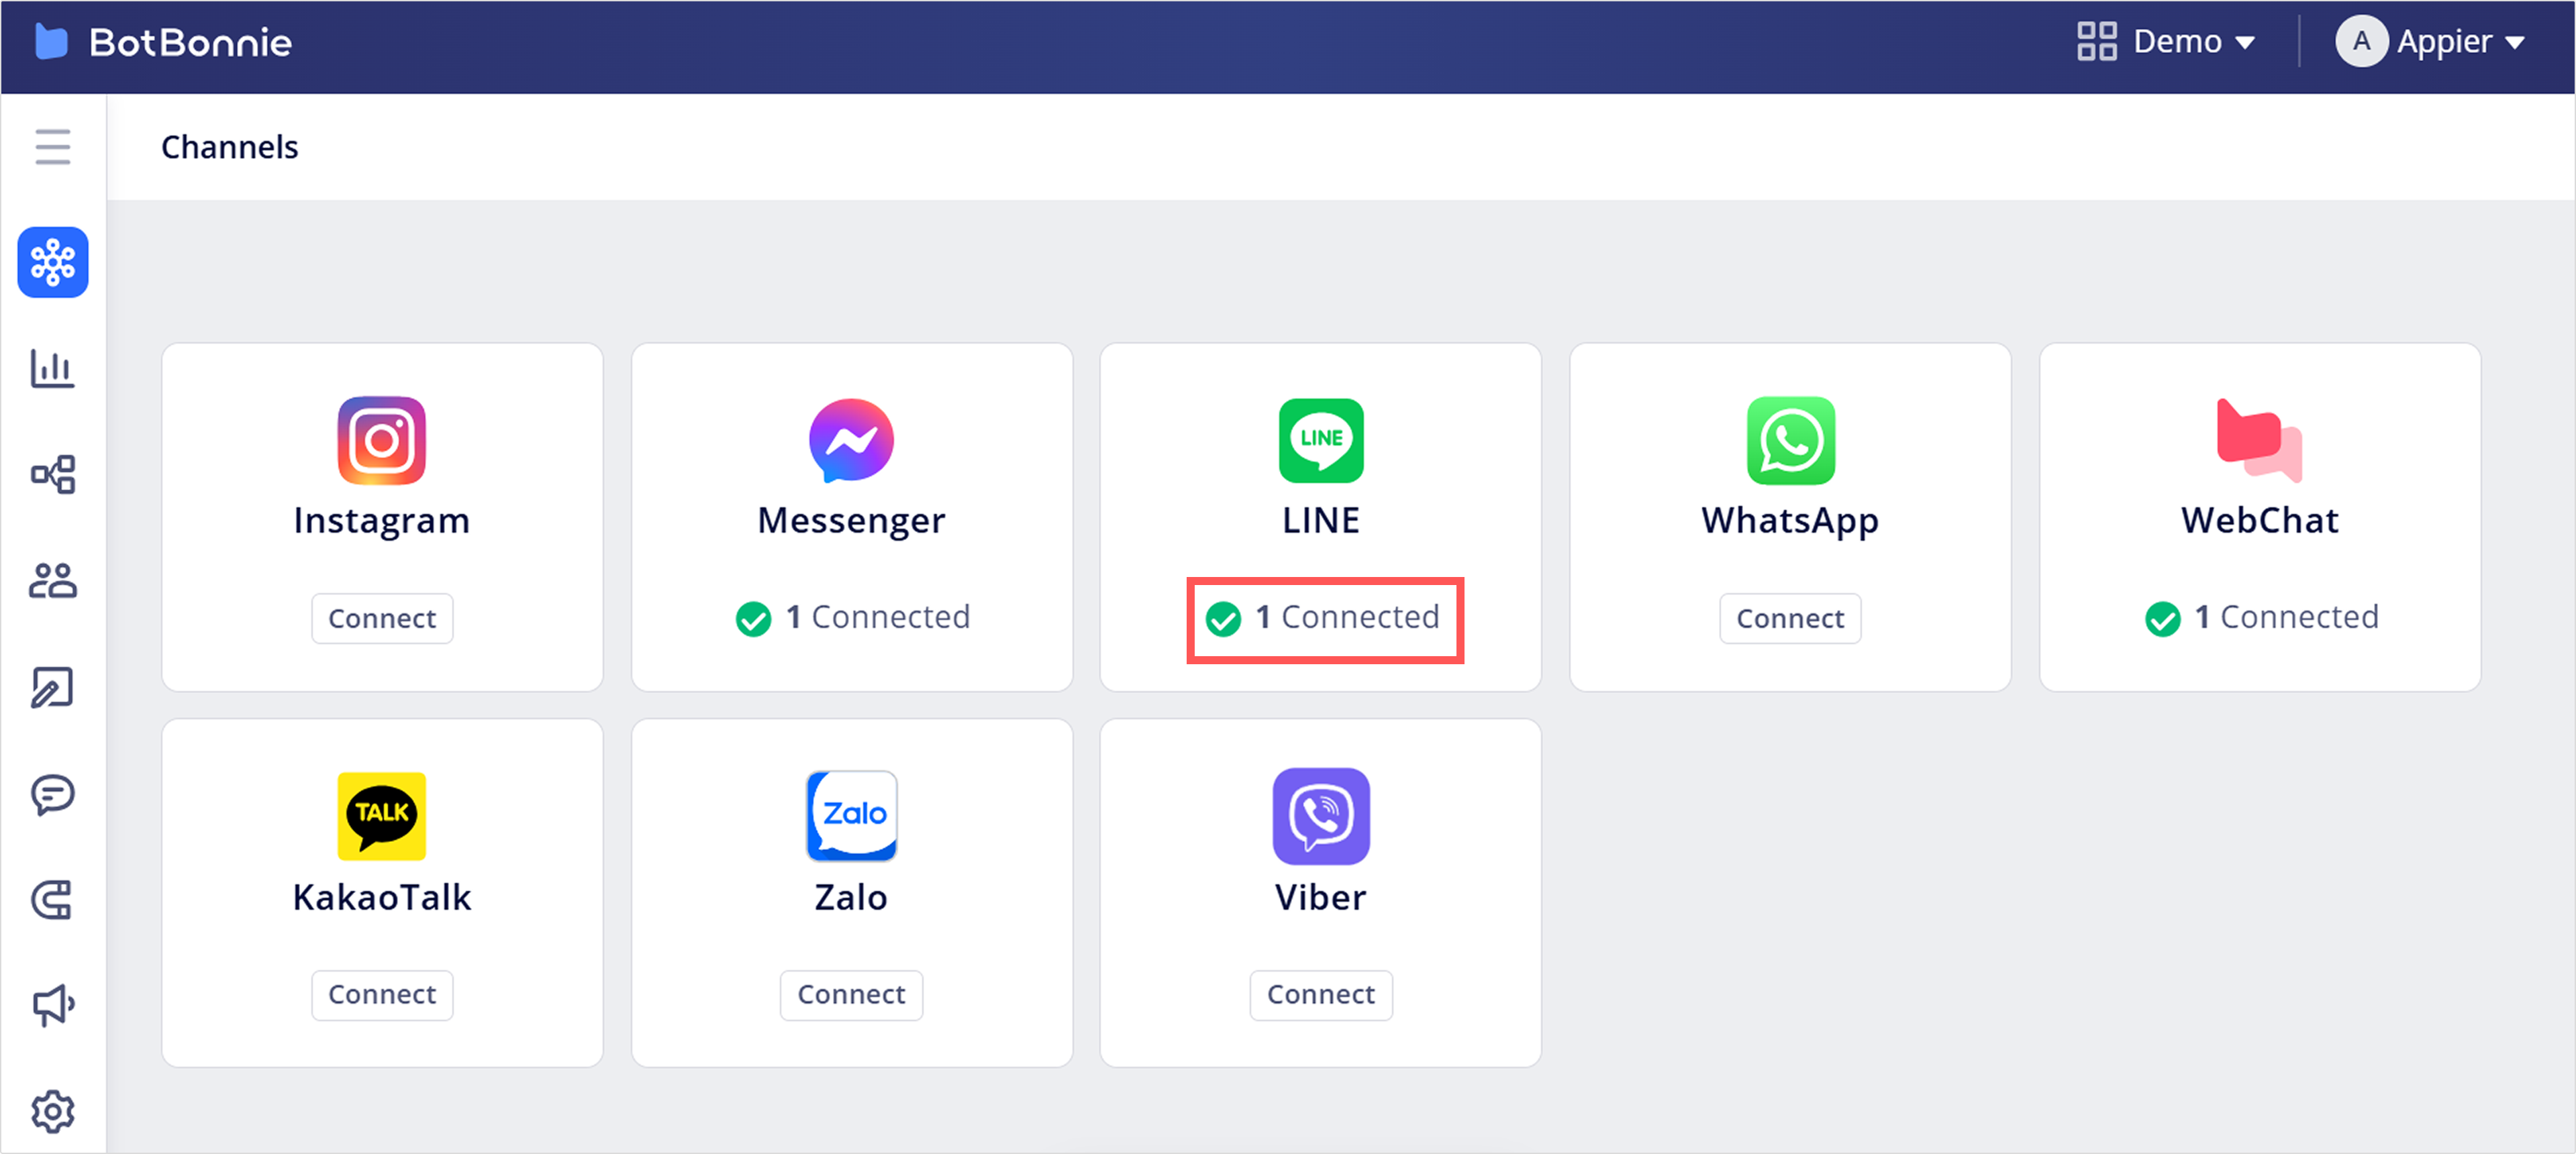
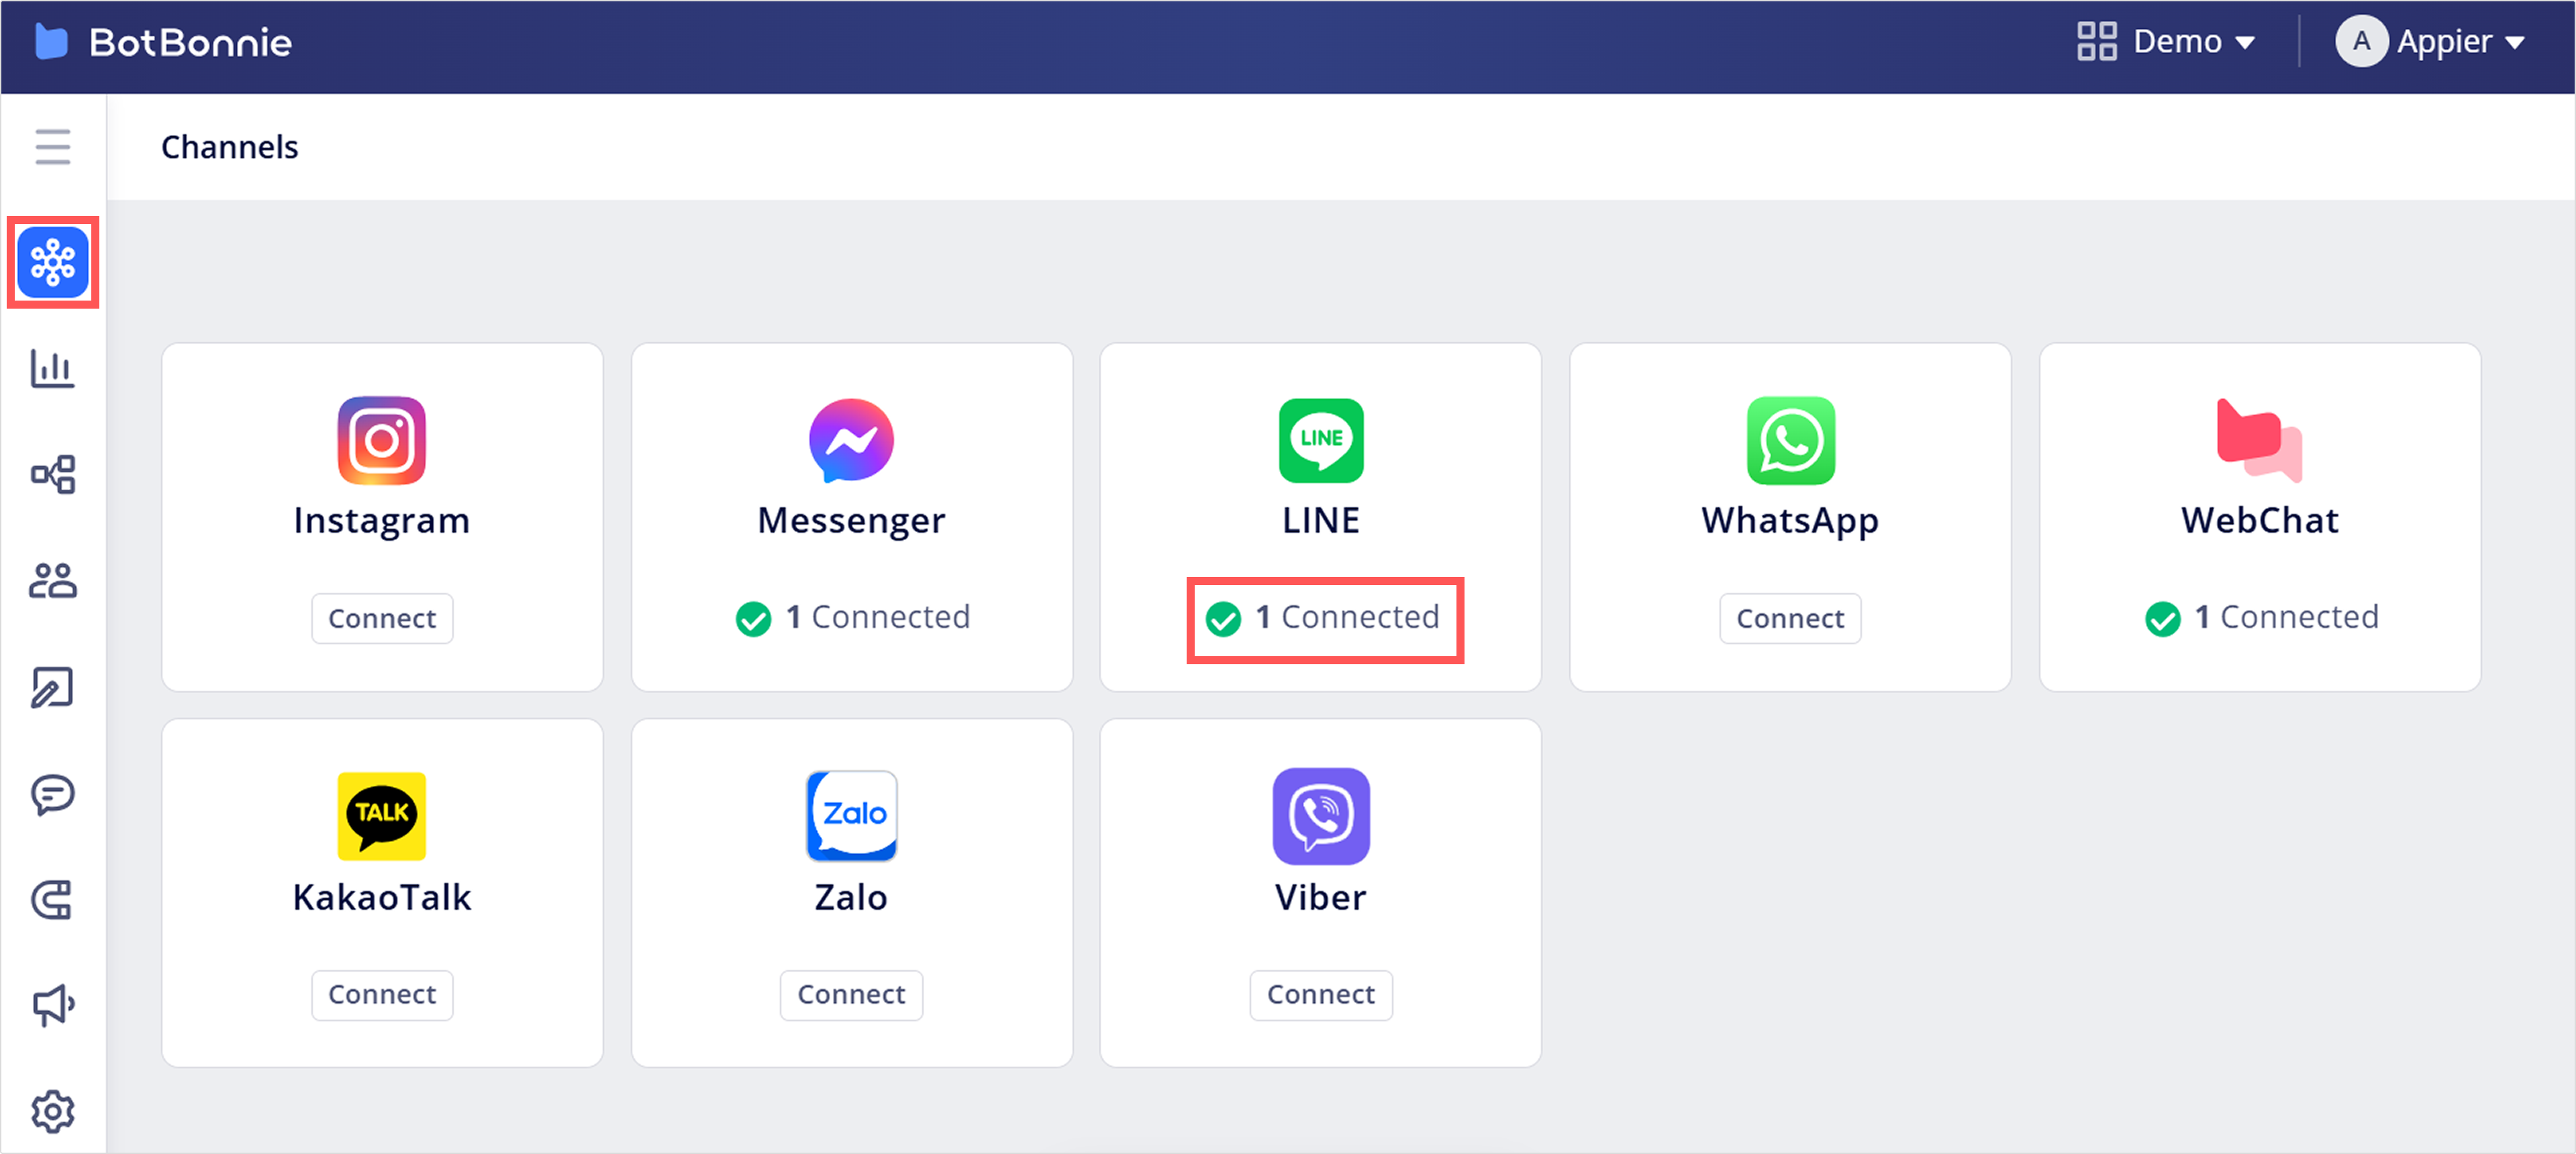
Log into your BotBonnie account. Go to Channels, then click the LINE card.

-
Click + Connect LINE OA to start the connection flow.
Part I. Connect Messaging API channel
-
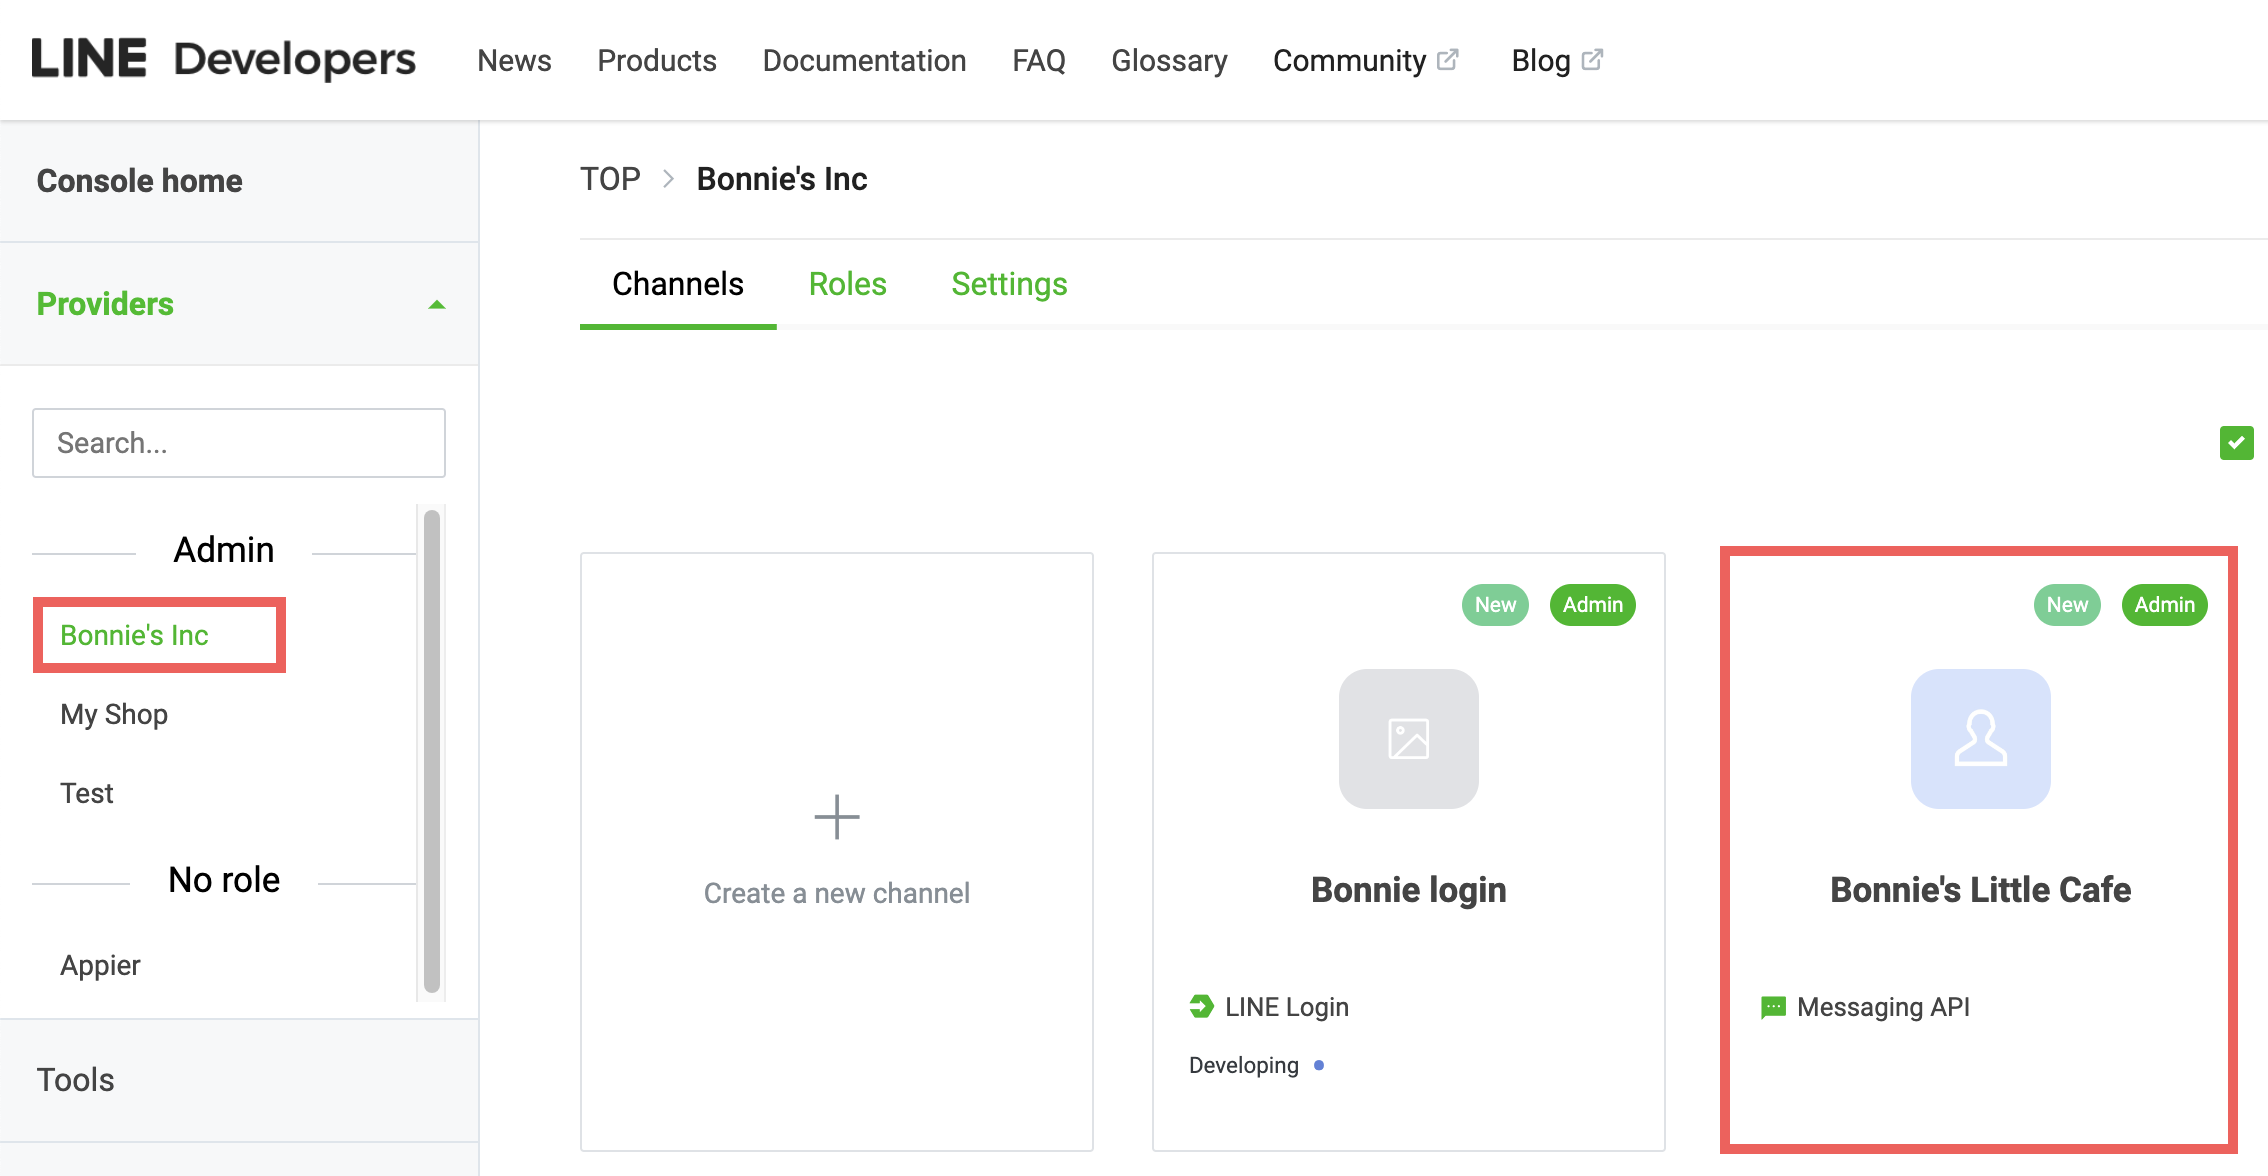
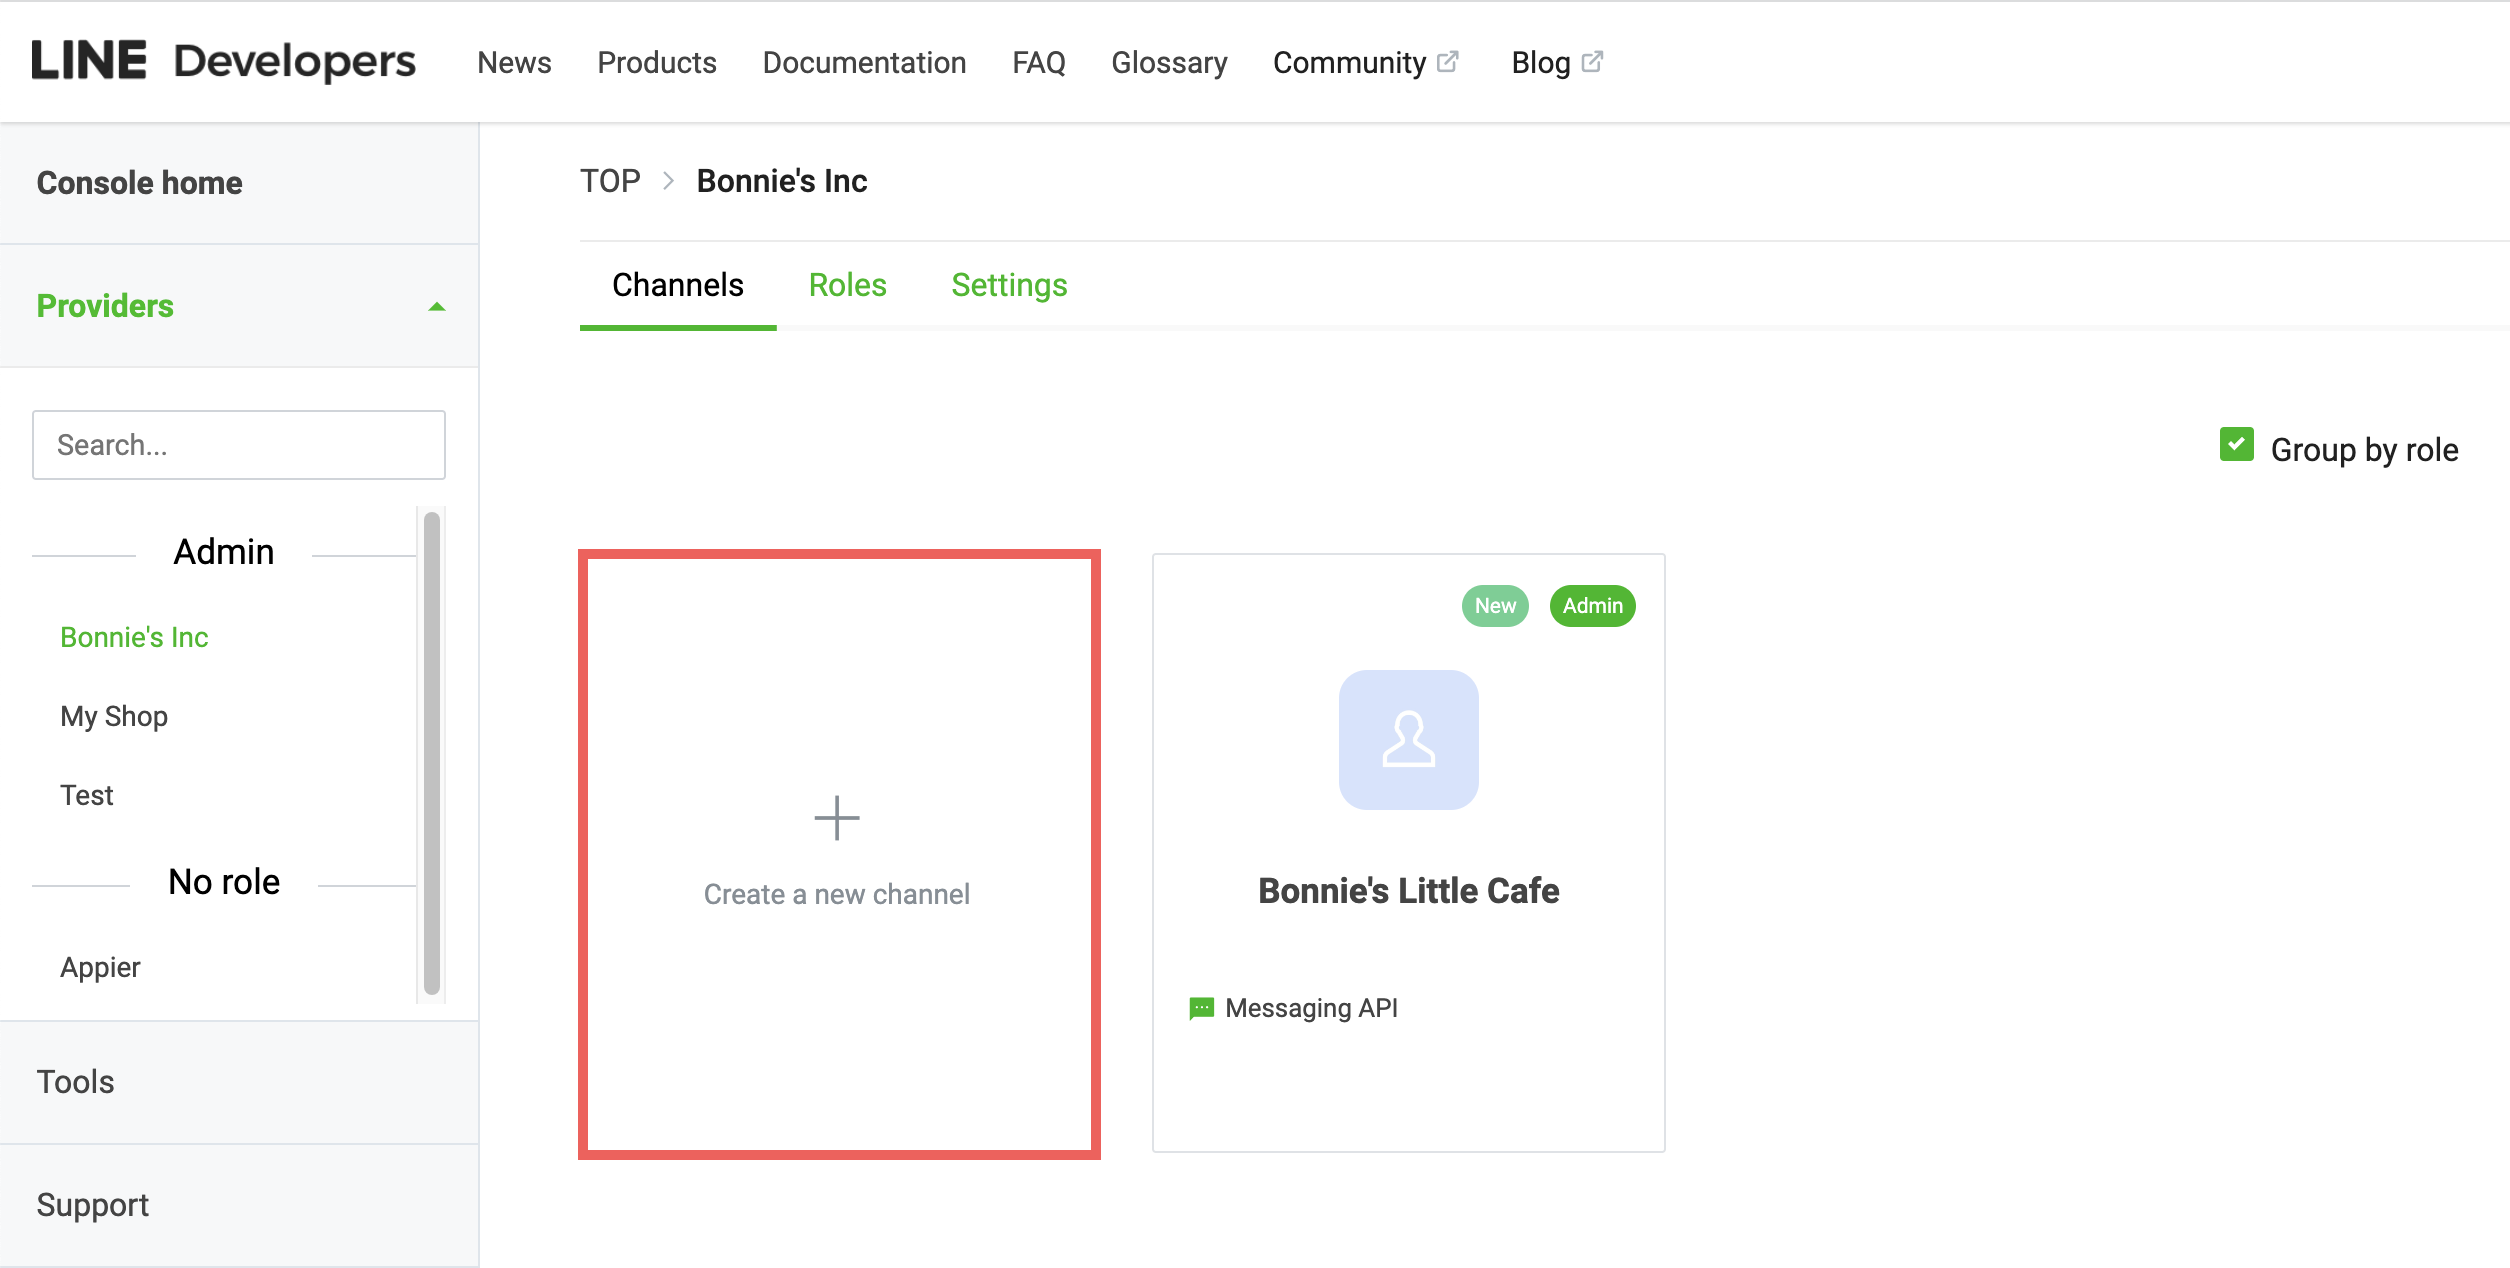
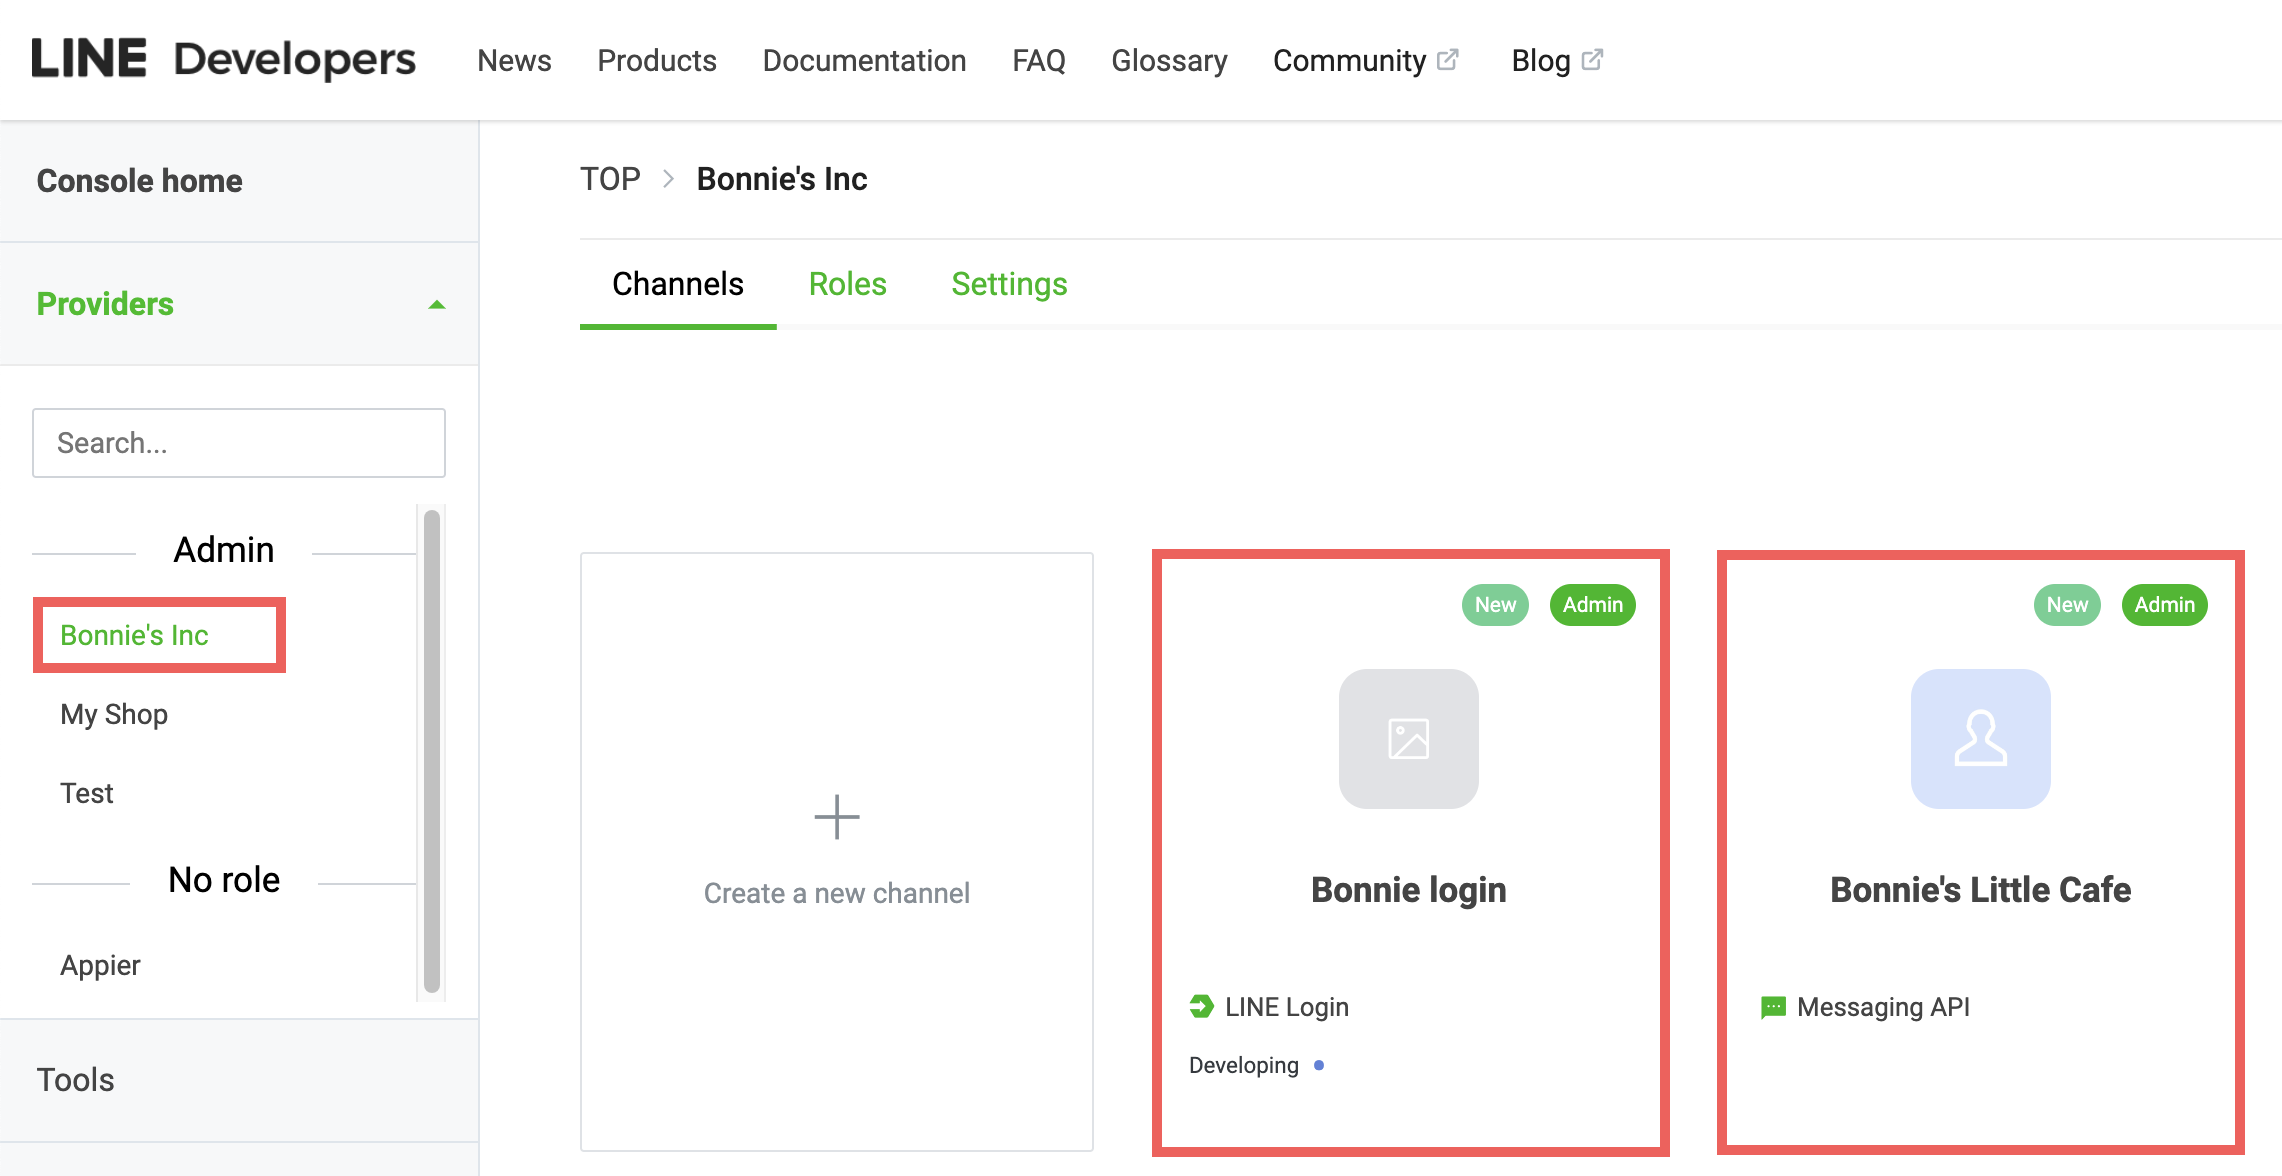
Log in to LINE Developers Console, go to the provider of your LINE OA, and check if there's already a Messaging API channel.
- If there's no Messaging API channel under the provider, see how to create a Messaging API channel.
- If a Messaging API channel exists and you have admin access, return to BotBonnie's console and click Continue to complete ① Create Messaging API channel and ② Enable Messaging API.
-
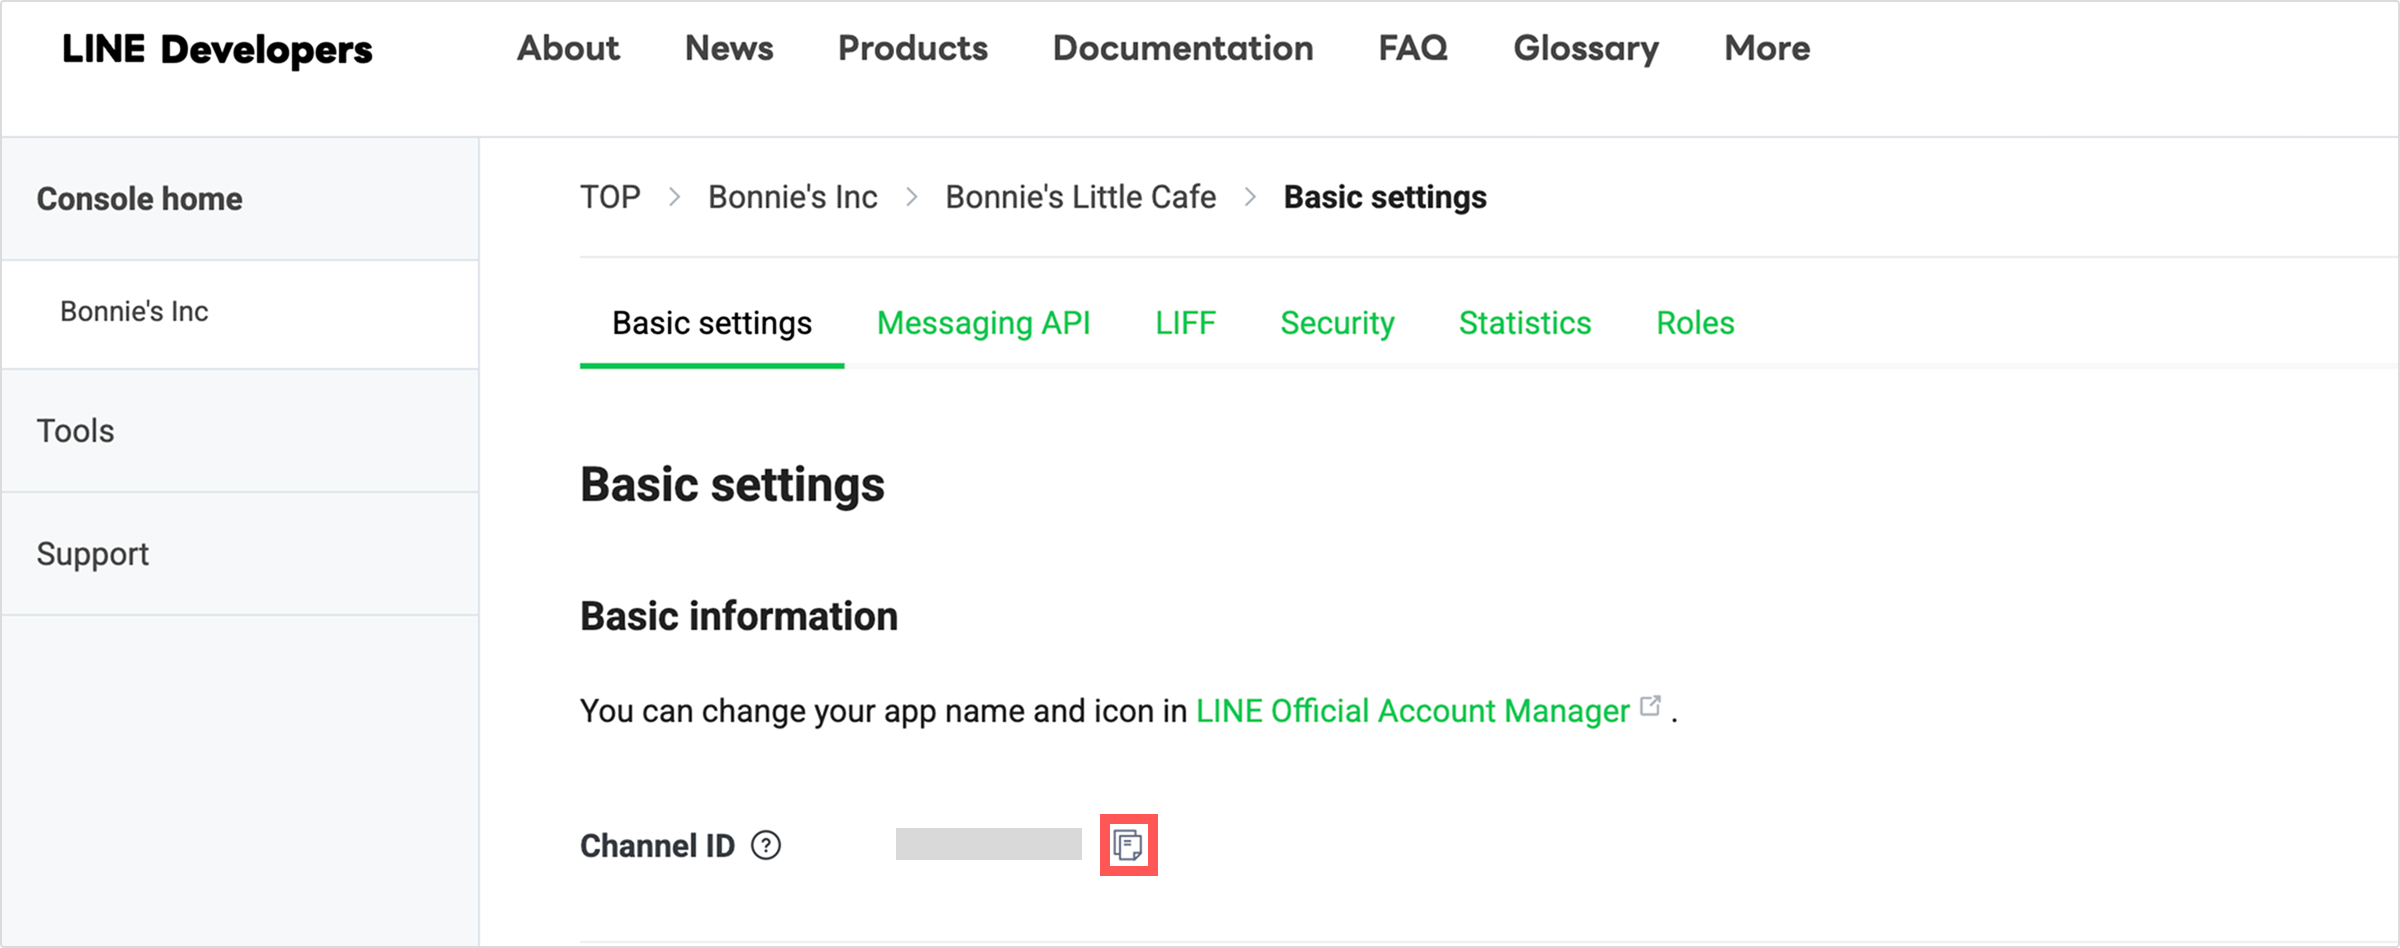
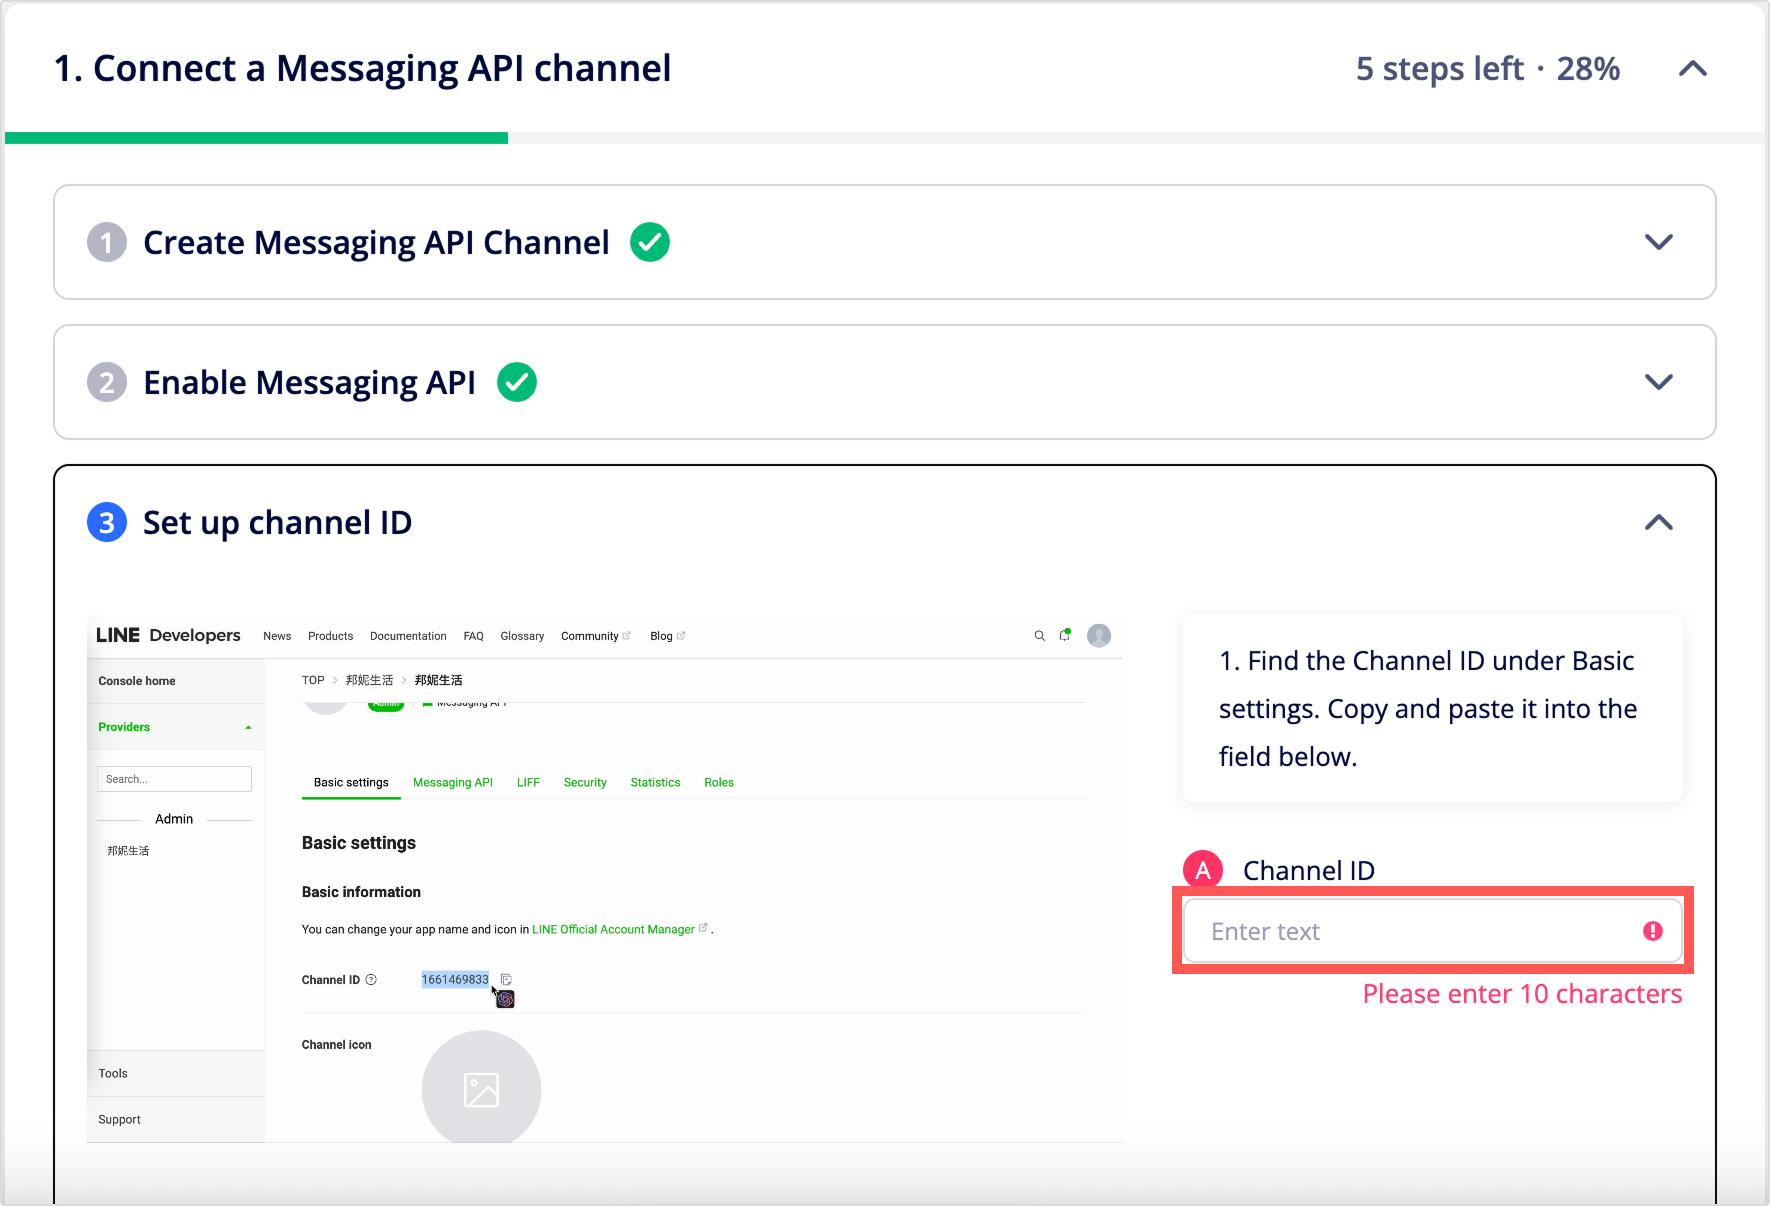
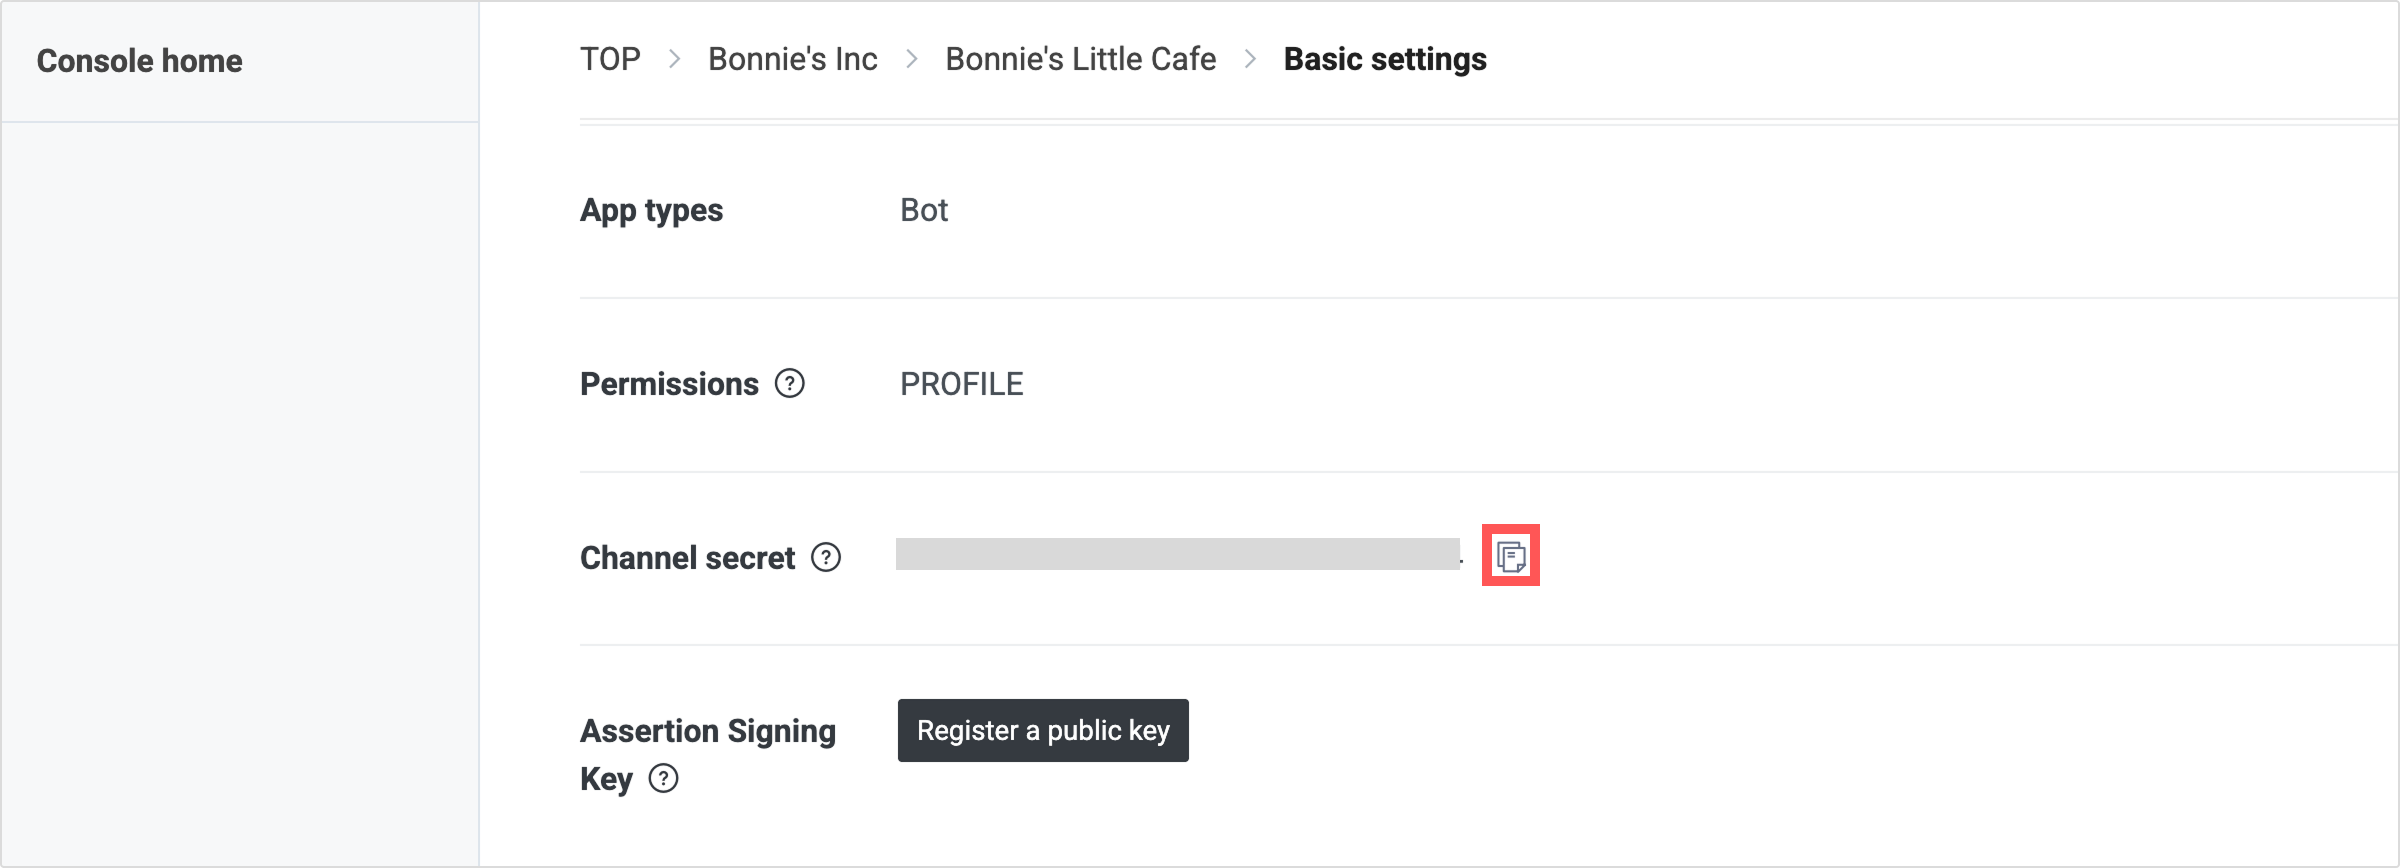
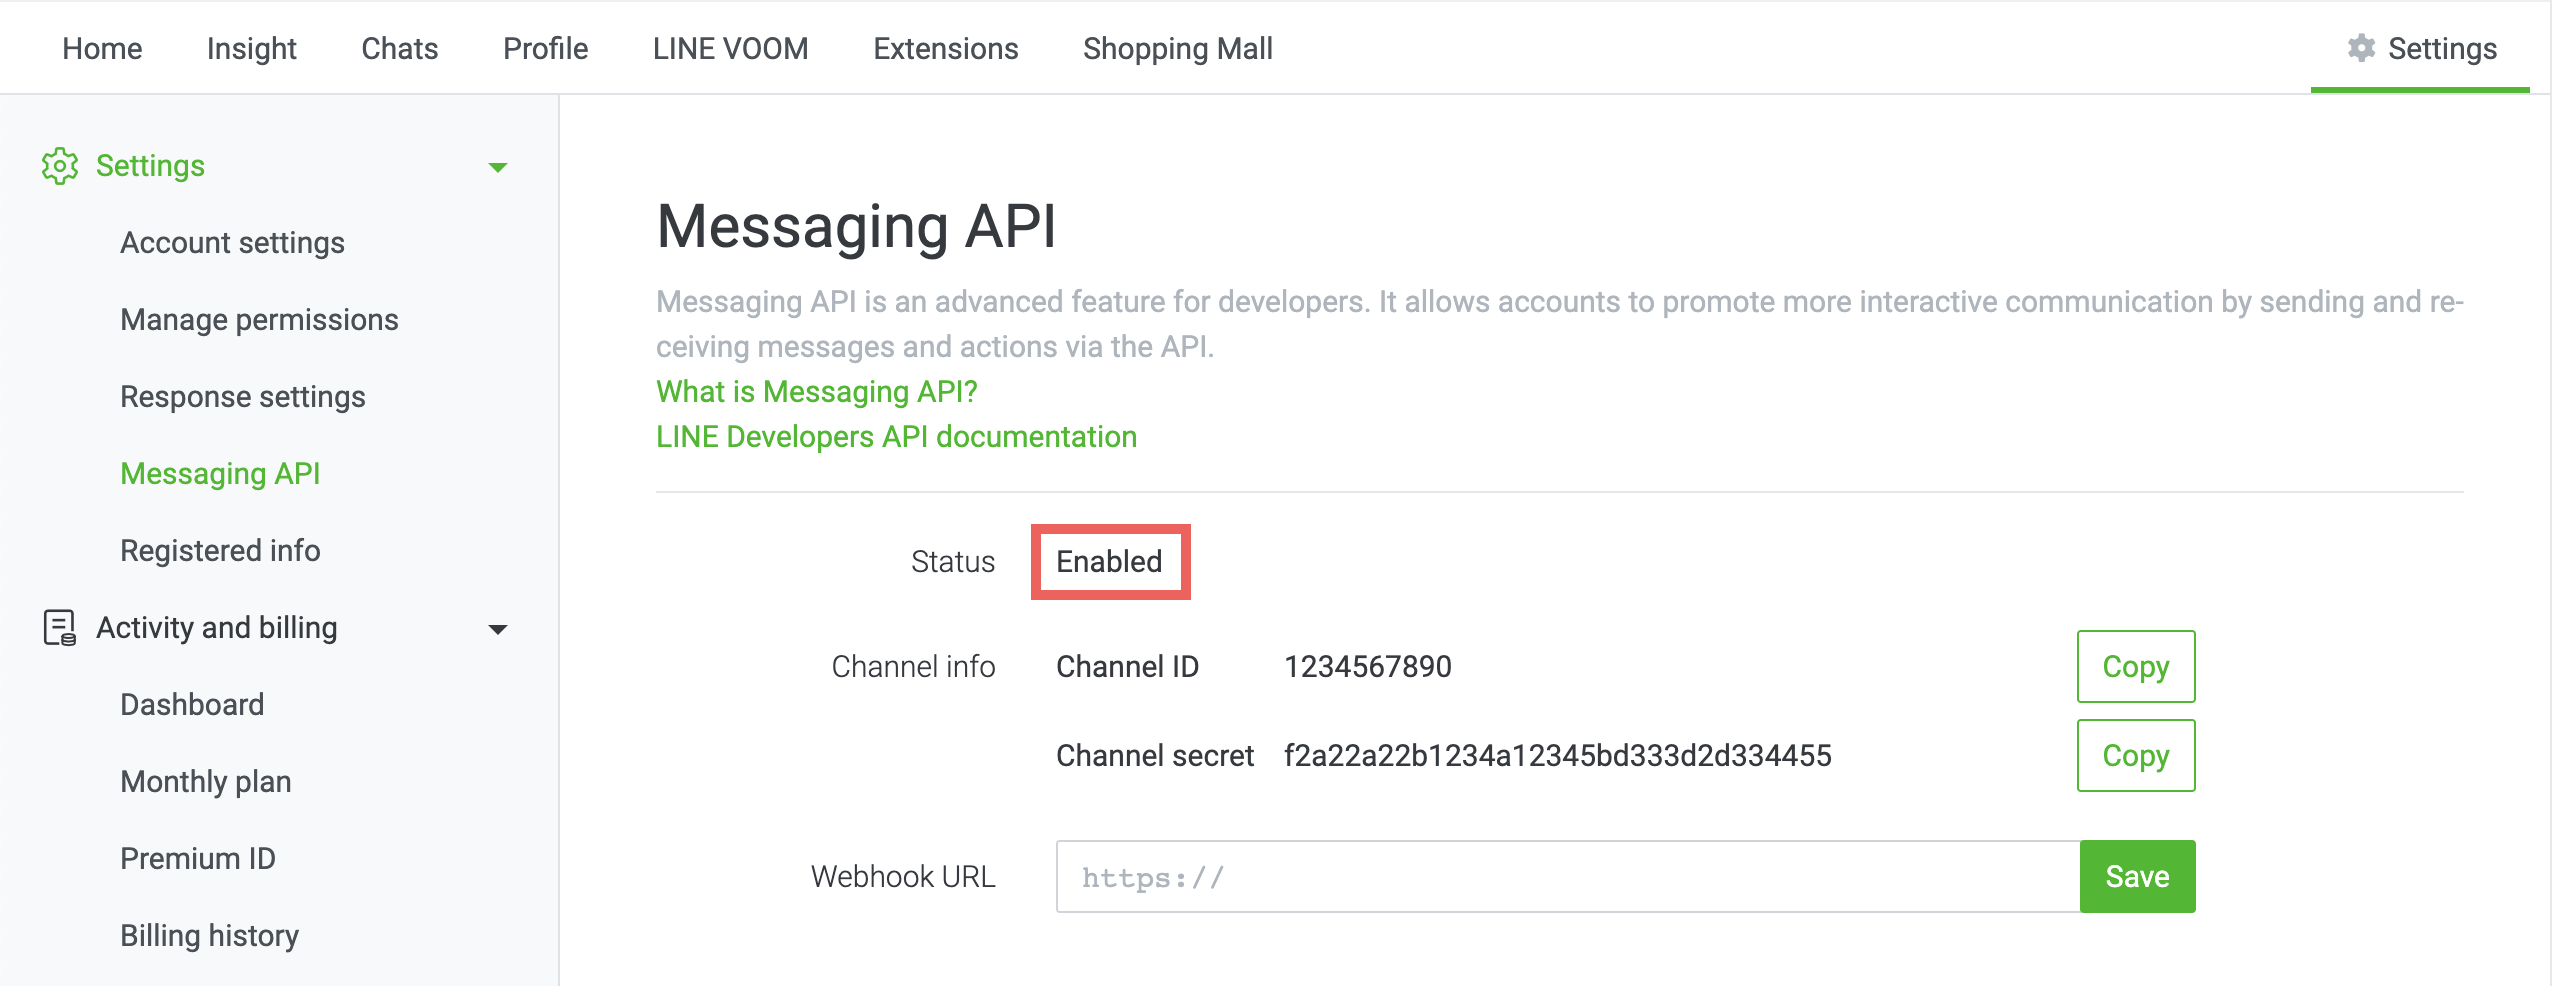
On LINE Developers console, click the Messaging API channel and go to the Basic settings tab.
- Find Channel ID, click the copy icon, and paste the Channel ID on BotBonnie Console under 1. Connect a Messaging API channel > ③ Set up channel ID, and click Continue.
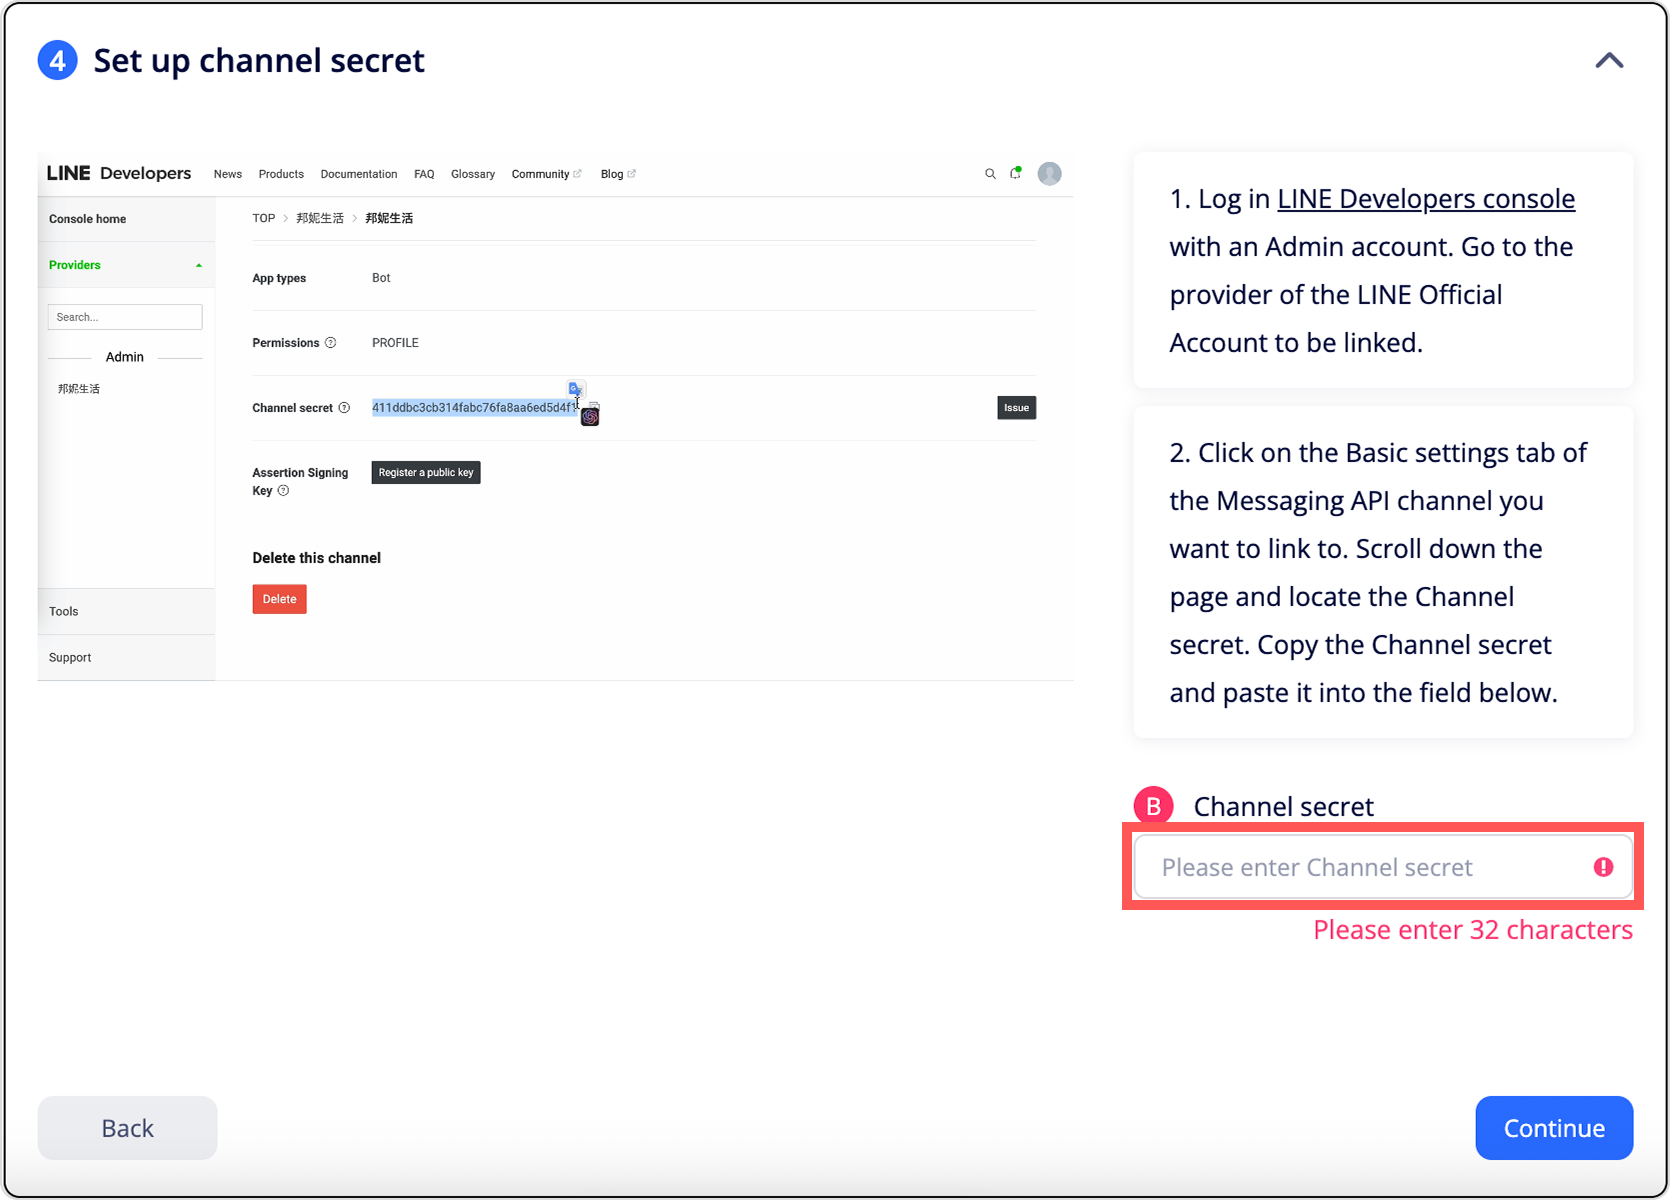
ii. Copy the Channel Secret from LINE Developers console, paste it on BotBonnie Console under 1. Connect a Messaging API channel > ④ Set up channel secret, and click Continue.
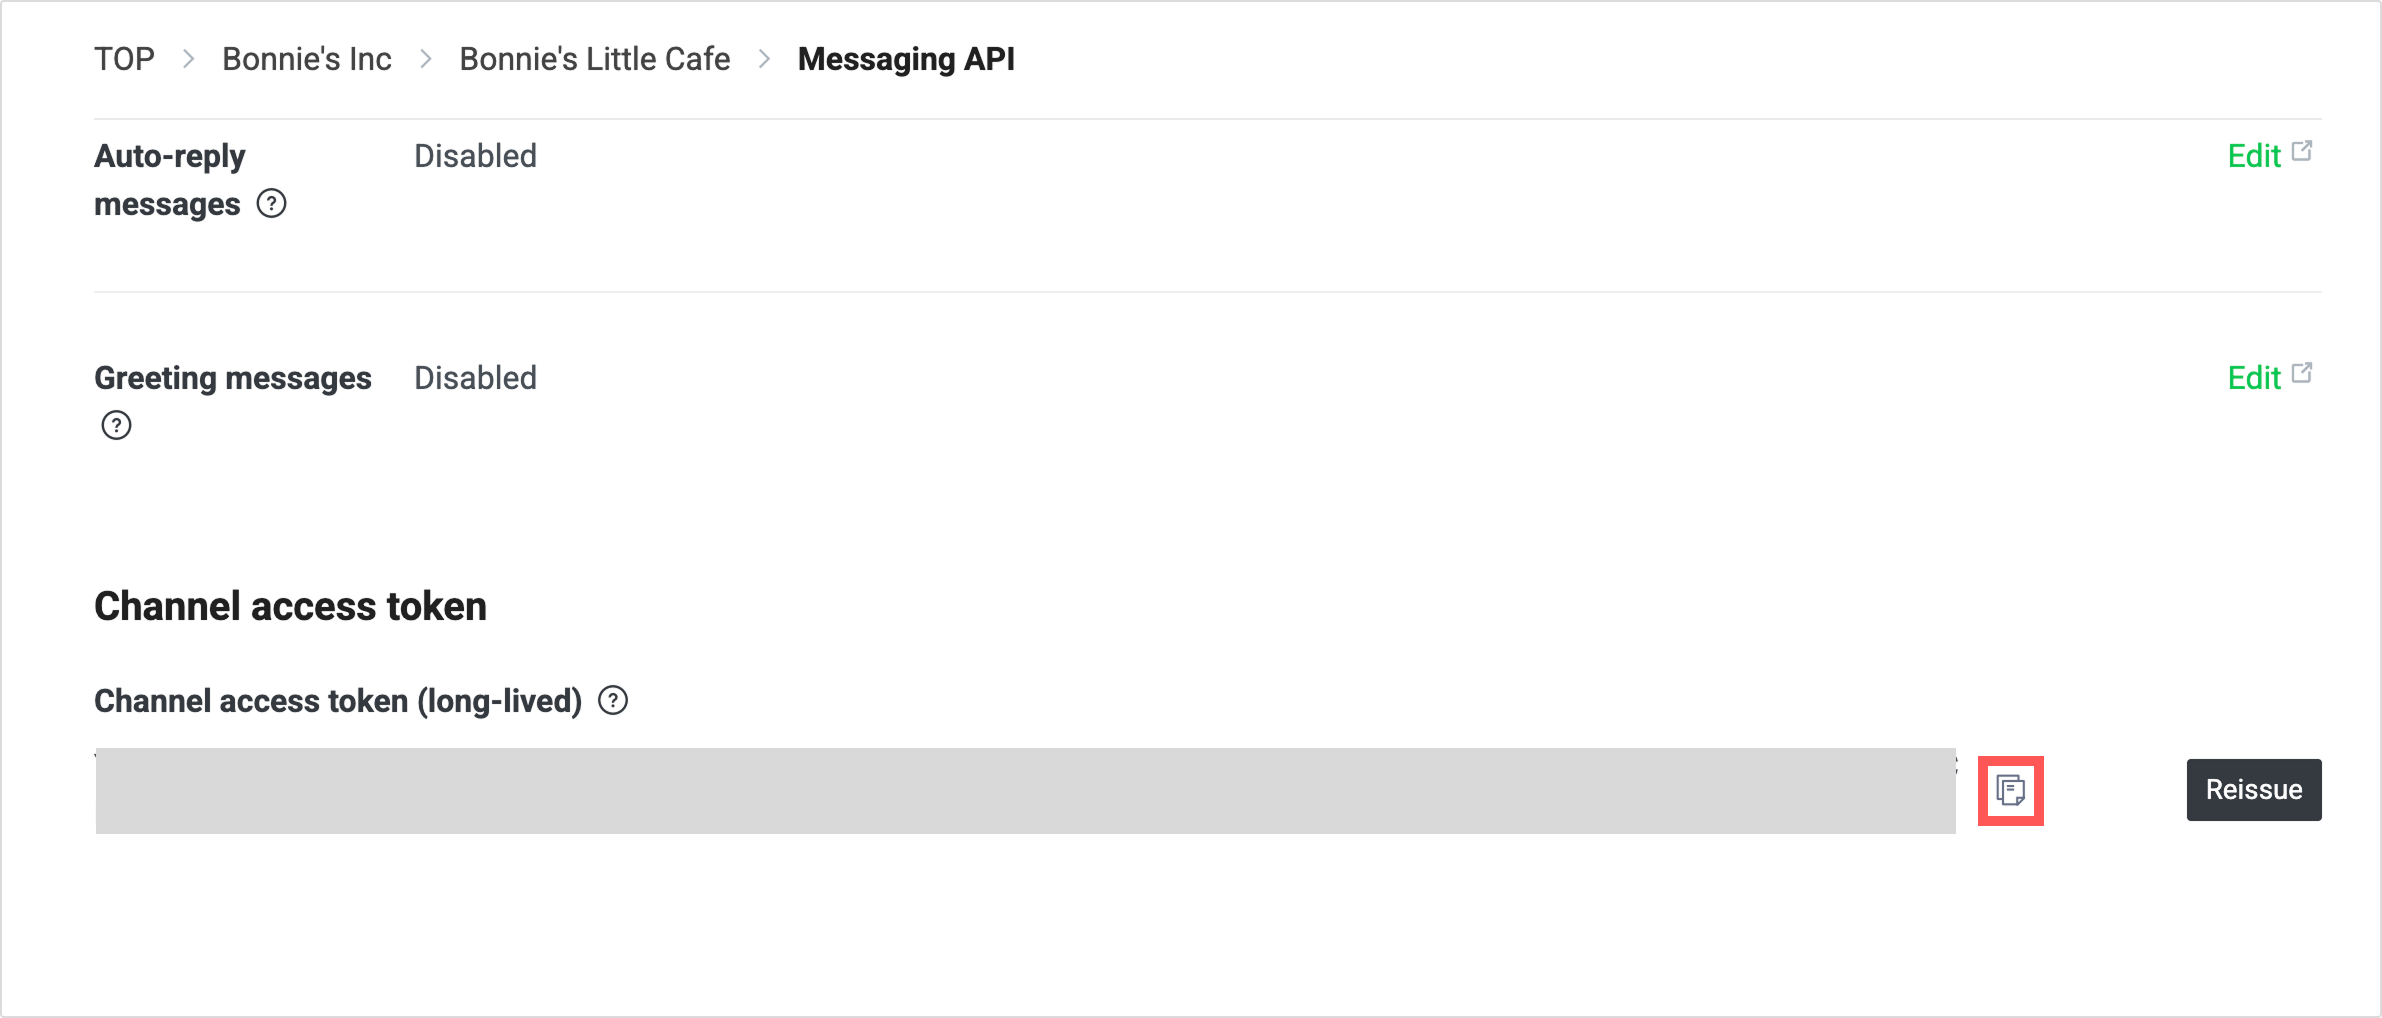
- On LINE Developers console, go to the Messaging API tab in the Messaging API channel.
- Find the Channel access token, click Issue if empty, copy the channel access token, paste it on BotBonnie Console under 1. Connect a Messaging API channel > ⑤ Set up channel access token, and click Continue.

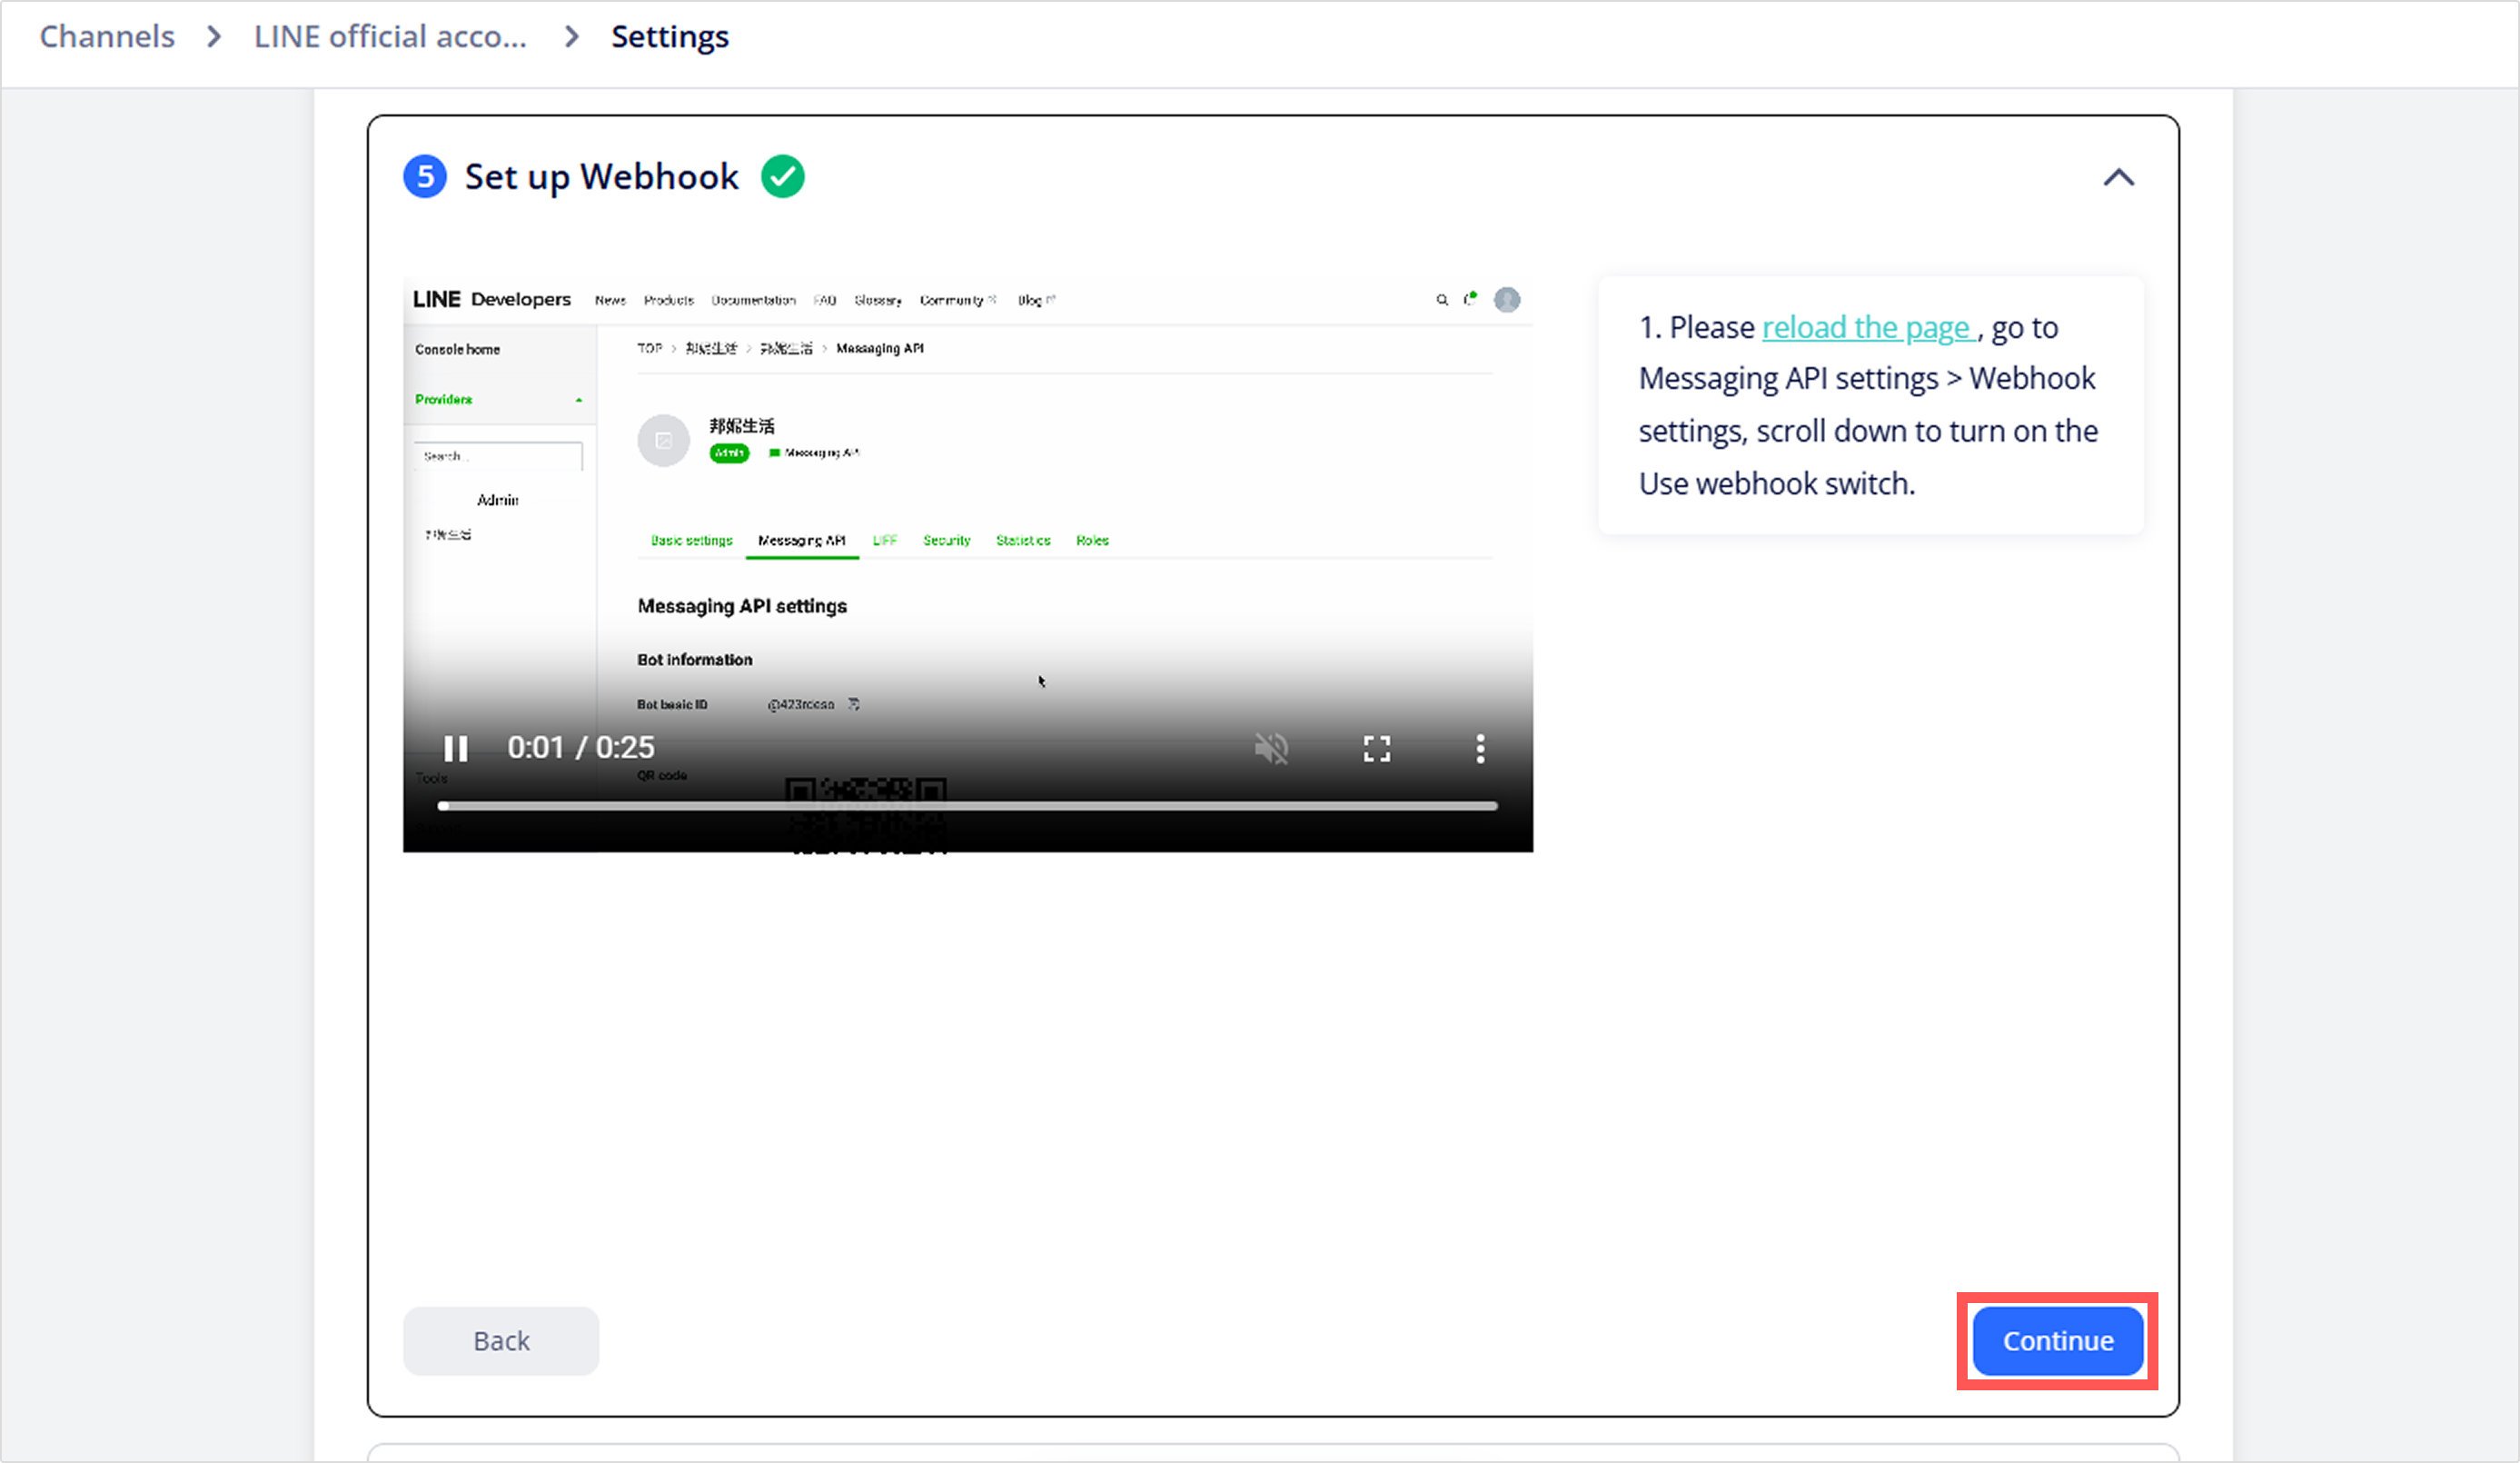
- Reload the LINE Developers console. Go to Messaging API > Webhook settings, and enable Use webhook, followed by Webhook redelivery and Error statistic aggregation.
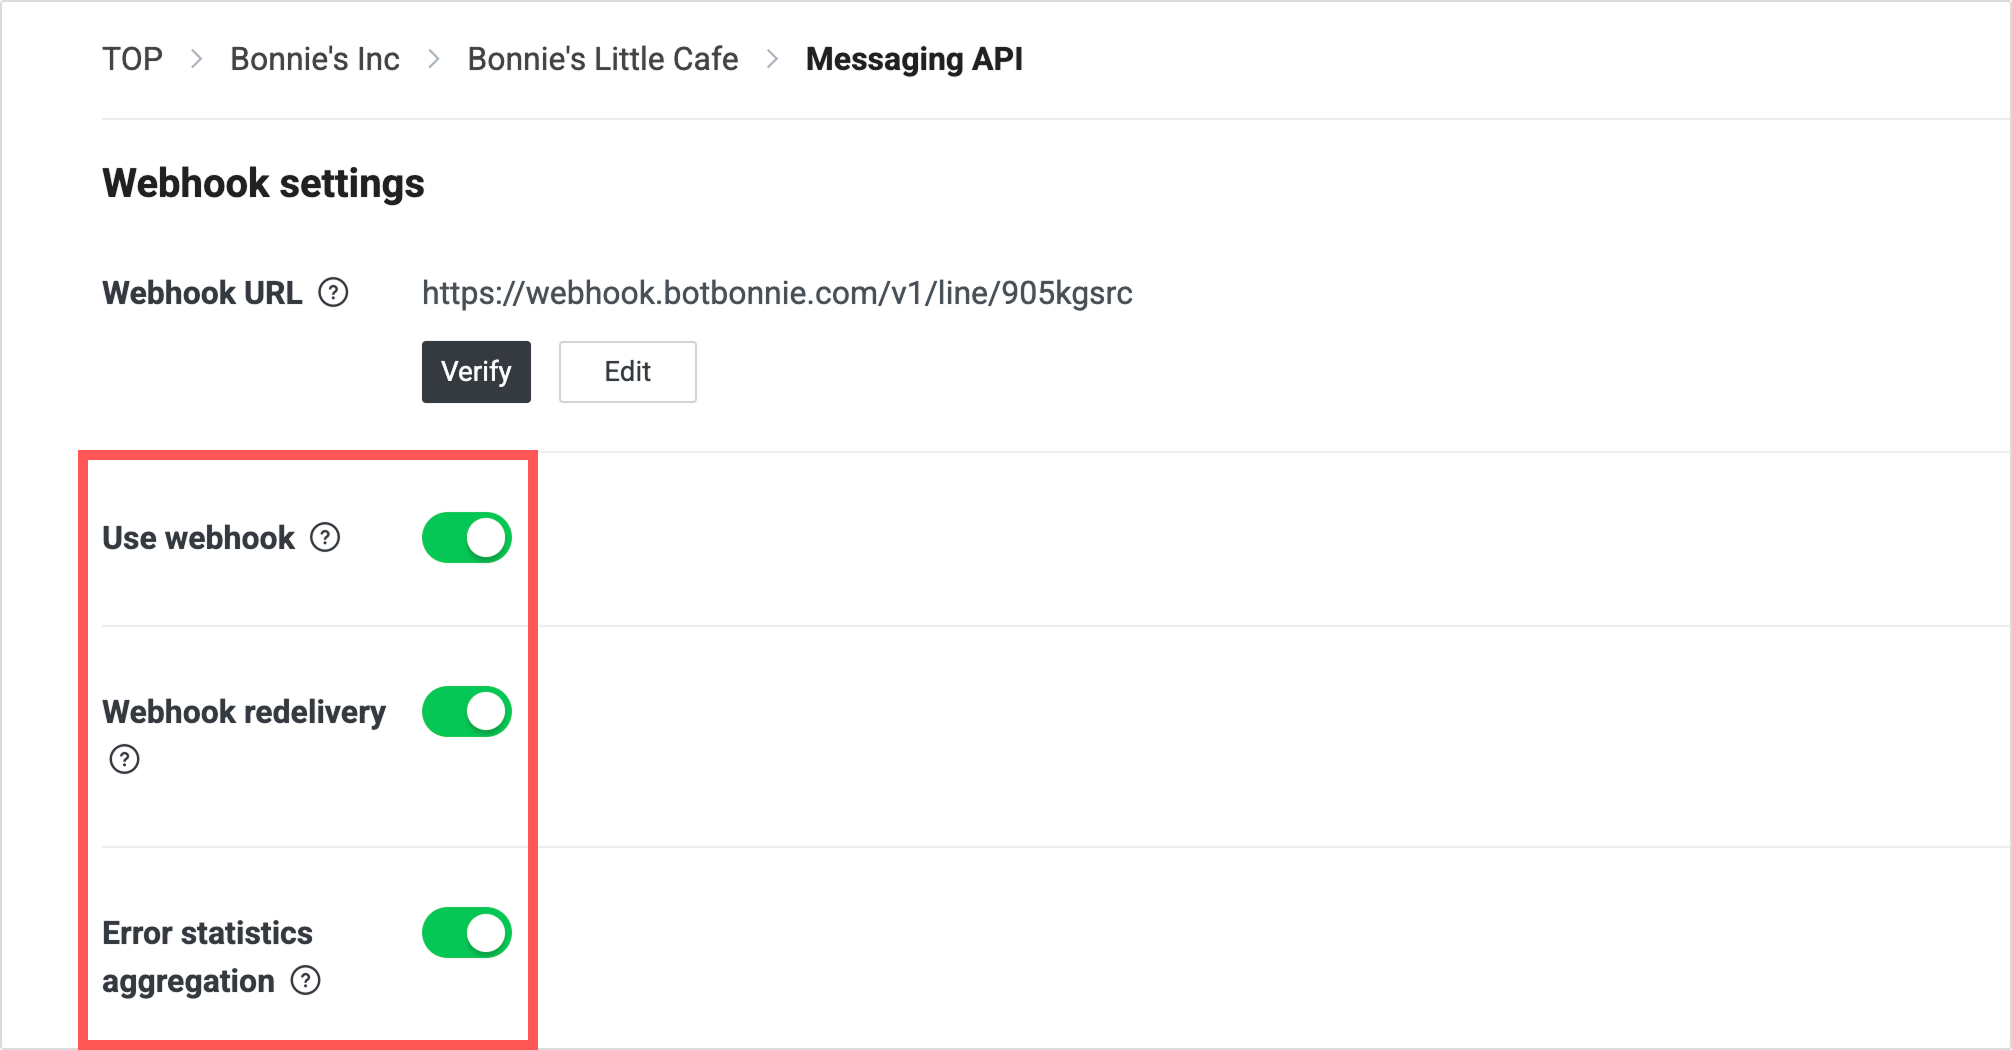
- Go back to BotBonnie console, click Continue under ⑥ Set up Webhook.
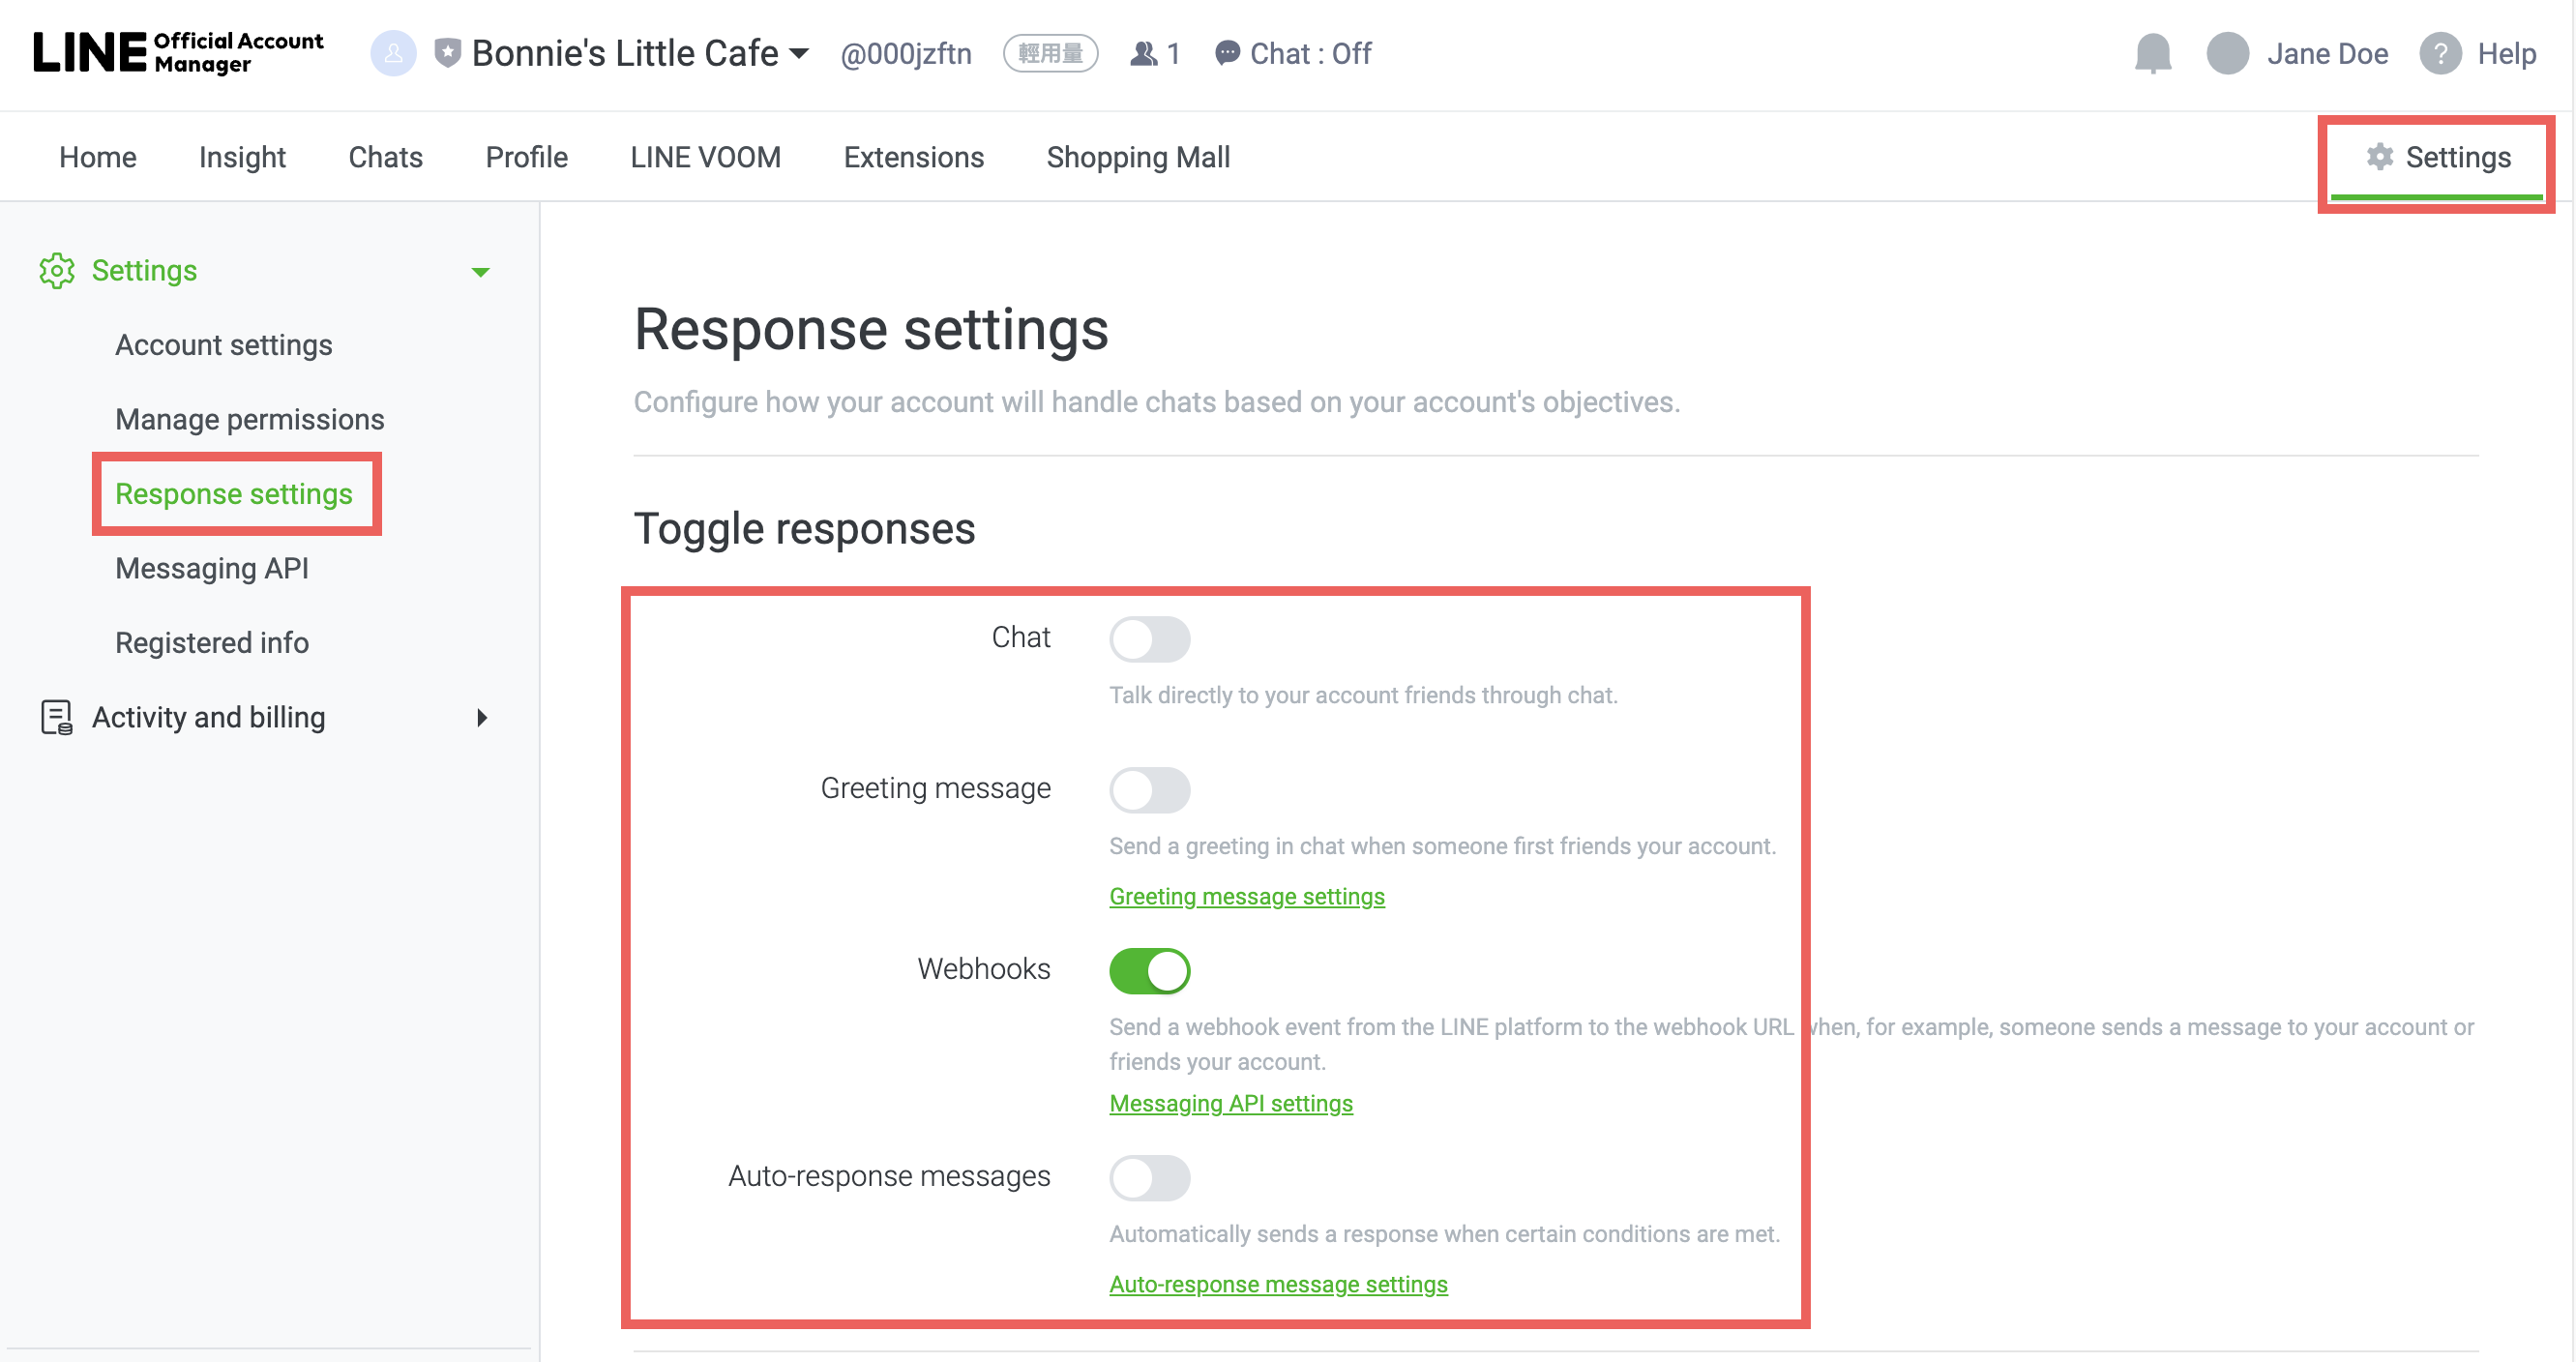
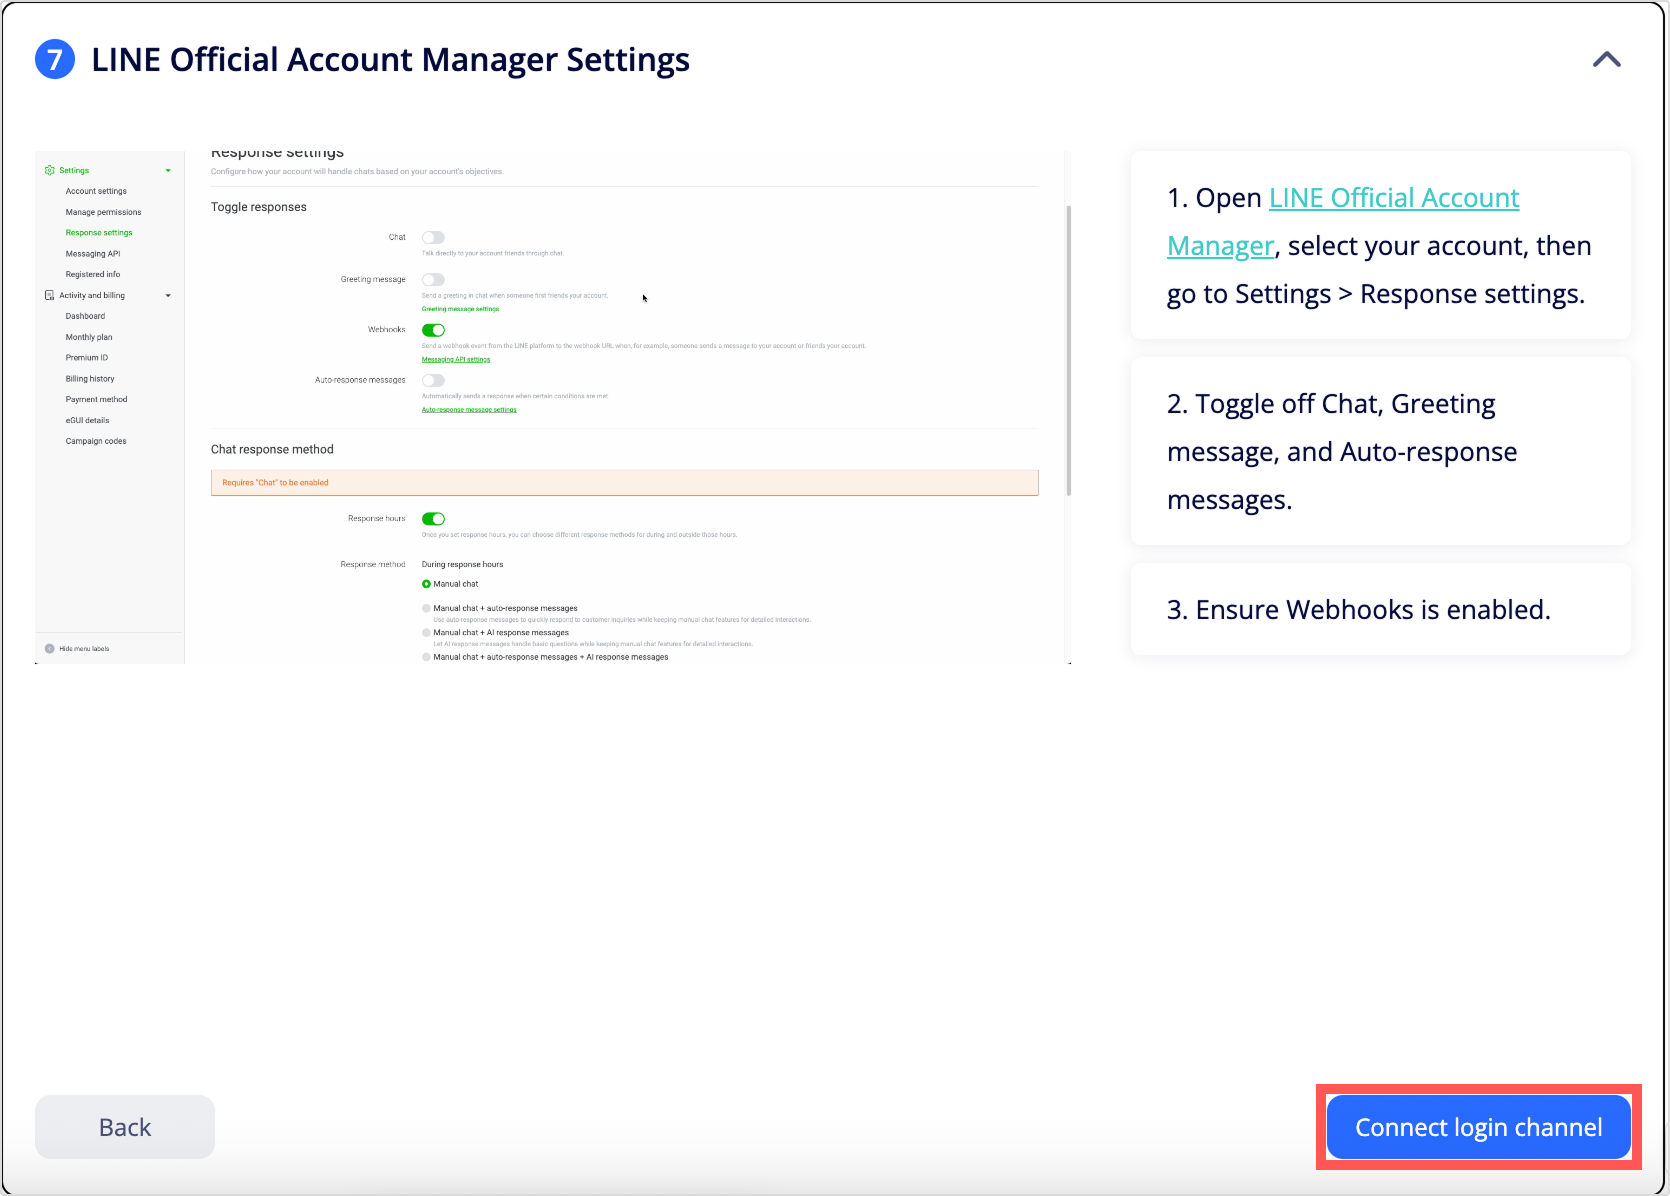
- Log in to LINE Official Account Manager, select the LINE OA you're configuring, click Settings > Response settings.
- Disable Chat, Greeting message, and Auto-response messages.
- Make sure Webhooks is enabled.
- Return to the BotBonnie console. Click Connect login channel to complete the LINE login channel setup.
Part II. Connect LINE Login channel
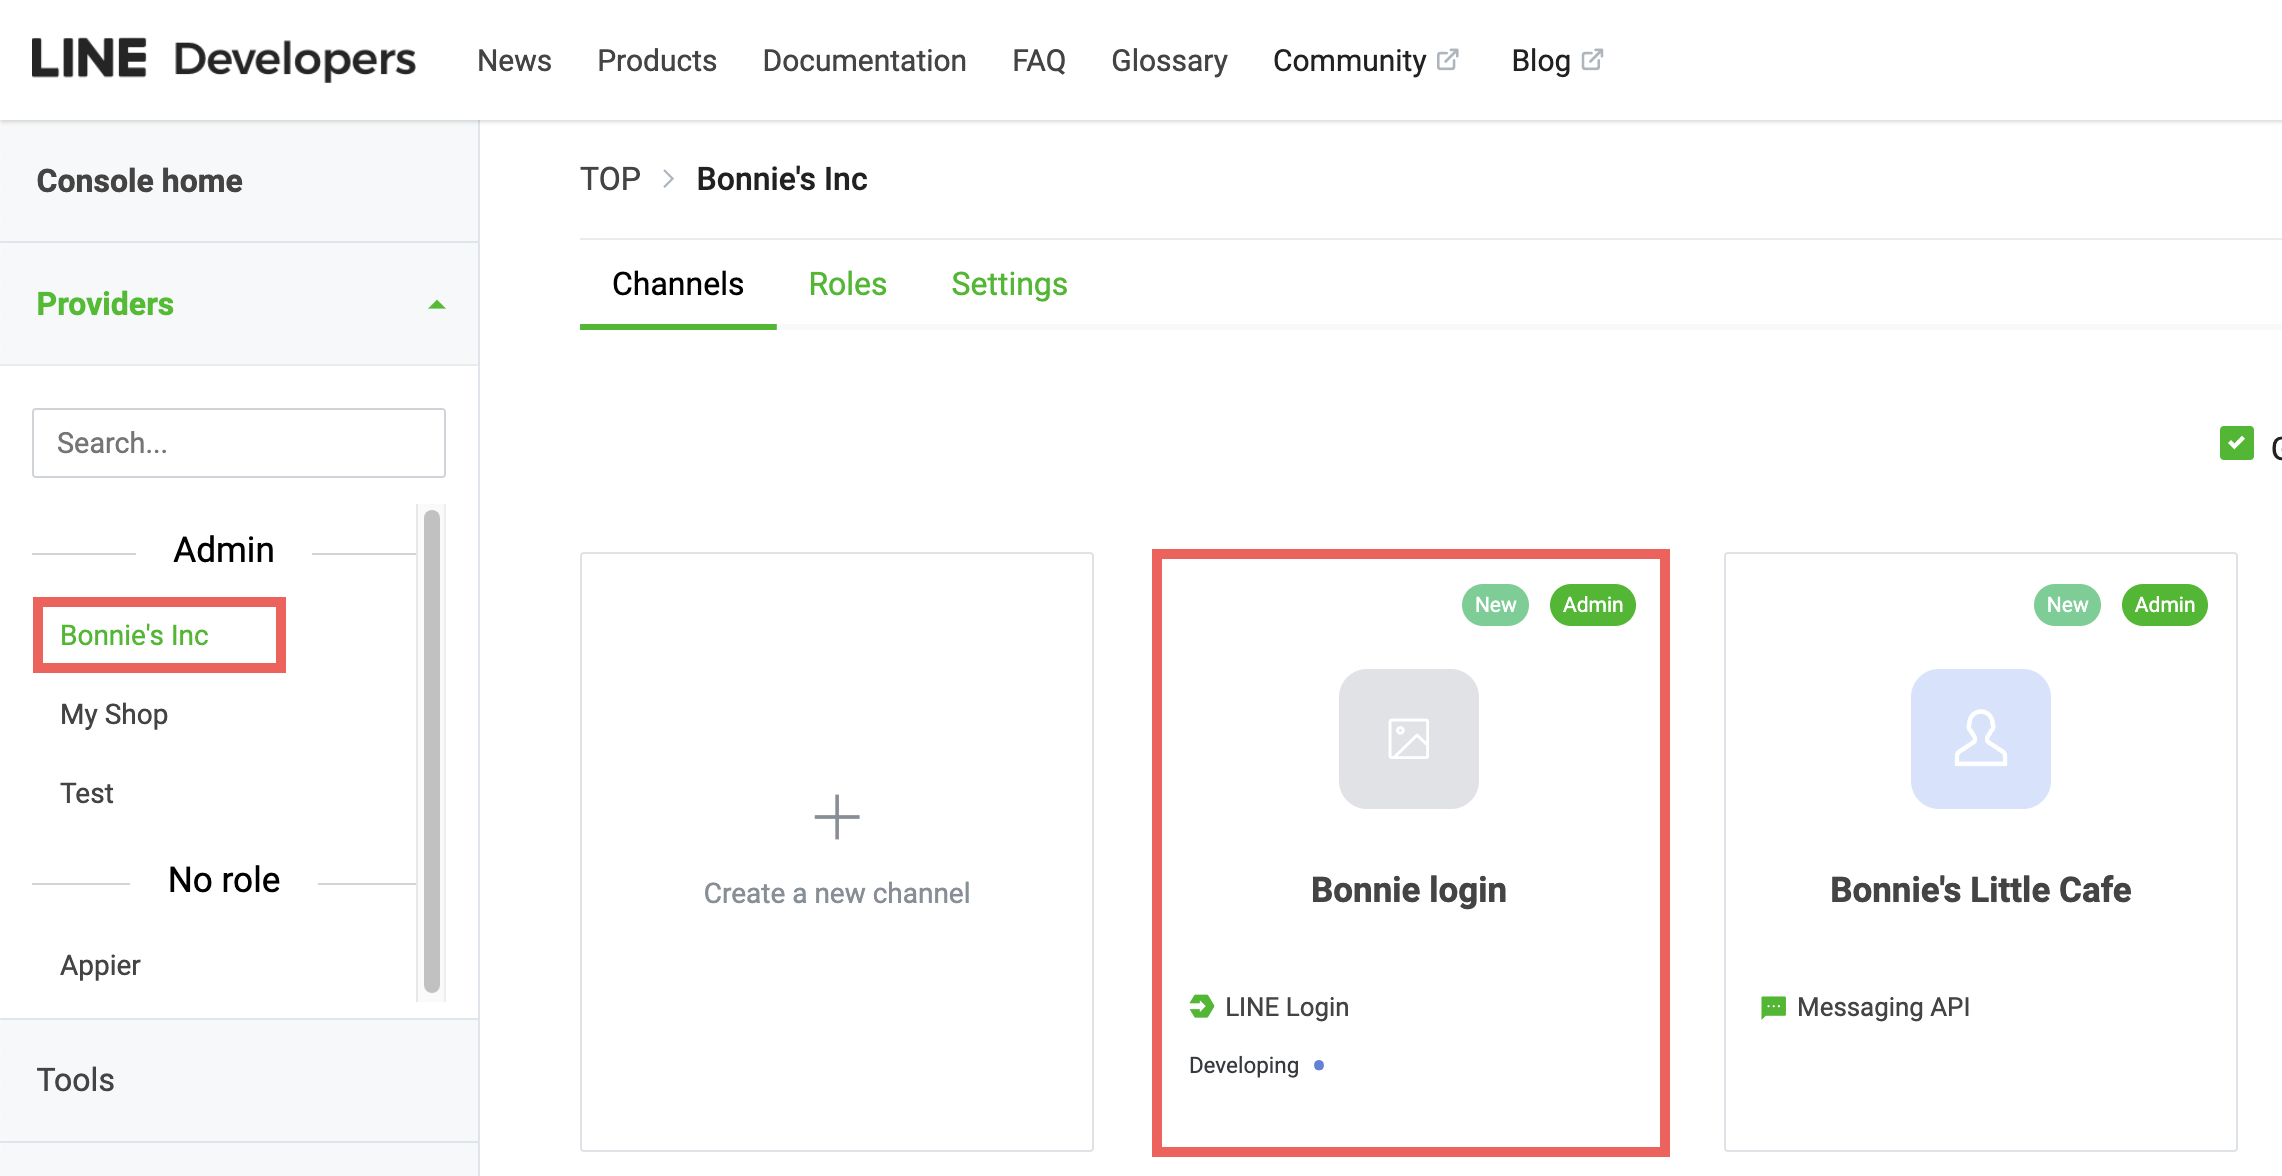
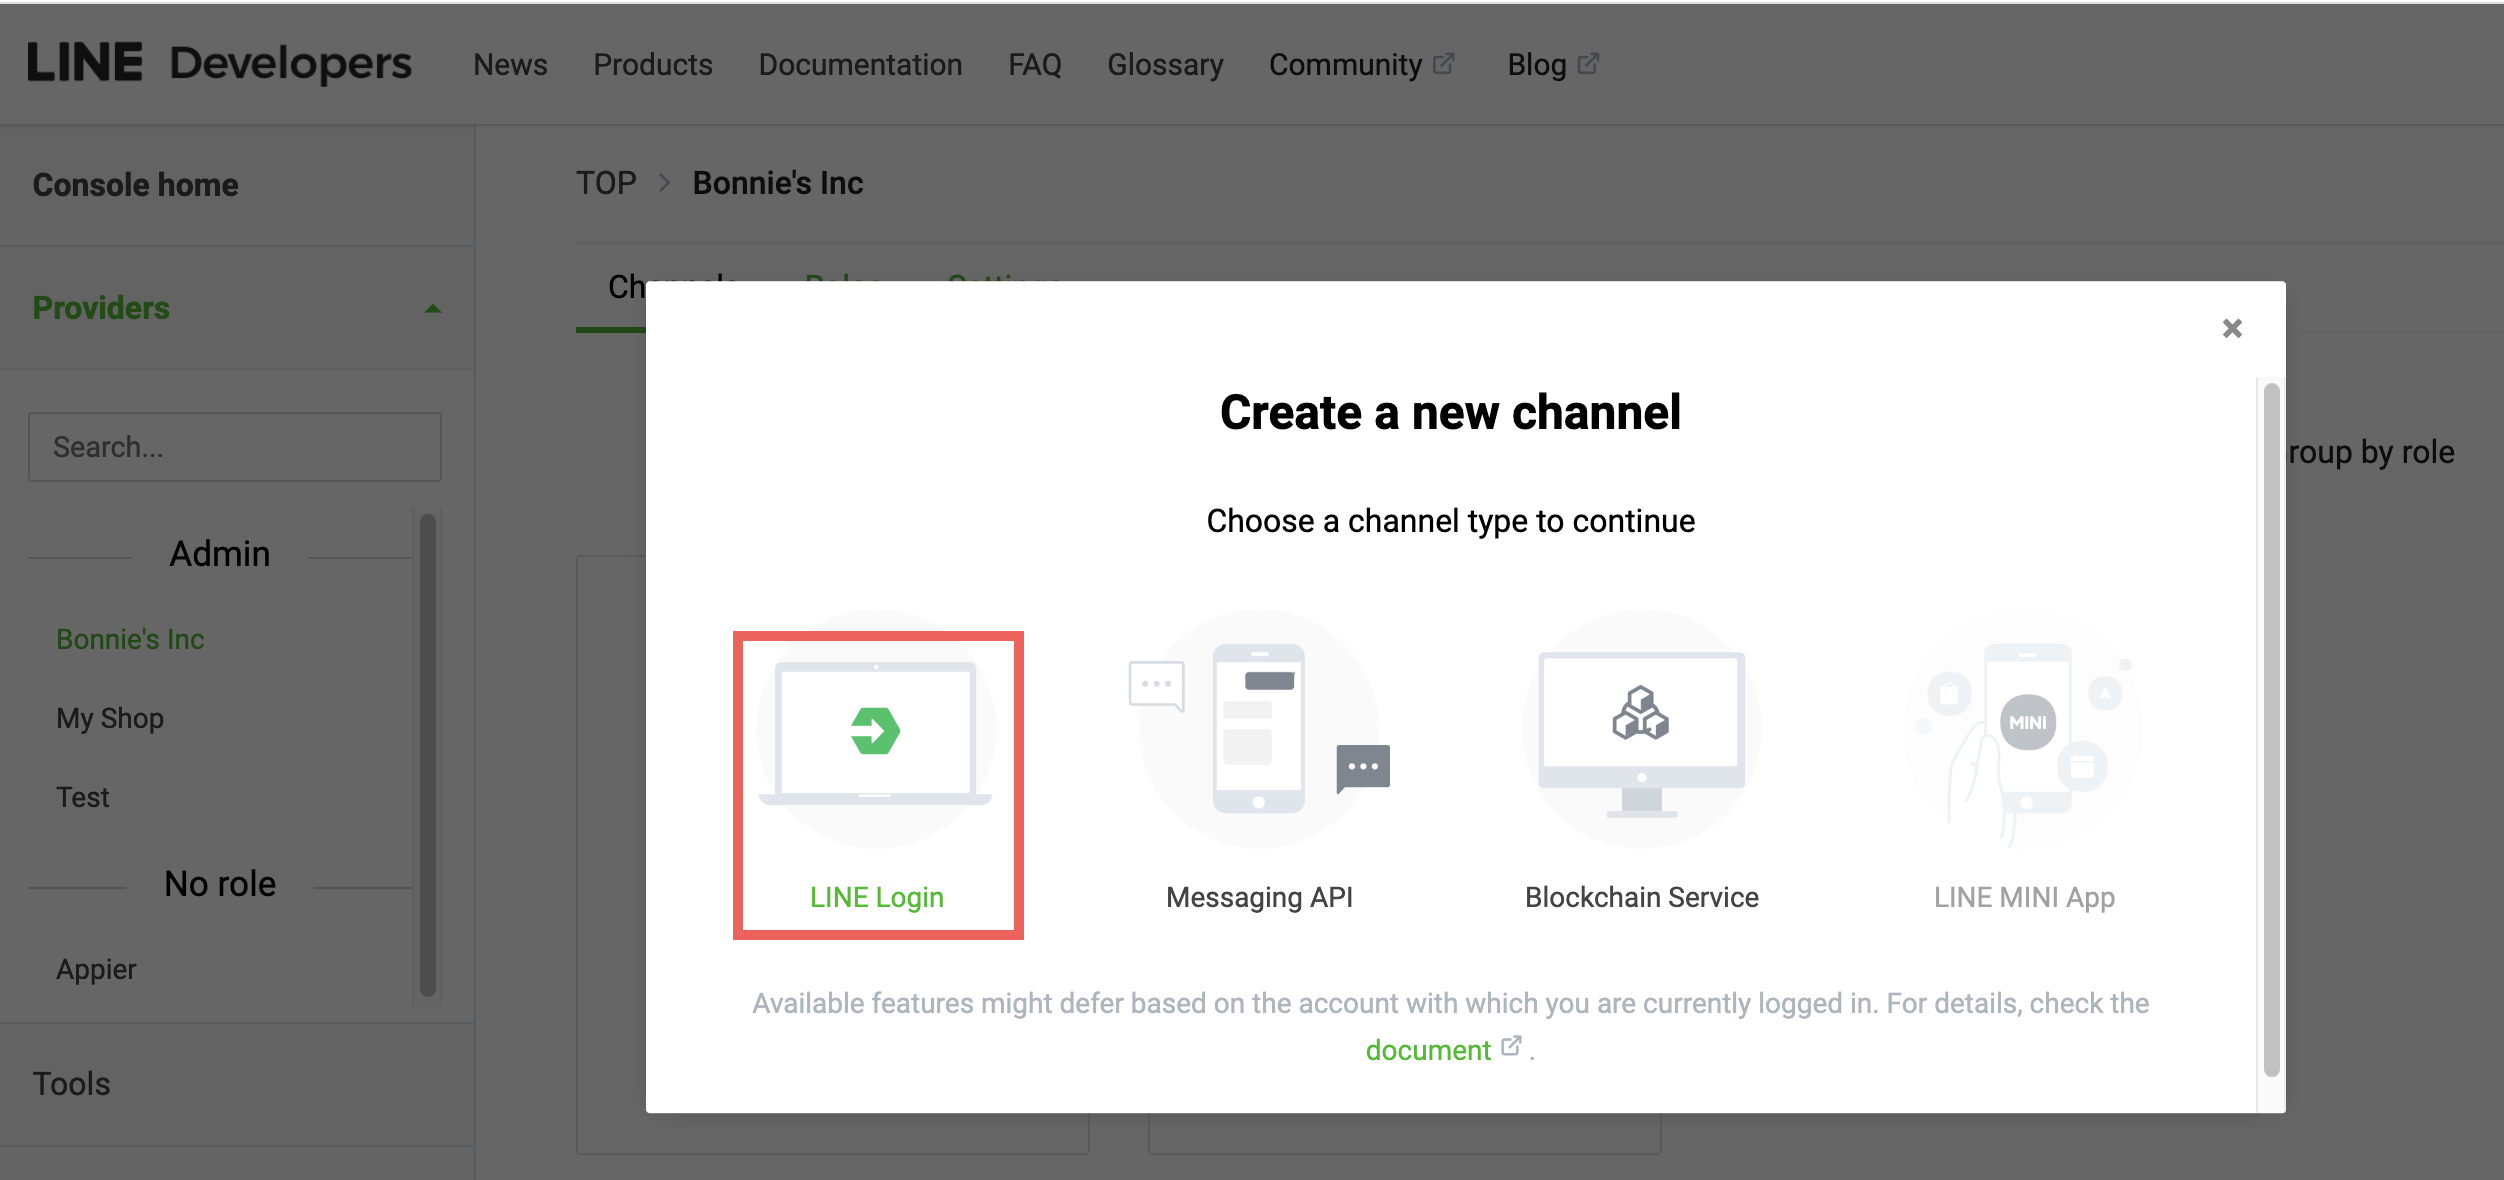
- On LINE Developers console, go to the provider of your LINE OA, and check if there's already a LINE Login channel.
- If you don't see a LINE Login channel under the provider, see how to create a LINE Login channel.
- If there's a LINE Login channel, make sure you have admin access to the channel. You can skip 2. Connect a Login channel > ① Create Login channel on BotBonnie Console.
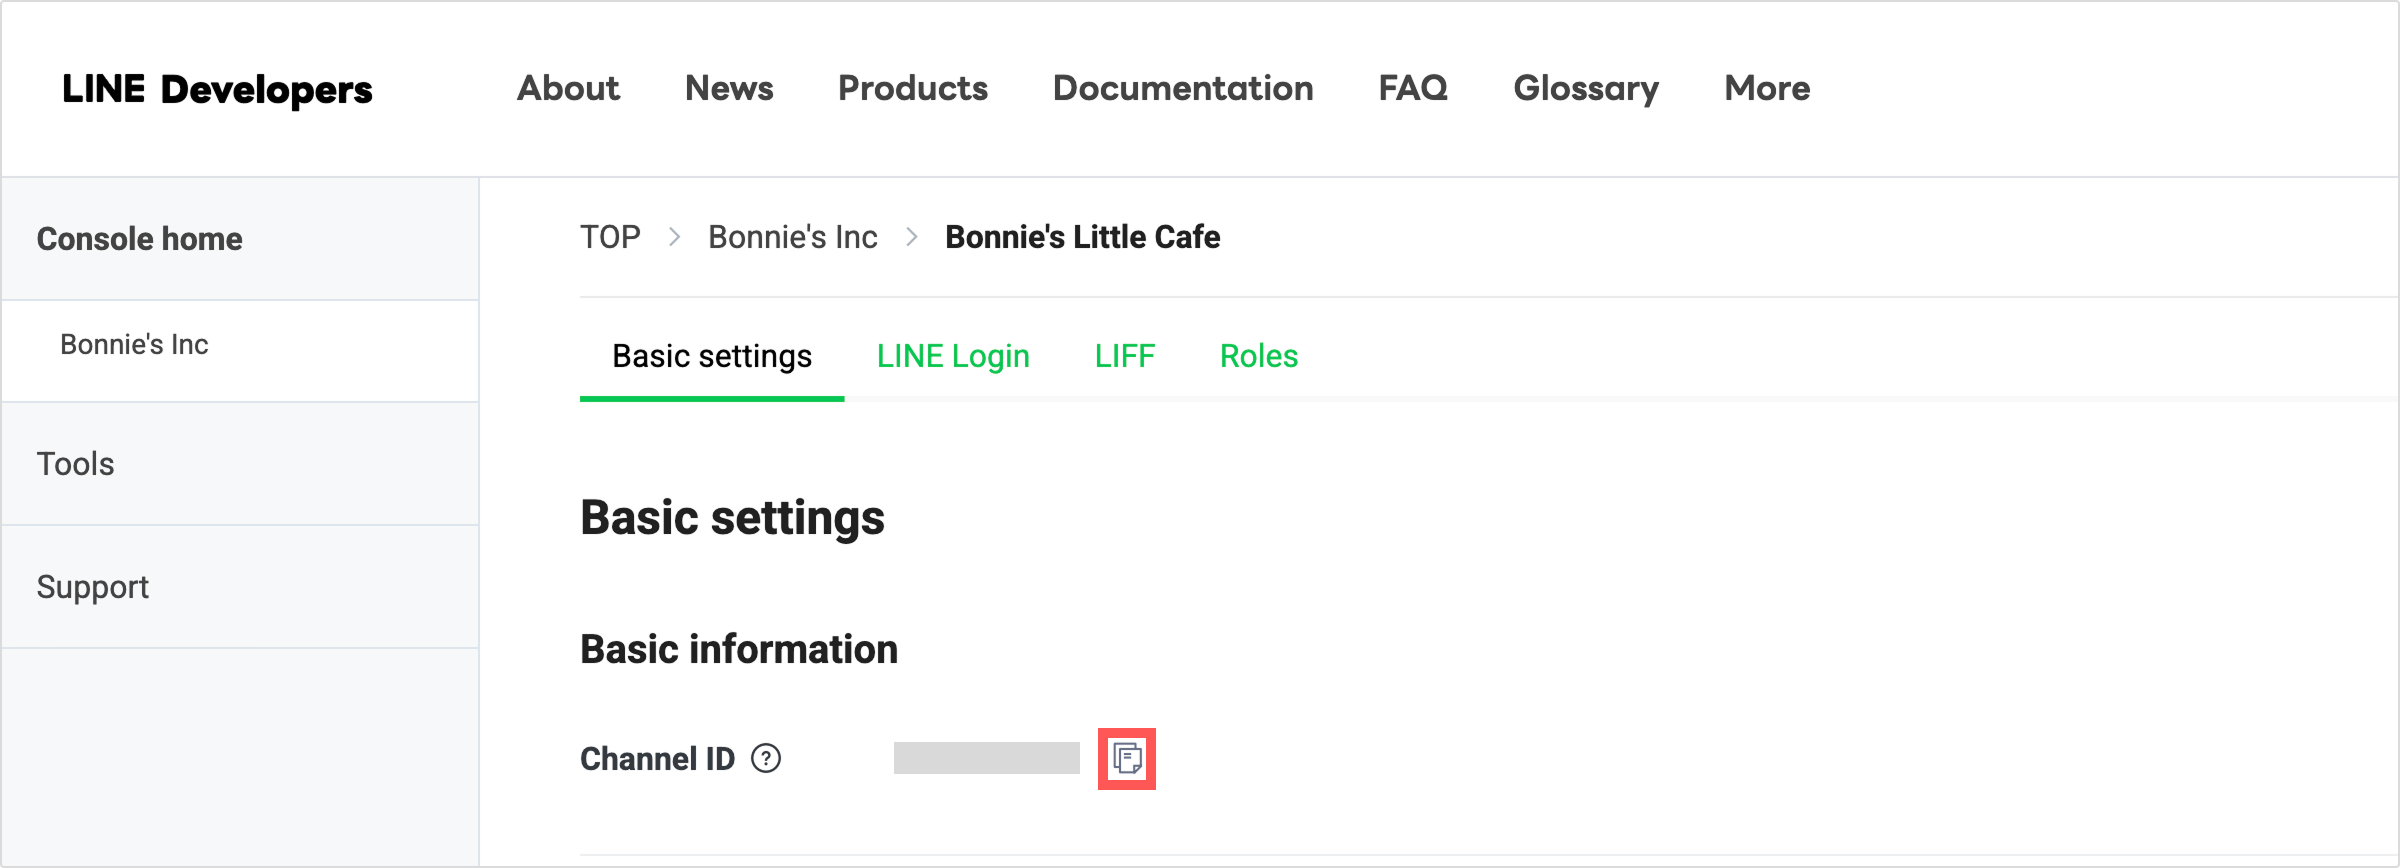
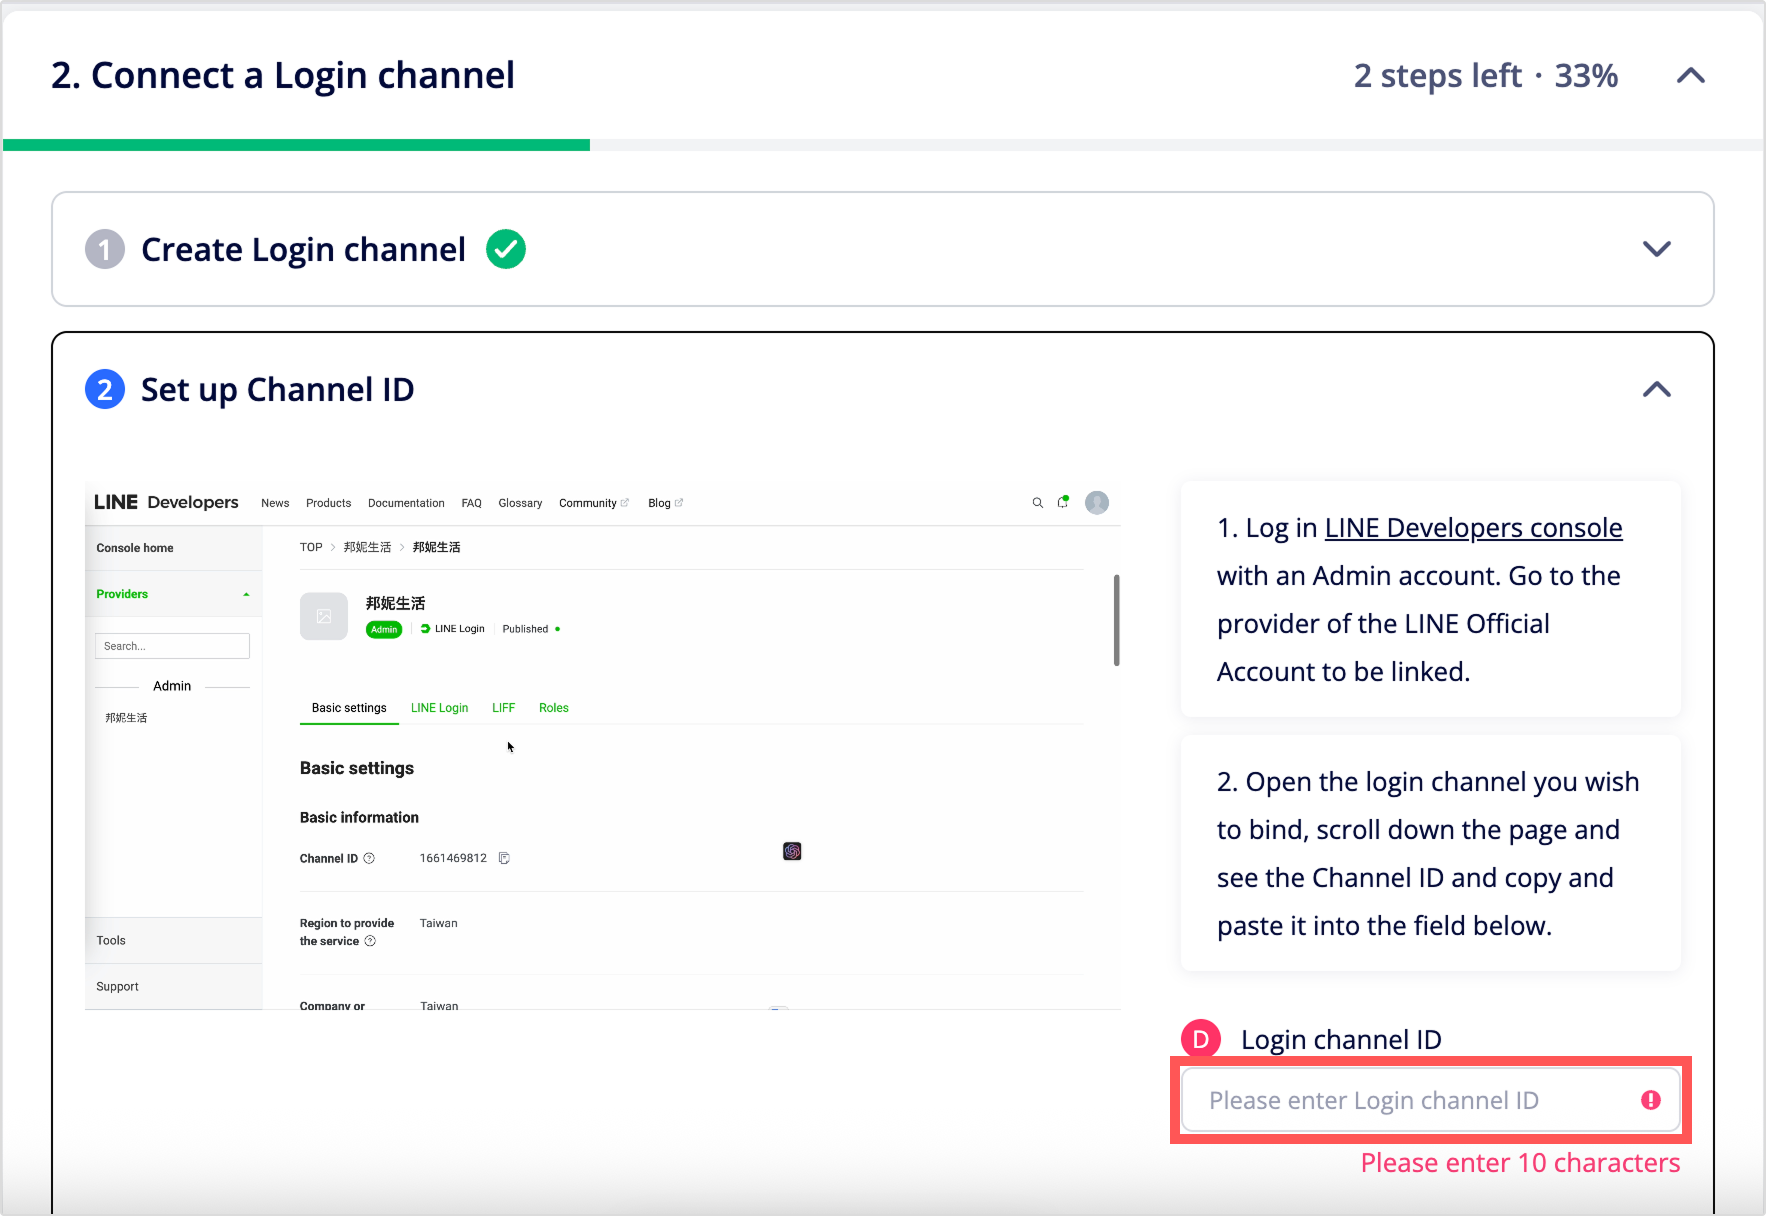
- On LINE Developers console, click the LINE Login channel and go to the Basic settings tab.
- Find the Channel ID, copy the channel ID, paste it on BotBonnie Console under 2. Connect a Login channel > ② Set up channel ID, and click Continue.
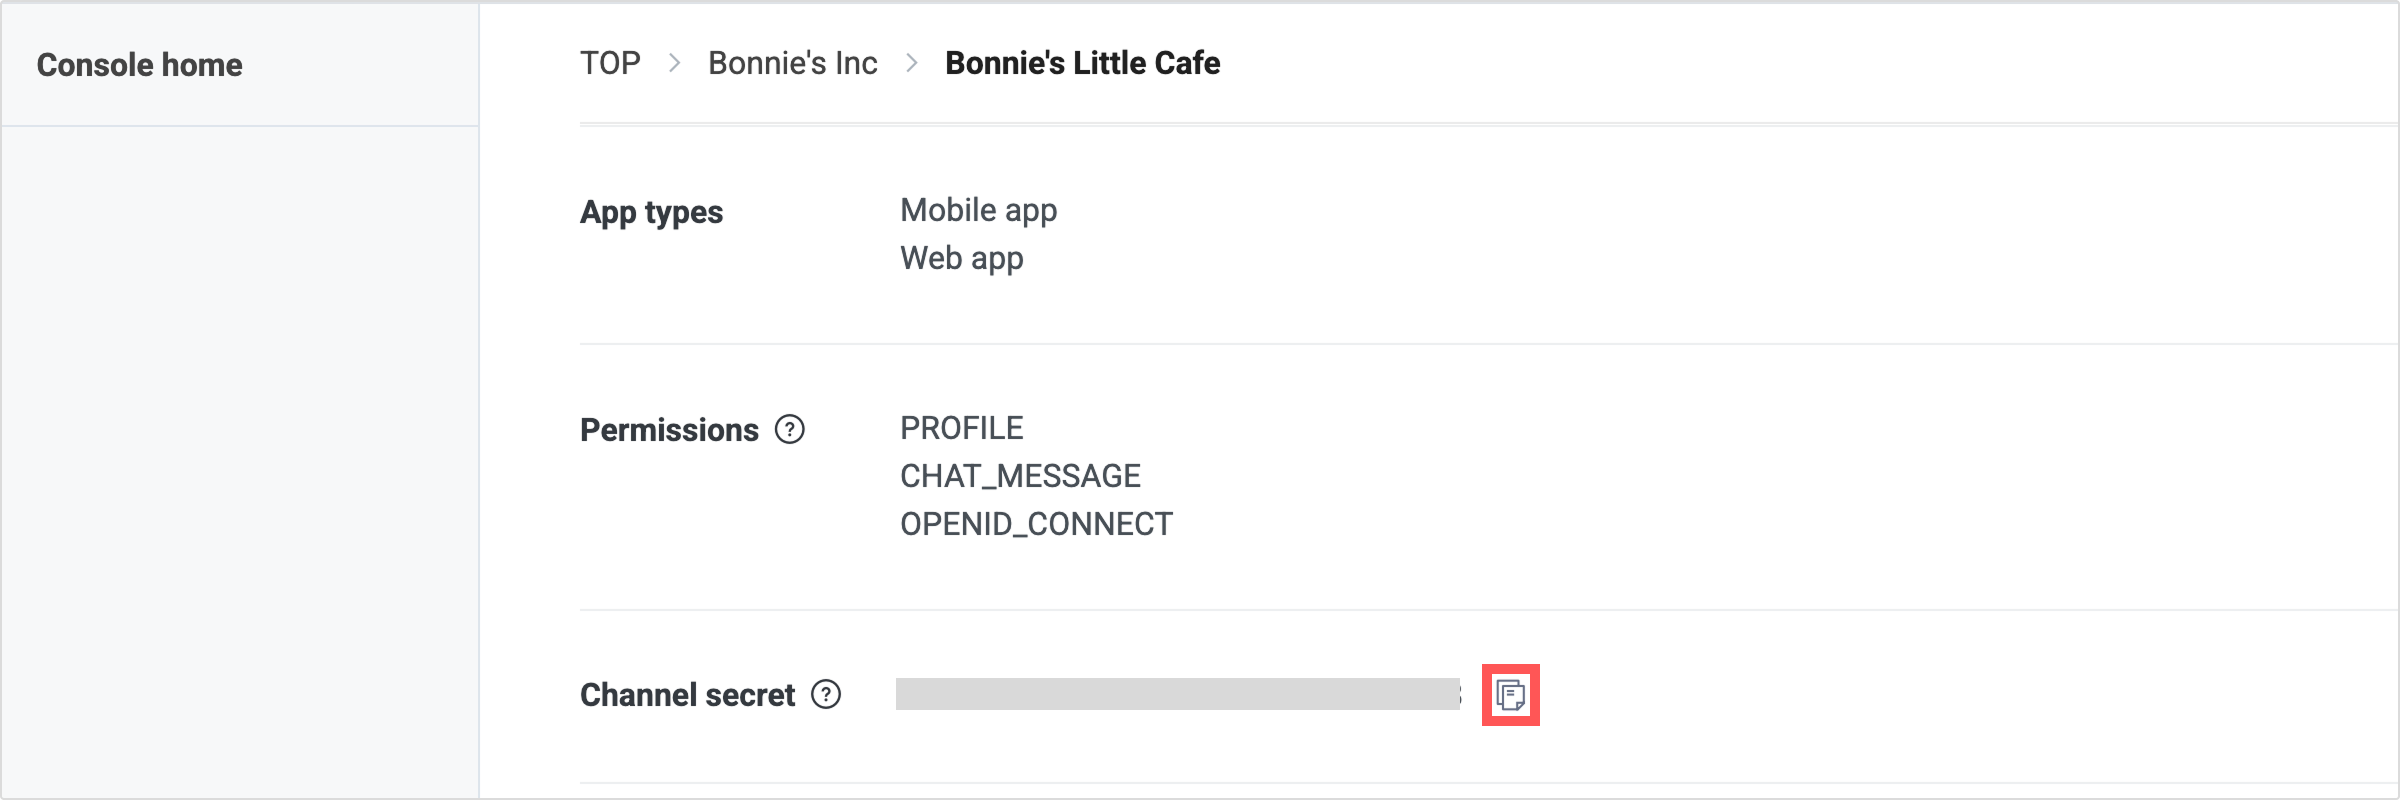
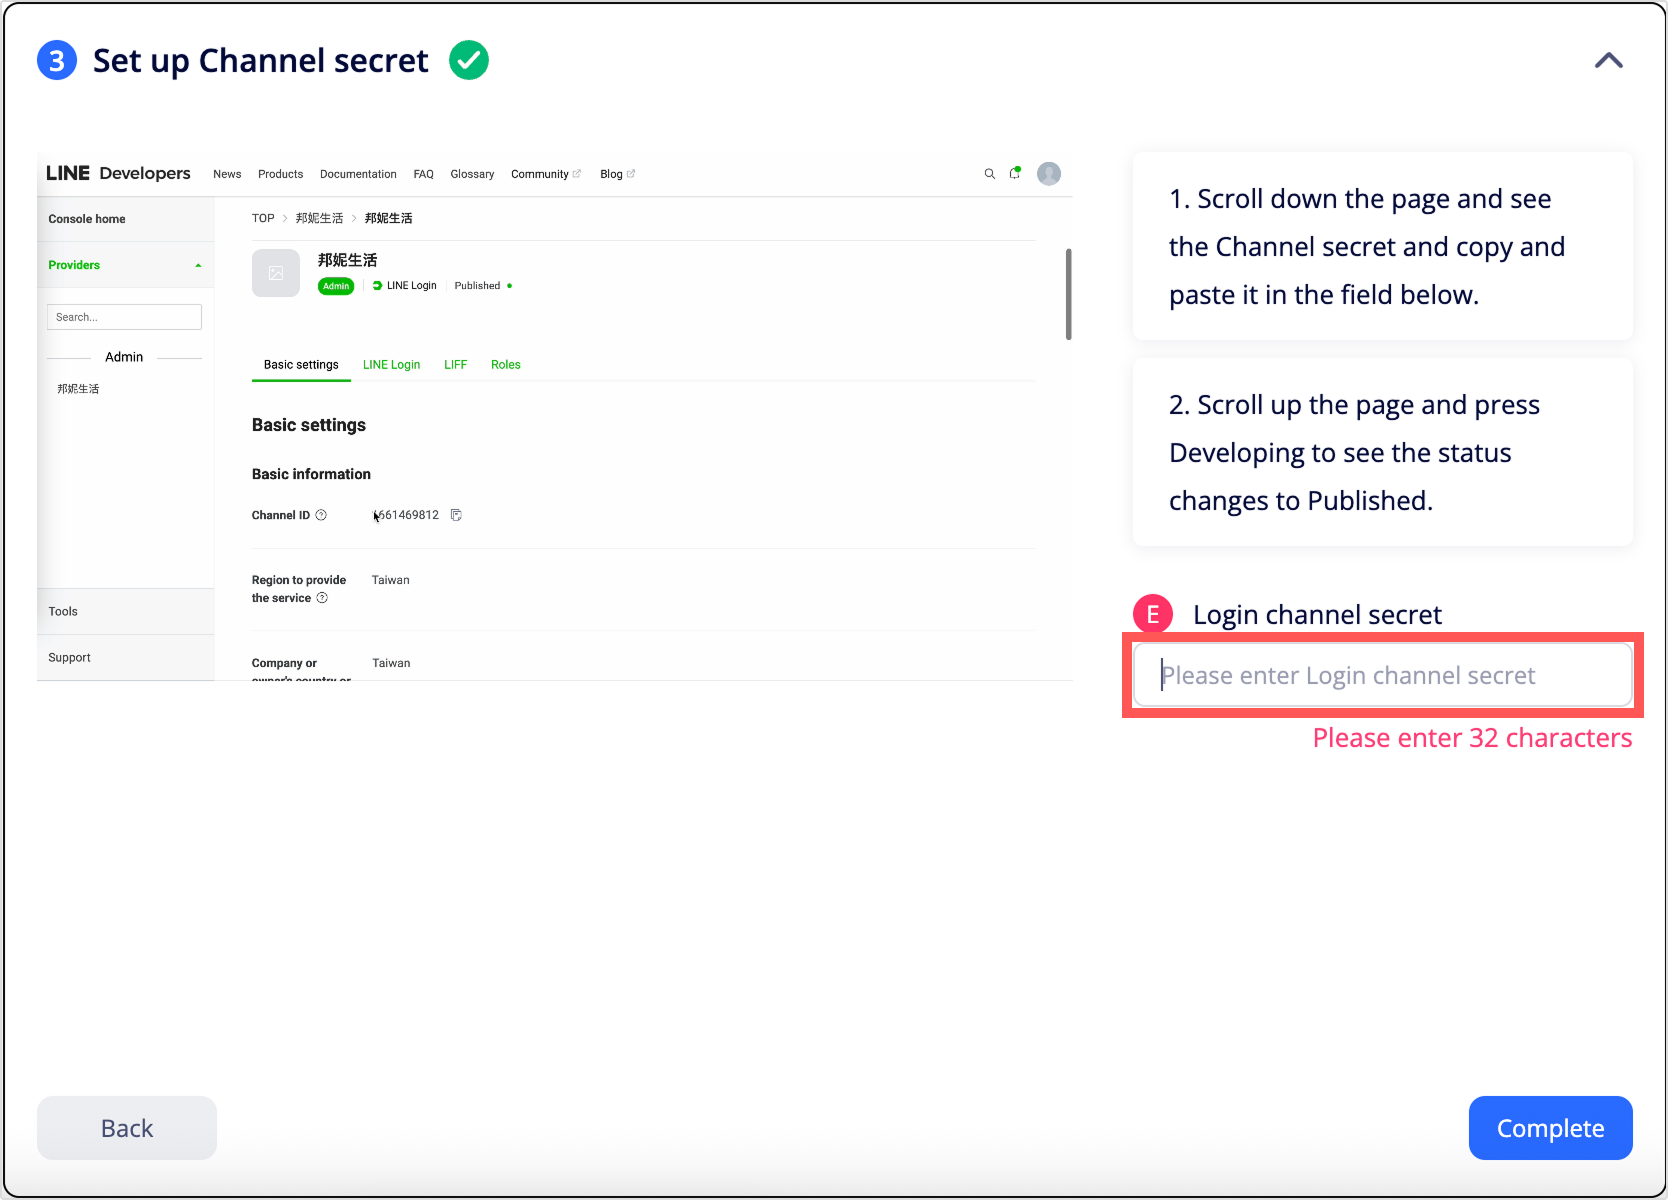
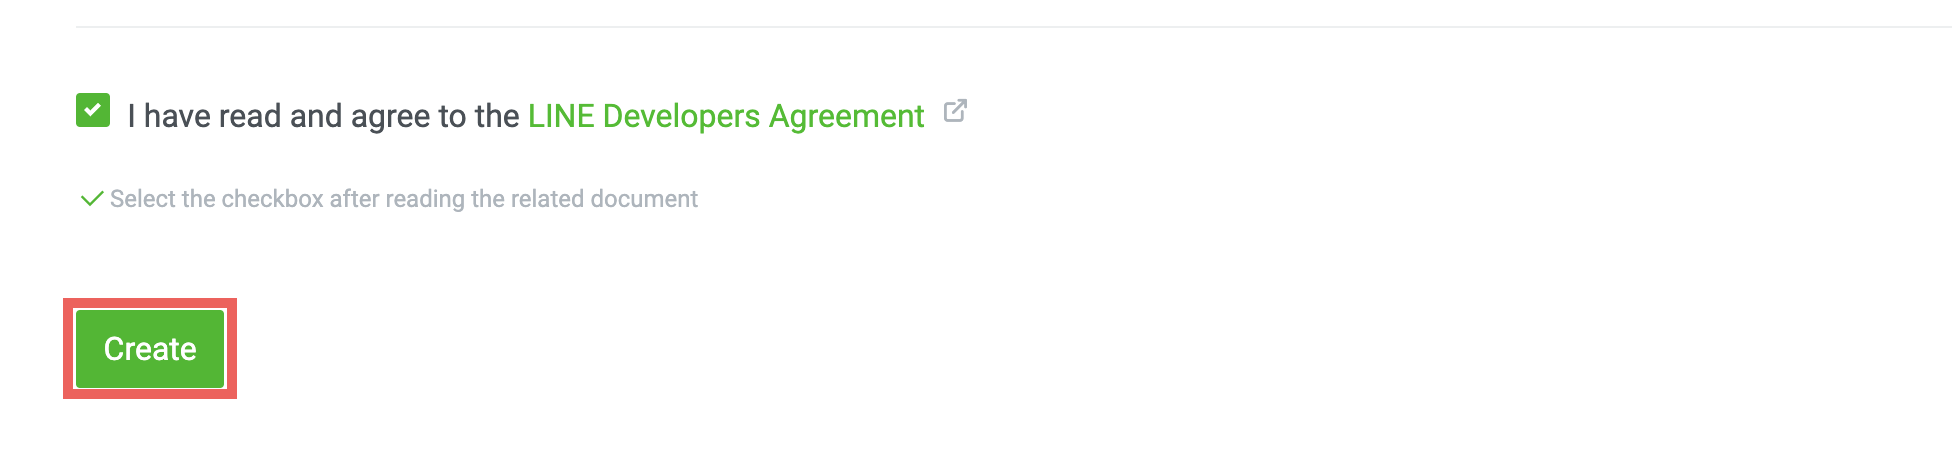
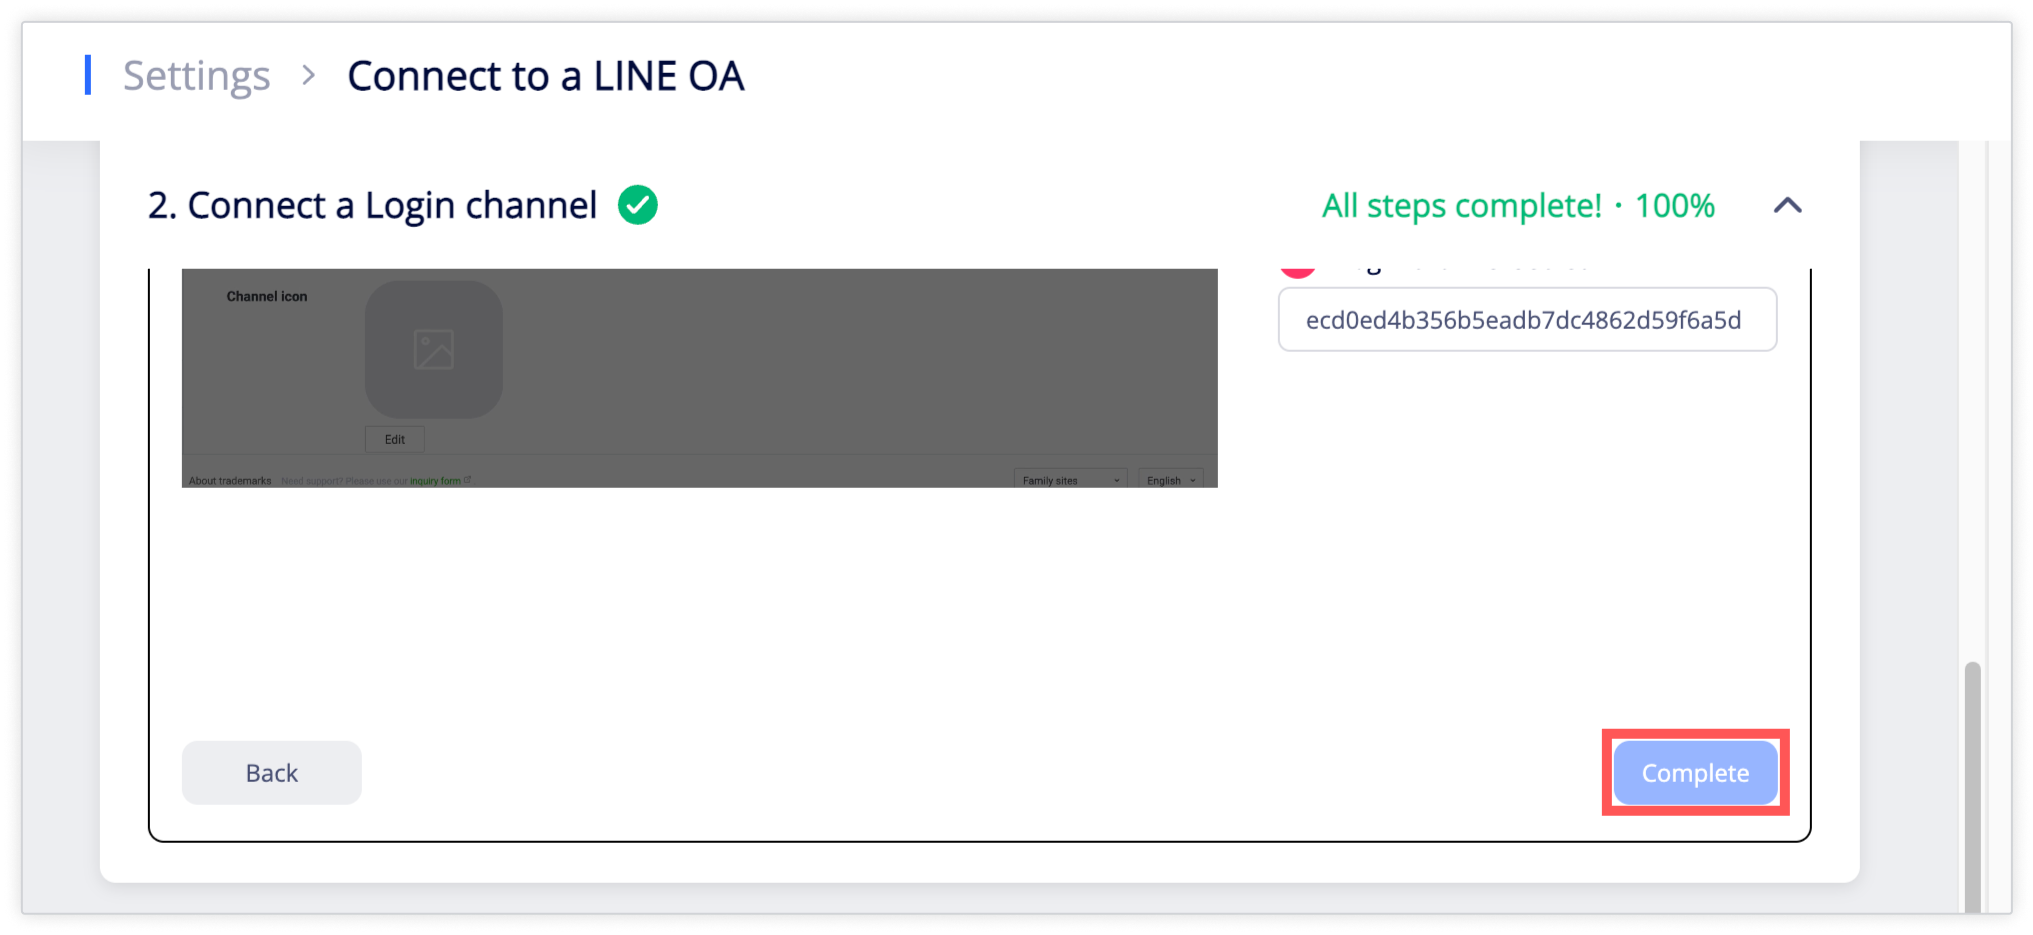
ii. Find Channel Secret, copy the Channel Secret, paste it on BotBonnie Console under 2. Connect a Login channel > ③ Set up channel secret, and click Complete.
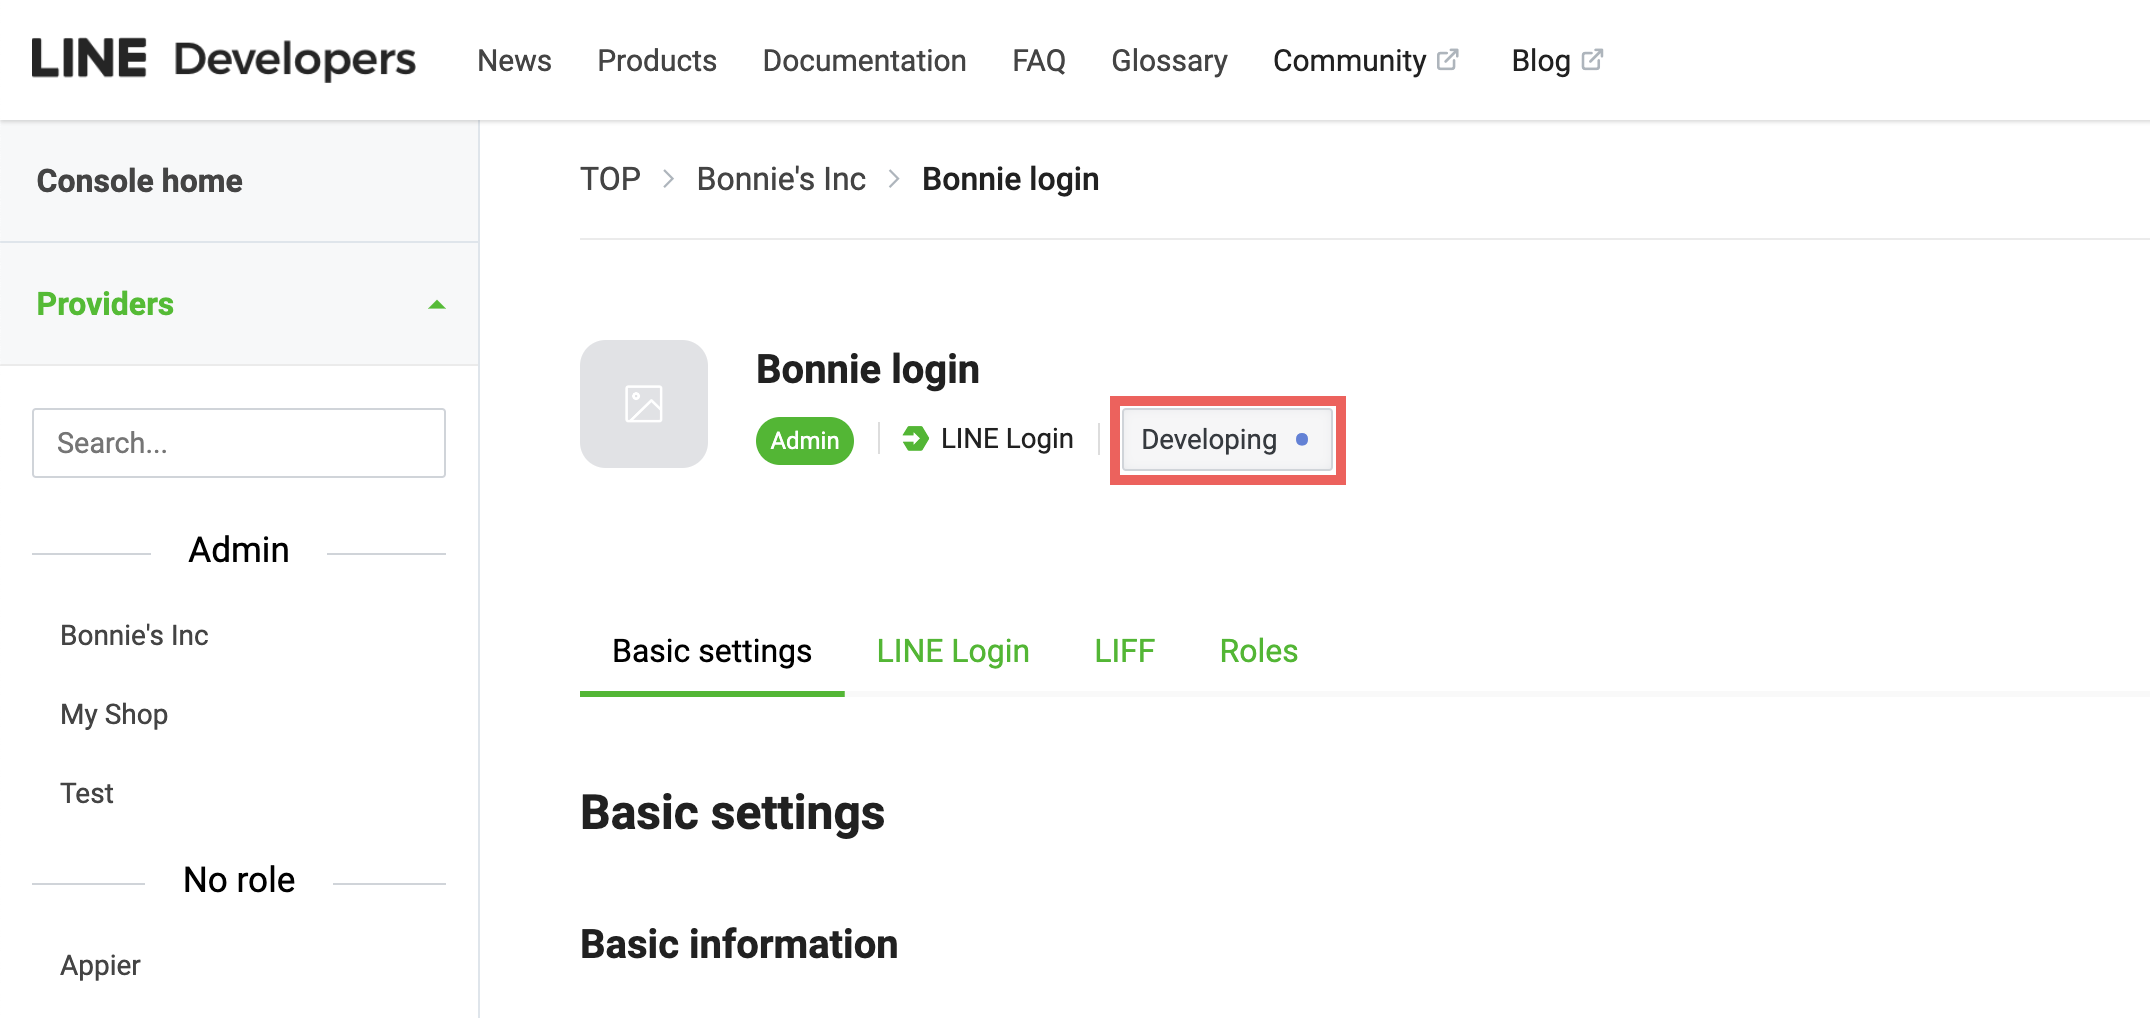
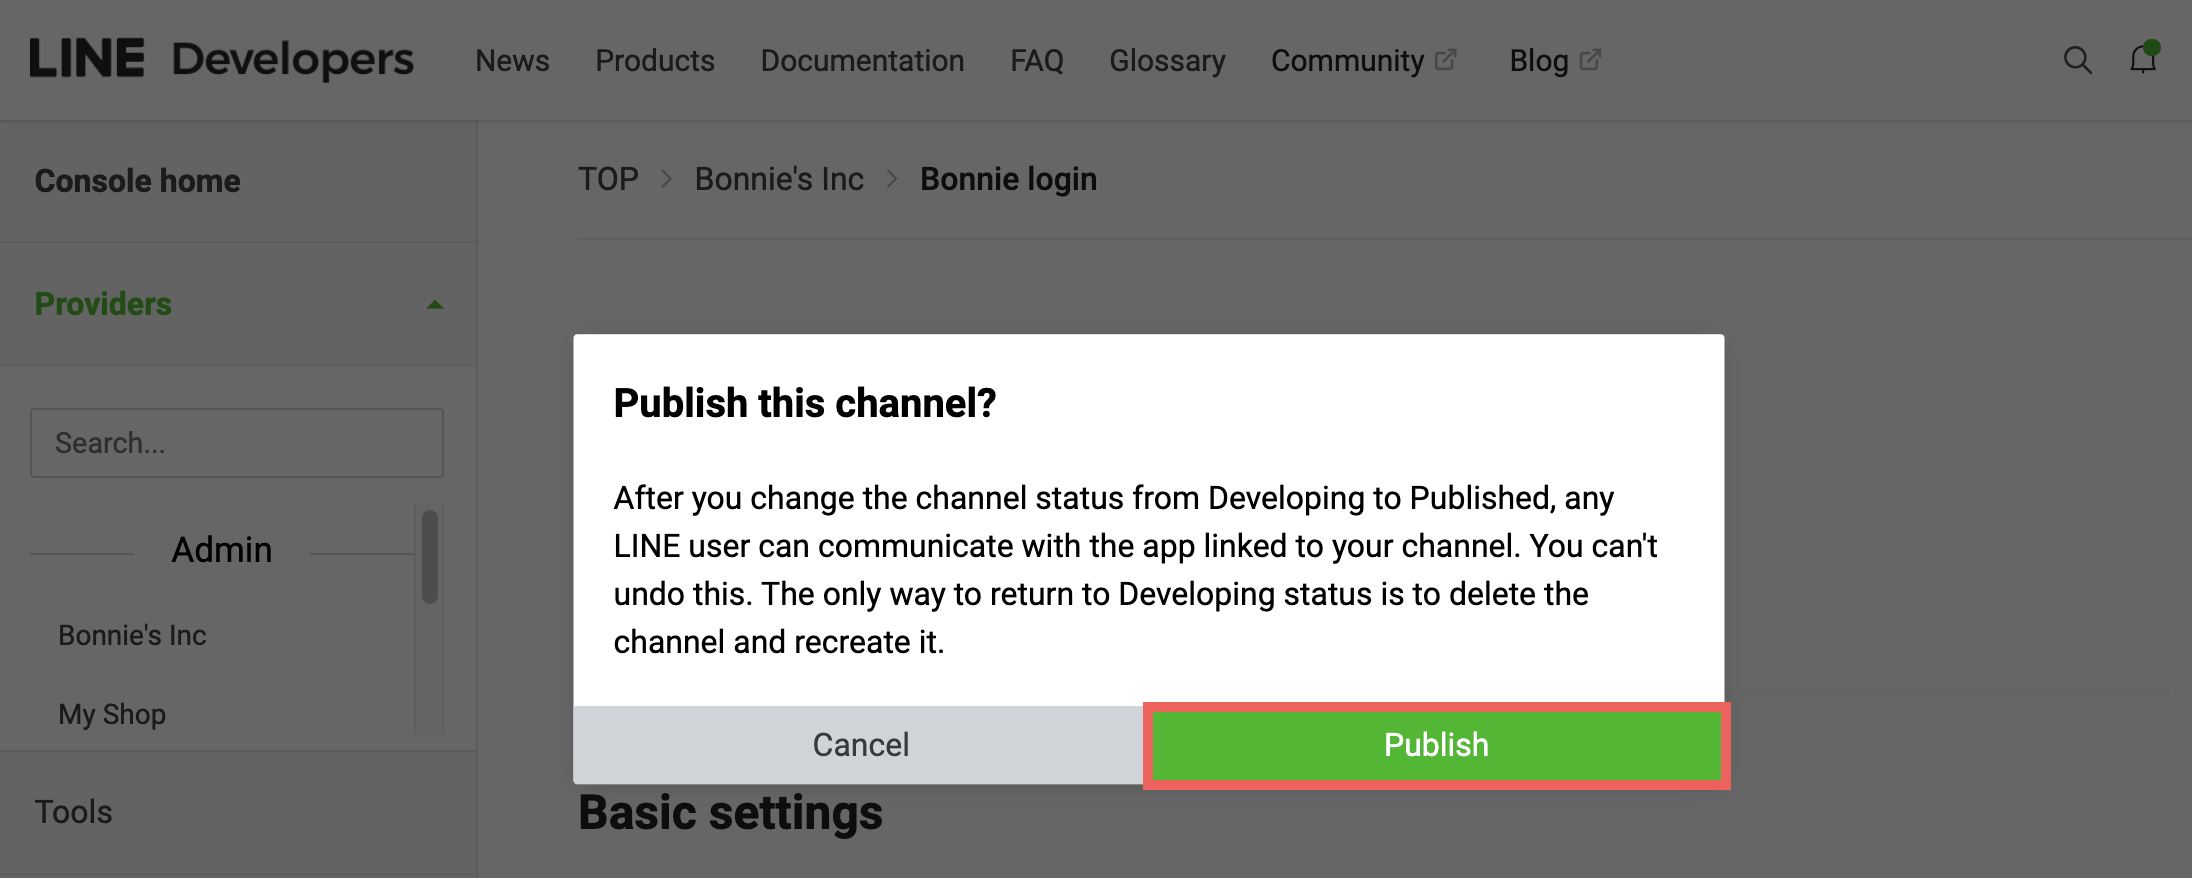
- If the login channel is not published yet, scroll up to the top of the LINE Login channel, click Developing and click Publish.
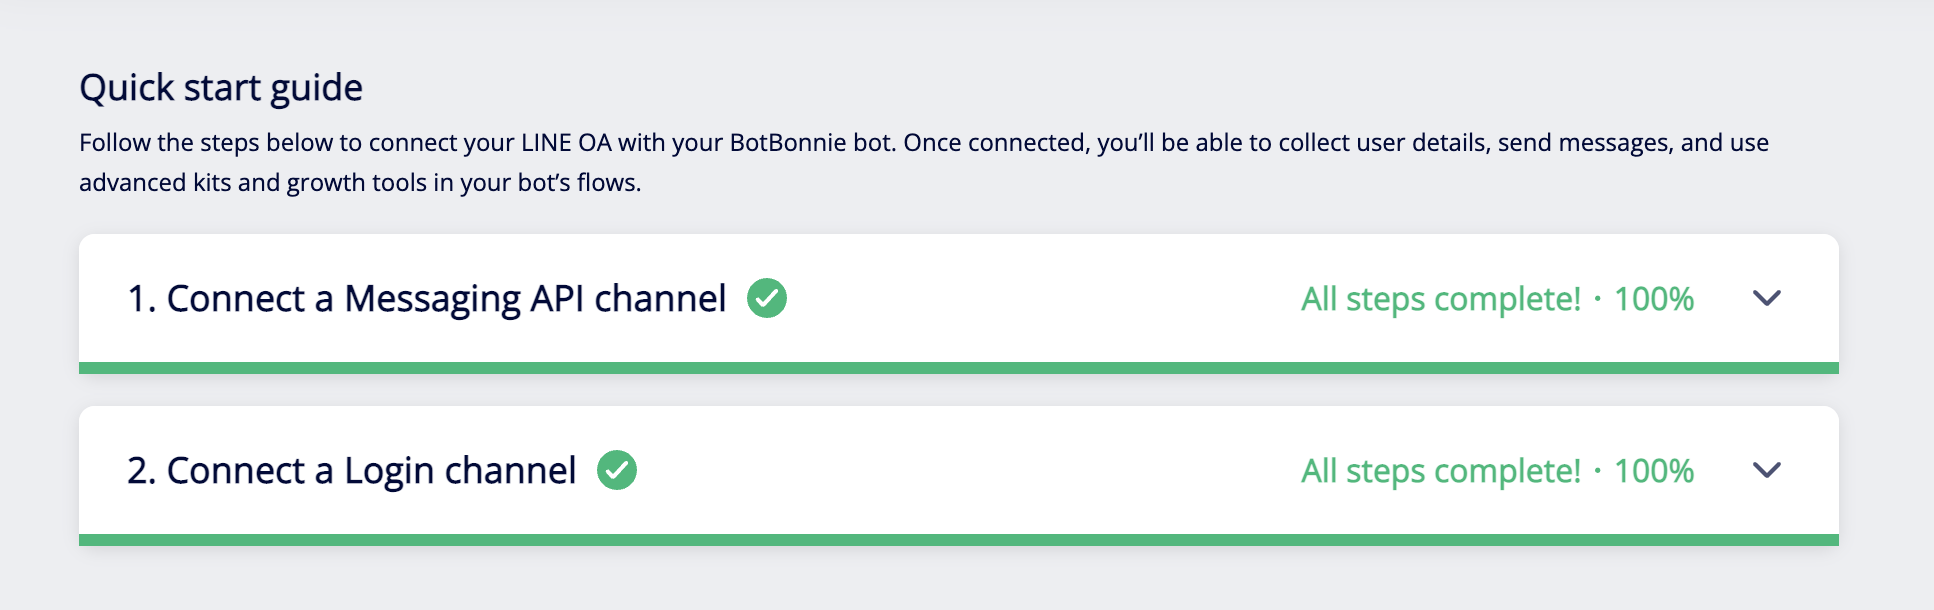
If your account was successfully connected, you'll see a Connected status displayed with a green check icon.
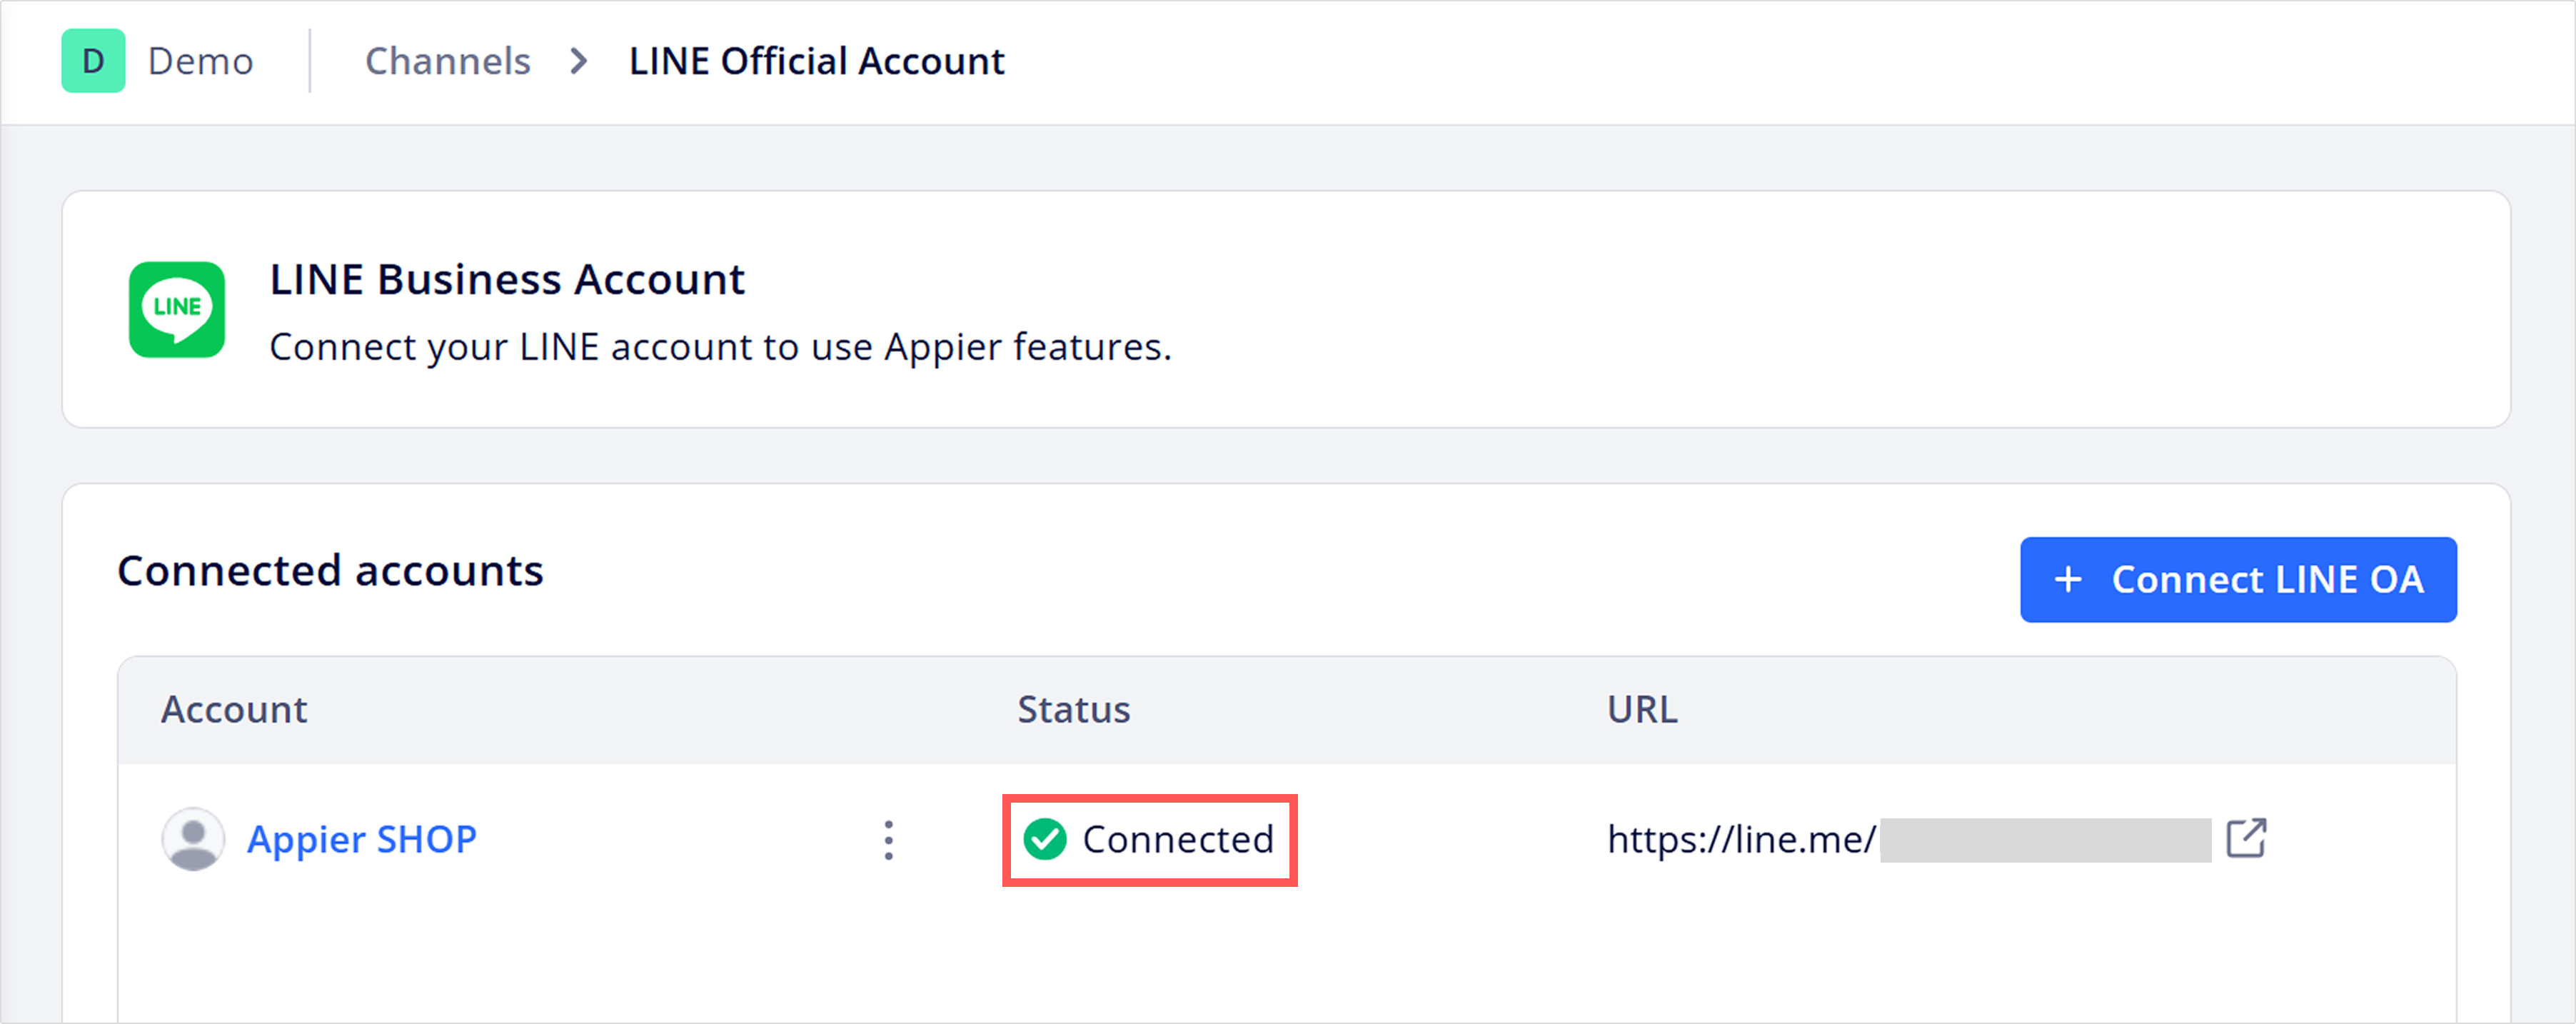
The connection status will be displayed on both the Connected accounts list and the Channels page.
Test your connection
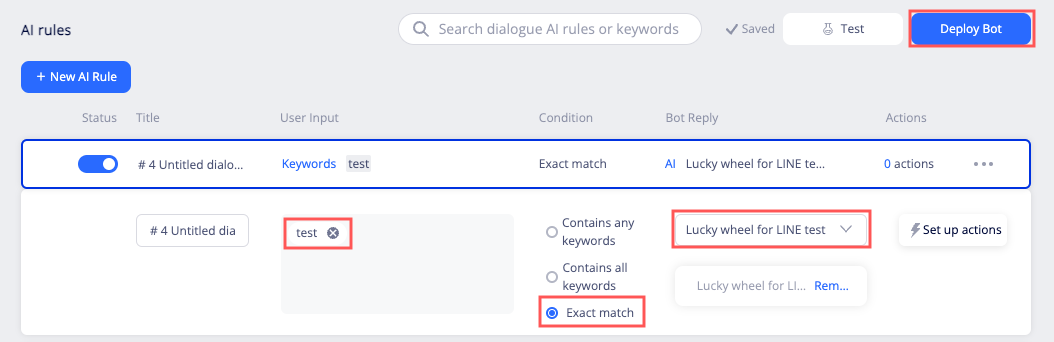
- From the left menu, go to Content > AI rules, then click + Add AI Rule.
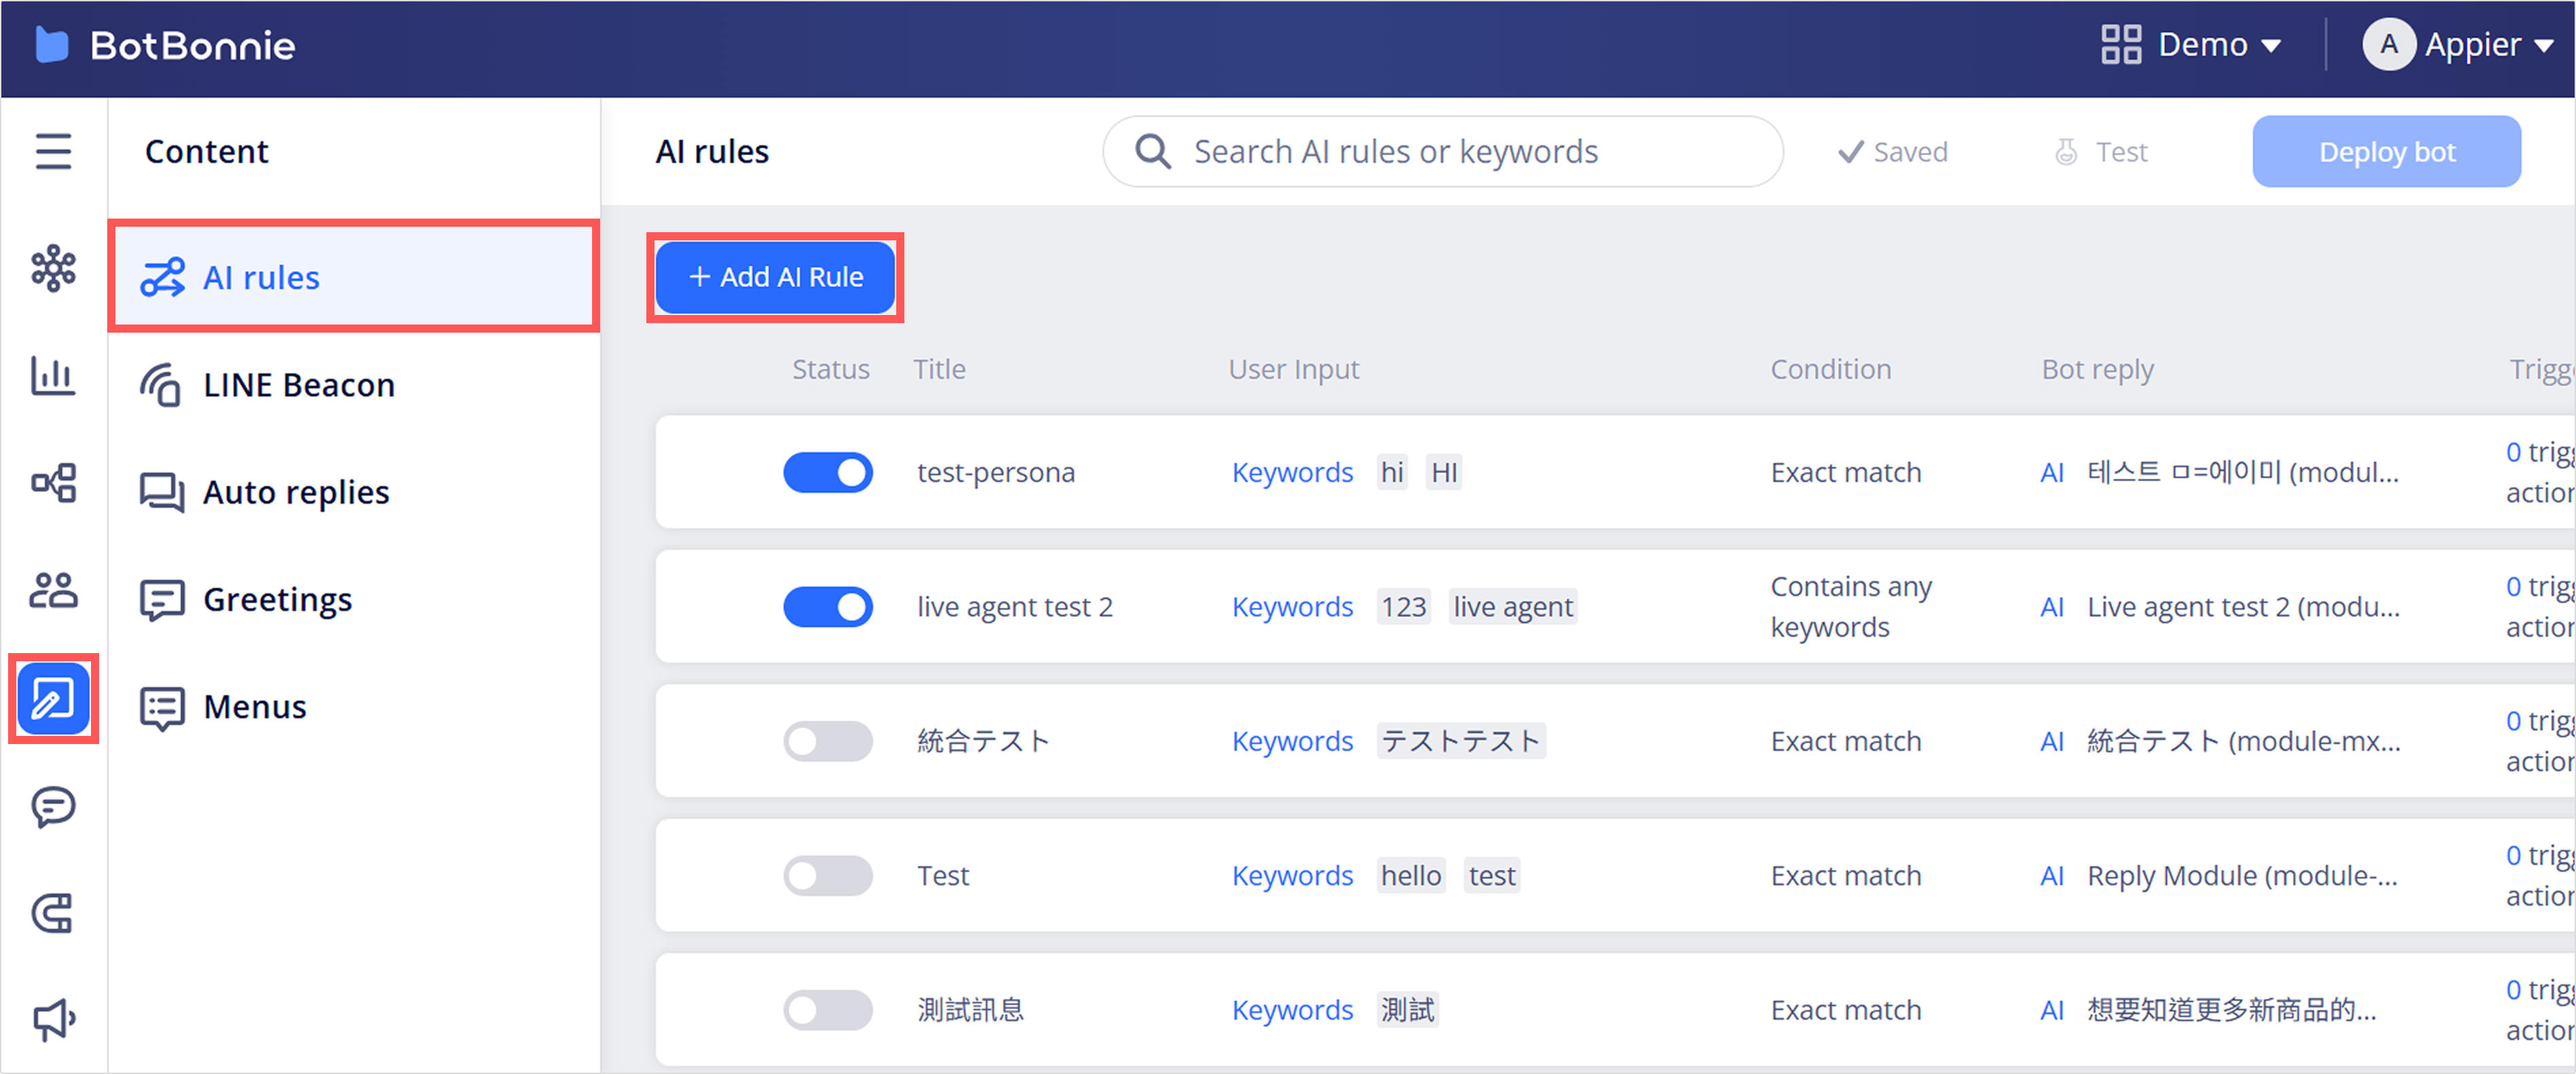
- Expand the new AI rule and complete the following settings.
- Enter a keyword under User input (such as
test). The keyword should be something your users are unlikely to enter when they send a message to your LINE OA. - Under Condition, select Exact match.
- Under Bot reply, select an advanced kit, such as a lucky wheel, daily check-in, or scratch-off kit.
- Click Deploy bot.
- Enter a keyword under User input (such as
- Send a message to your LINE OA that exactly matches the keyword in the AI rule and you should see the advanced kit you selected as the reply.
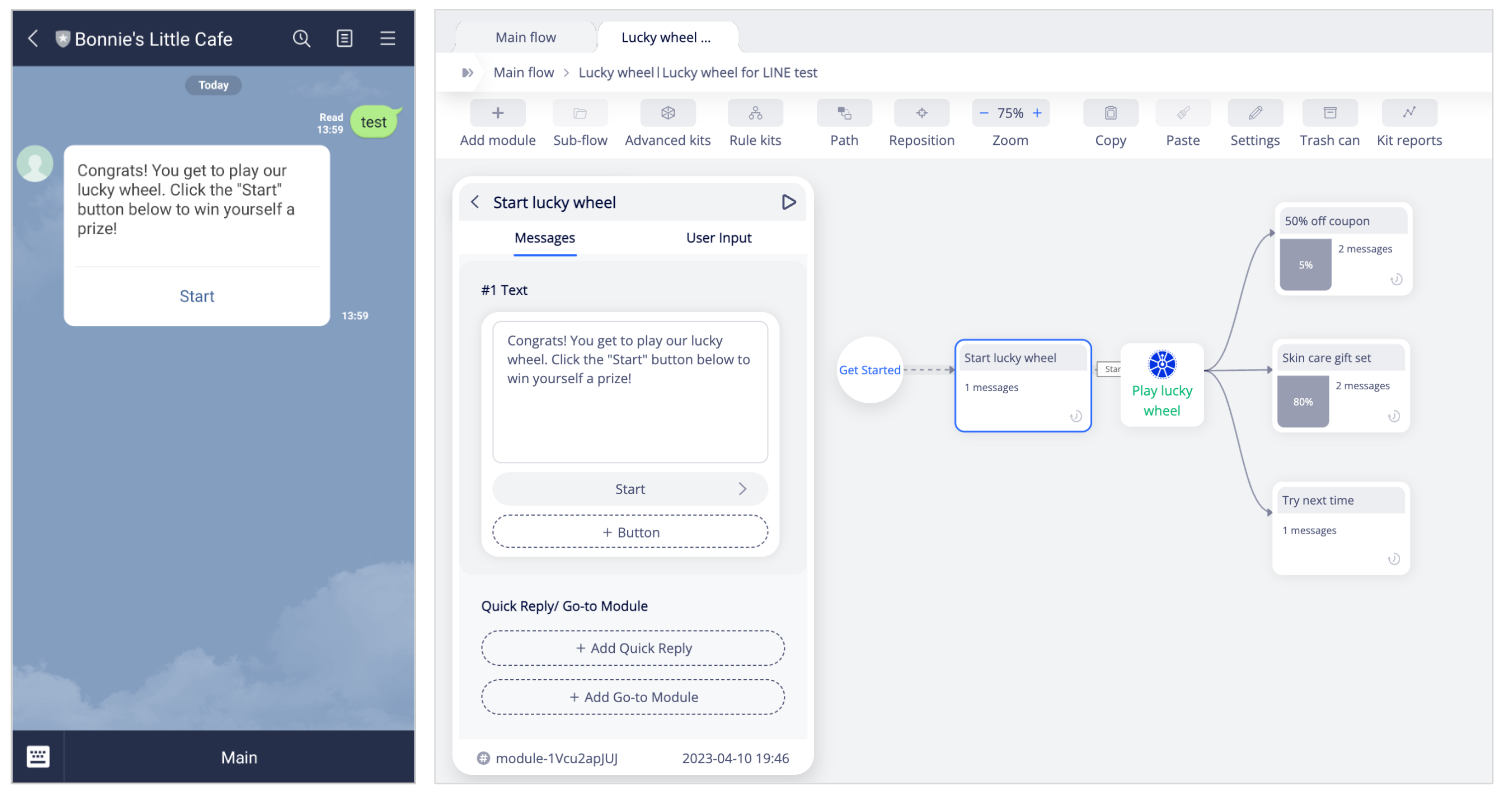
- Run the advanced kit to make sure it works.
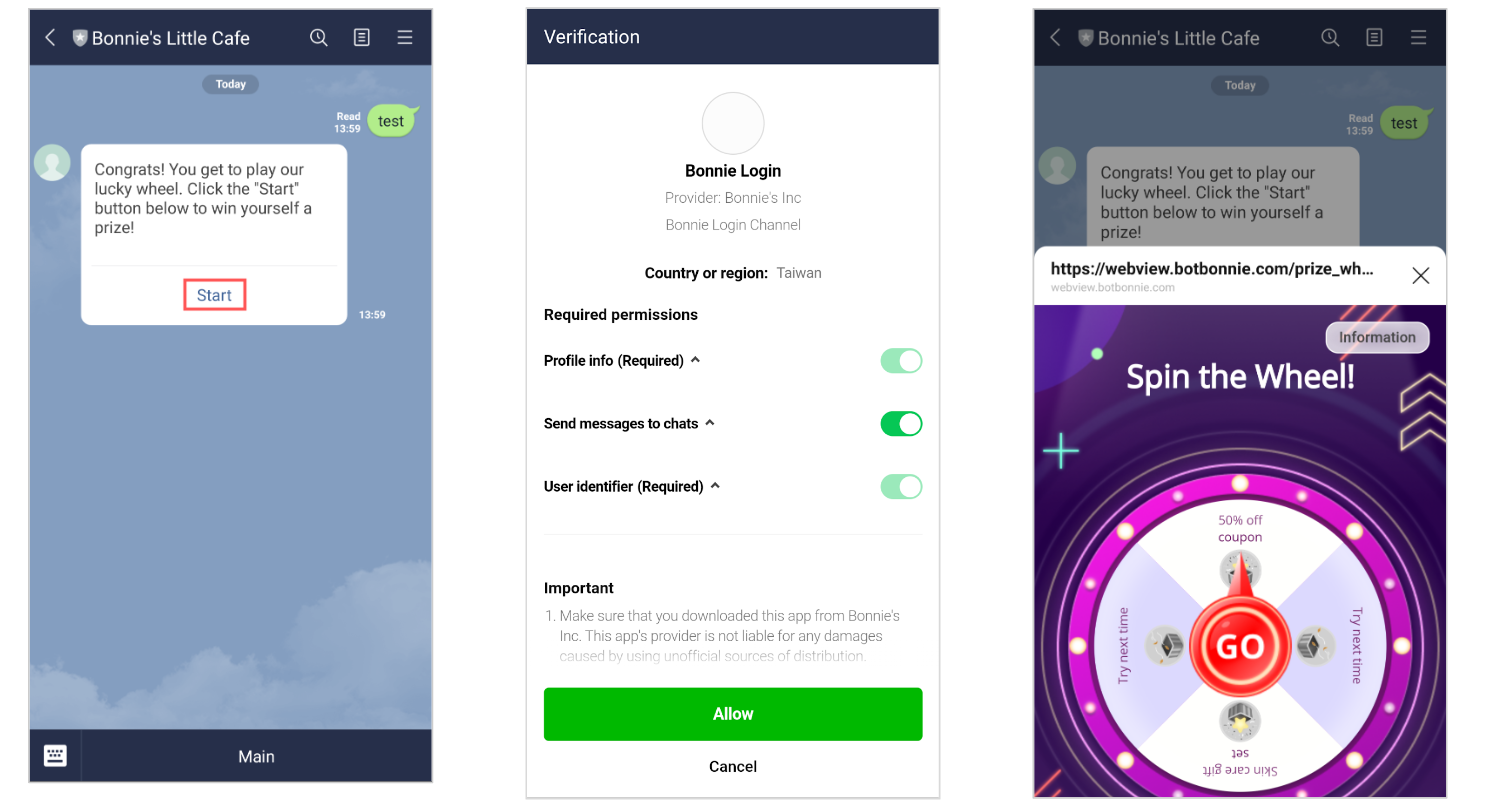
If errors occur while running the advanced kit, the LINE Login channel might not be connected properly. See how to troubleshoot.
Troubleshooting
Here are some common issues you might run into while setting up your LINE OA with BotBonnie:
- I can't find the Messaging API Channel
- I can't find the LINE Login Channel
- I can't click the Complete button on BotBonnie Console
- Your LINE OA is connected to another BotBonnie bot
- Advanced kits and growth tools are not working properly
I can't find the Messaging API Channel
If you cannot find the Messaging API channel under the provider on LINE Official Account Manager, log into LINE Developers Console, and go to Settings > Messaging API to check if a Messaging API channel is already created for the LINE OA.
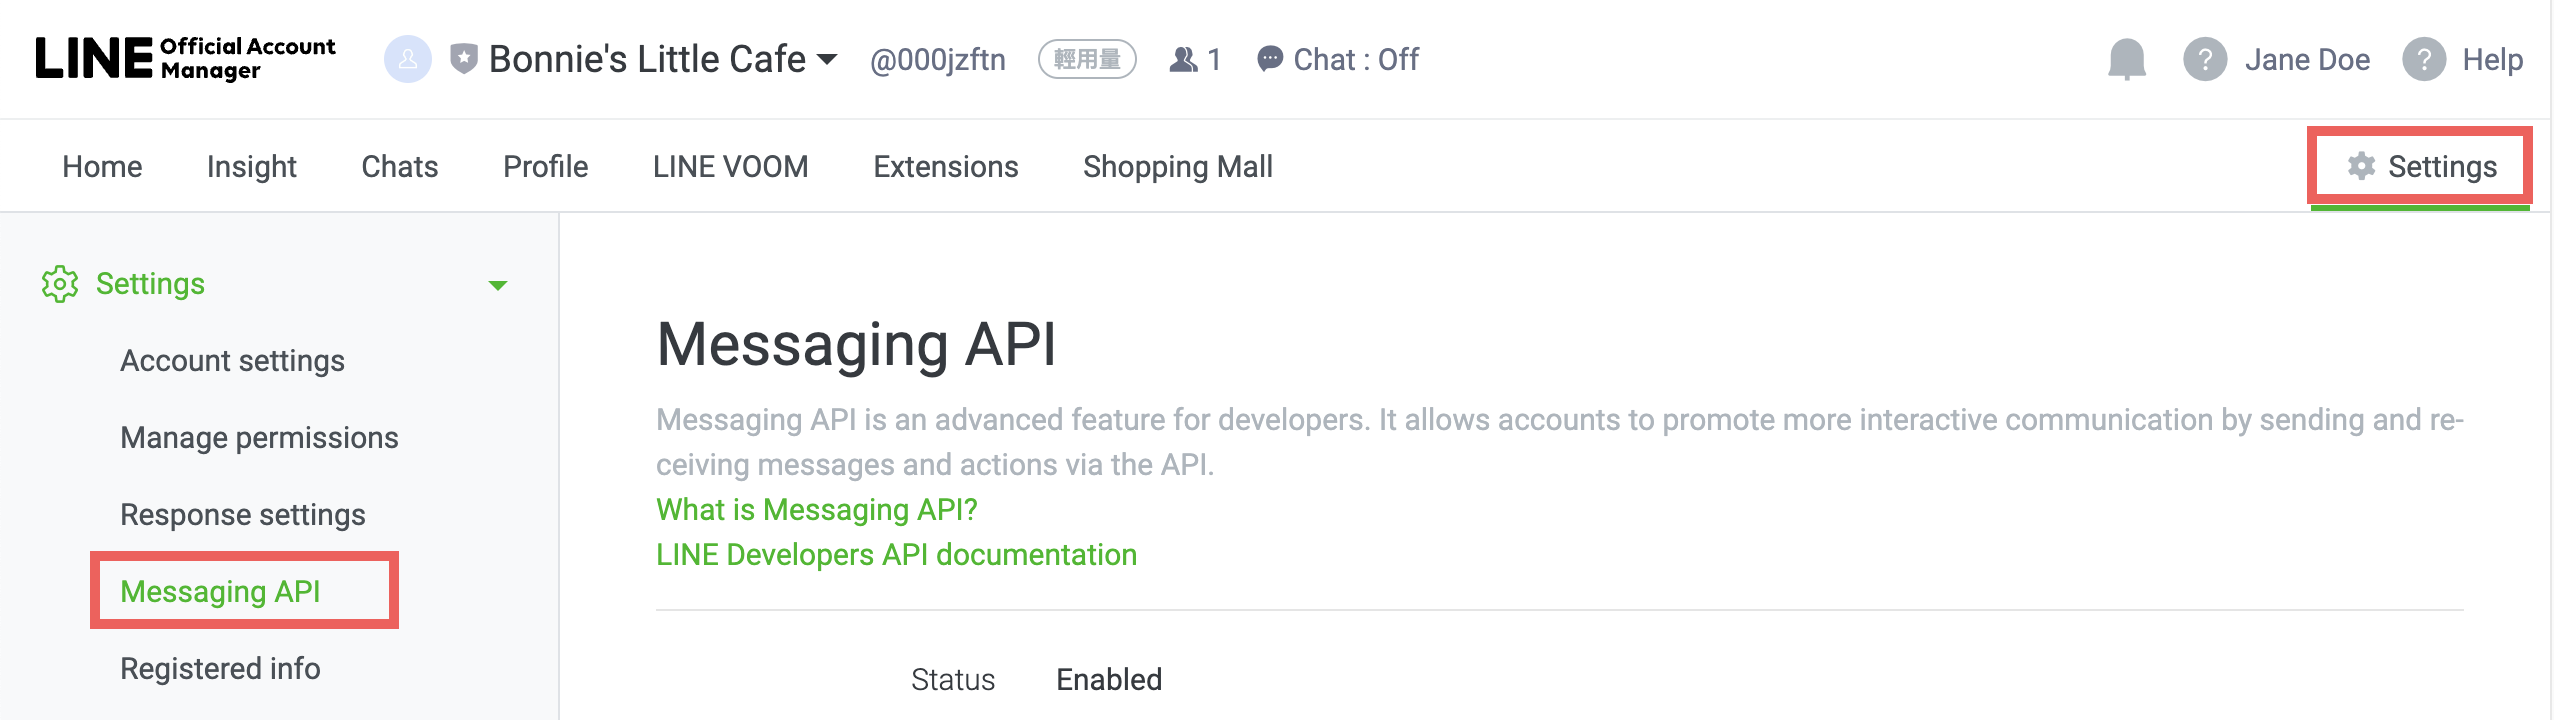
If the Messaging API channel is enabled already but not visible on LINE Developers console, it's possible that you do not have access to it. Check with your team to request access to the Messaging API channel. To see how to grant channel access, refer to LINE's documentation.

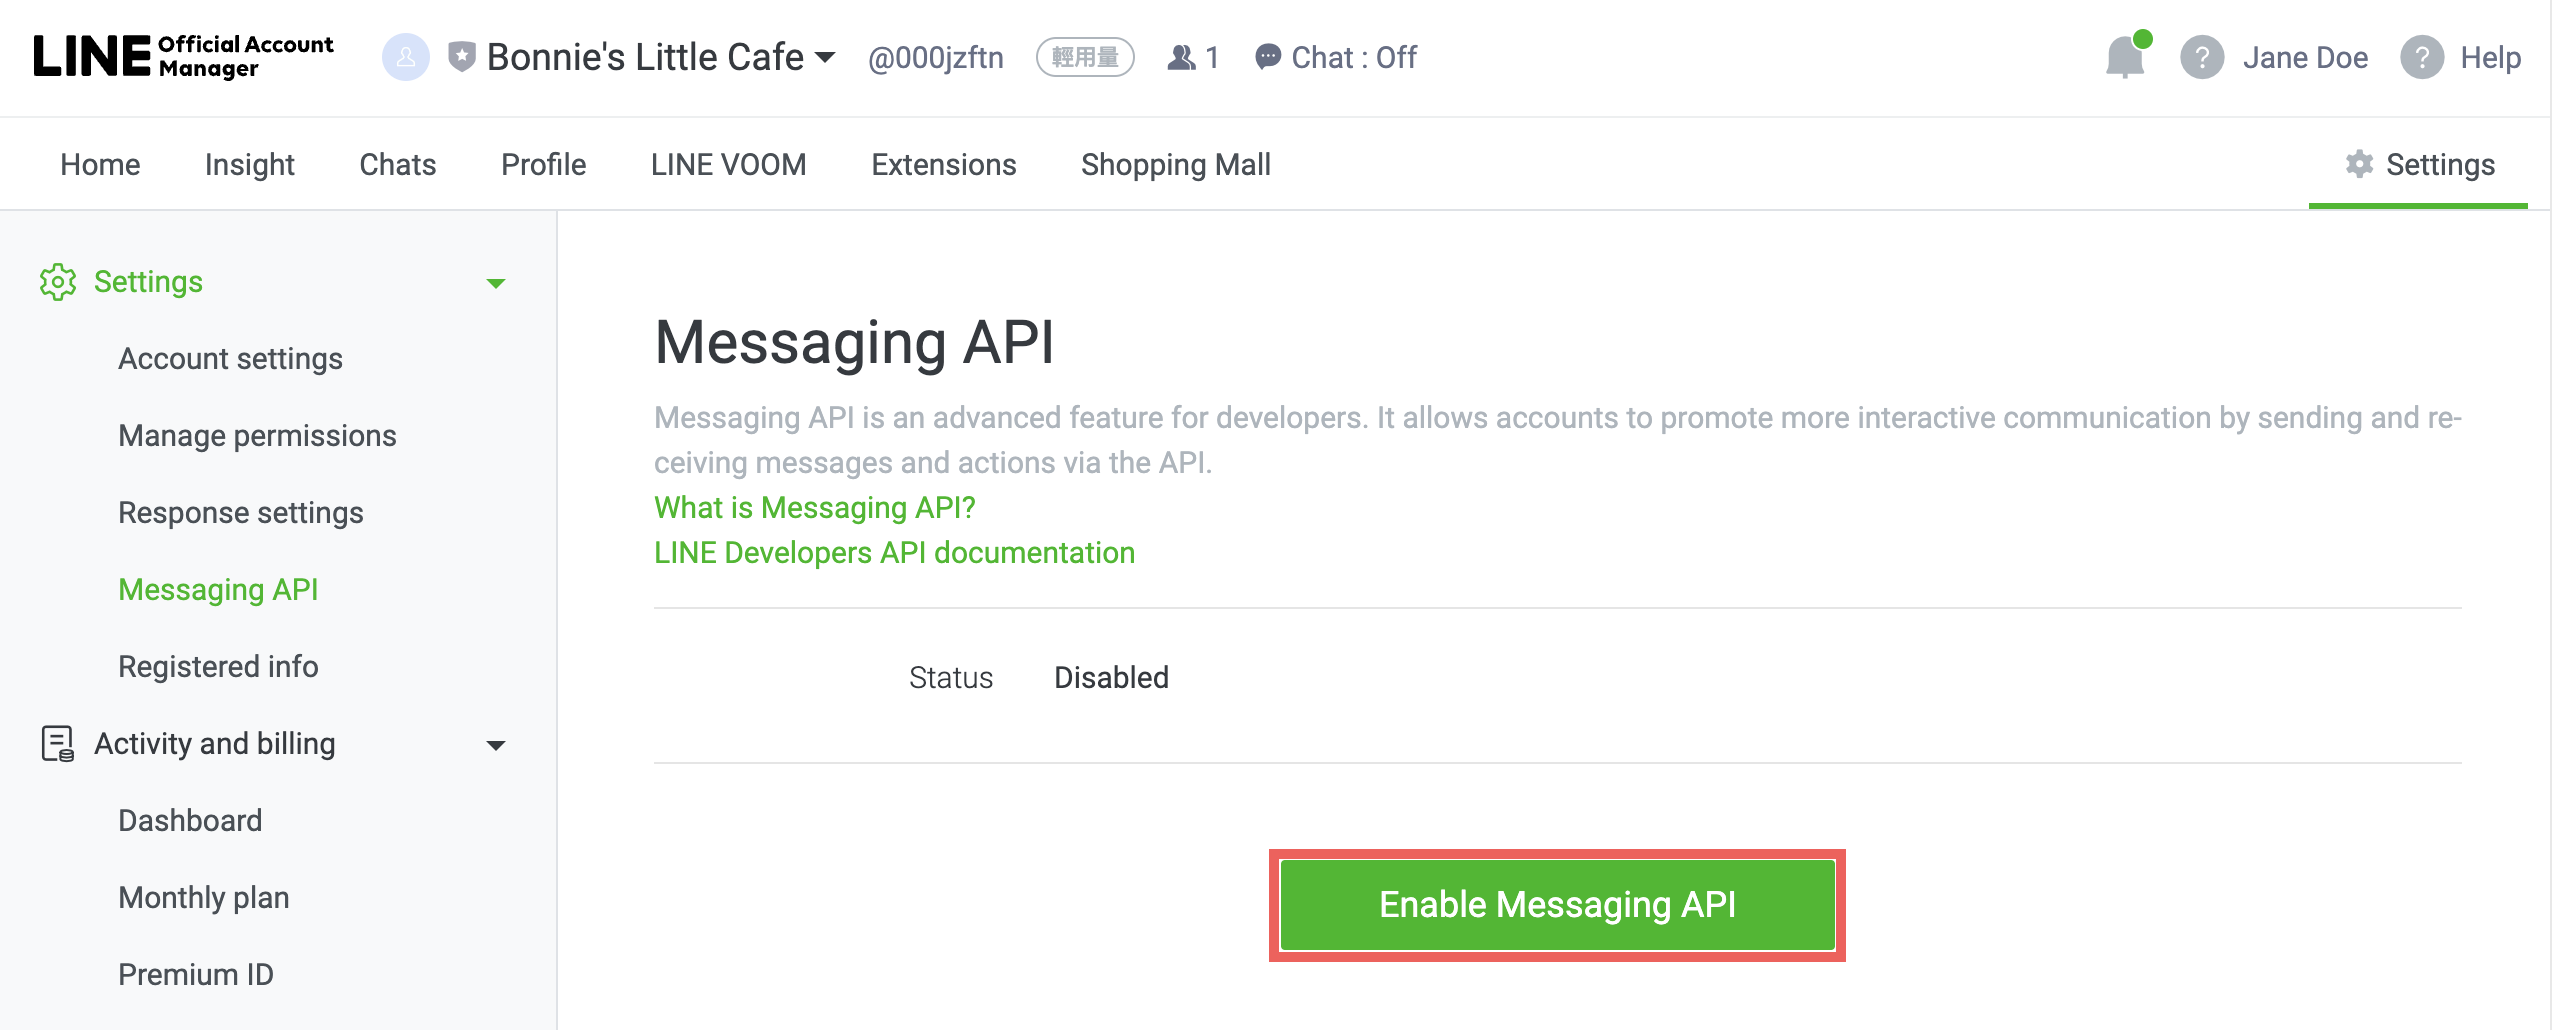
If Messaging API is not enabled, click Enable Messaging API and select the provider of the LINE OA to enable. This creates a Messaging API channel for your LINE OA.
I can't find the LINE Login Channel
If you cannot find the LINE Login channel under the provider on LINE Developers console, click Create a new channel and select LINE Login to create a login channel.
Set App types to Web app and complete all other settings.

Click Create.
I can't click the Complete button on BotBonnie Console
If you have reached the final step on BotBonnie Console and the Complete button is grayed out, this means that some steps are not completed yet.
Make sure both parts are marked as 100% completed.
Each step should have a green checkmark next to it. If not, go back to that step, make sure the field is entered correctly and click Continue.
Your LINE OA is connected to another BotBonnie bot
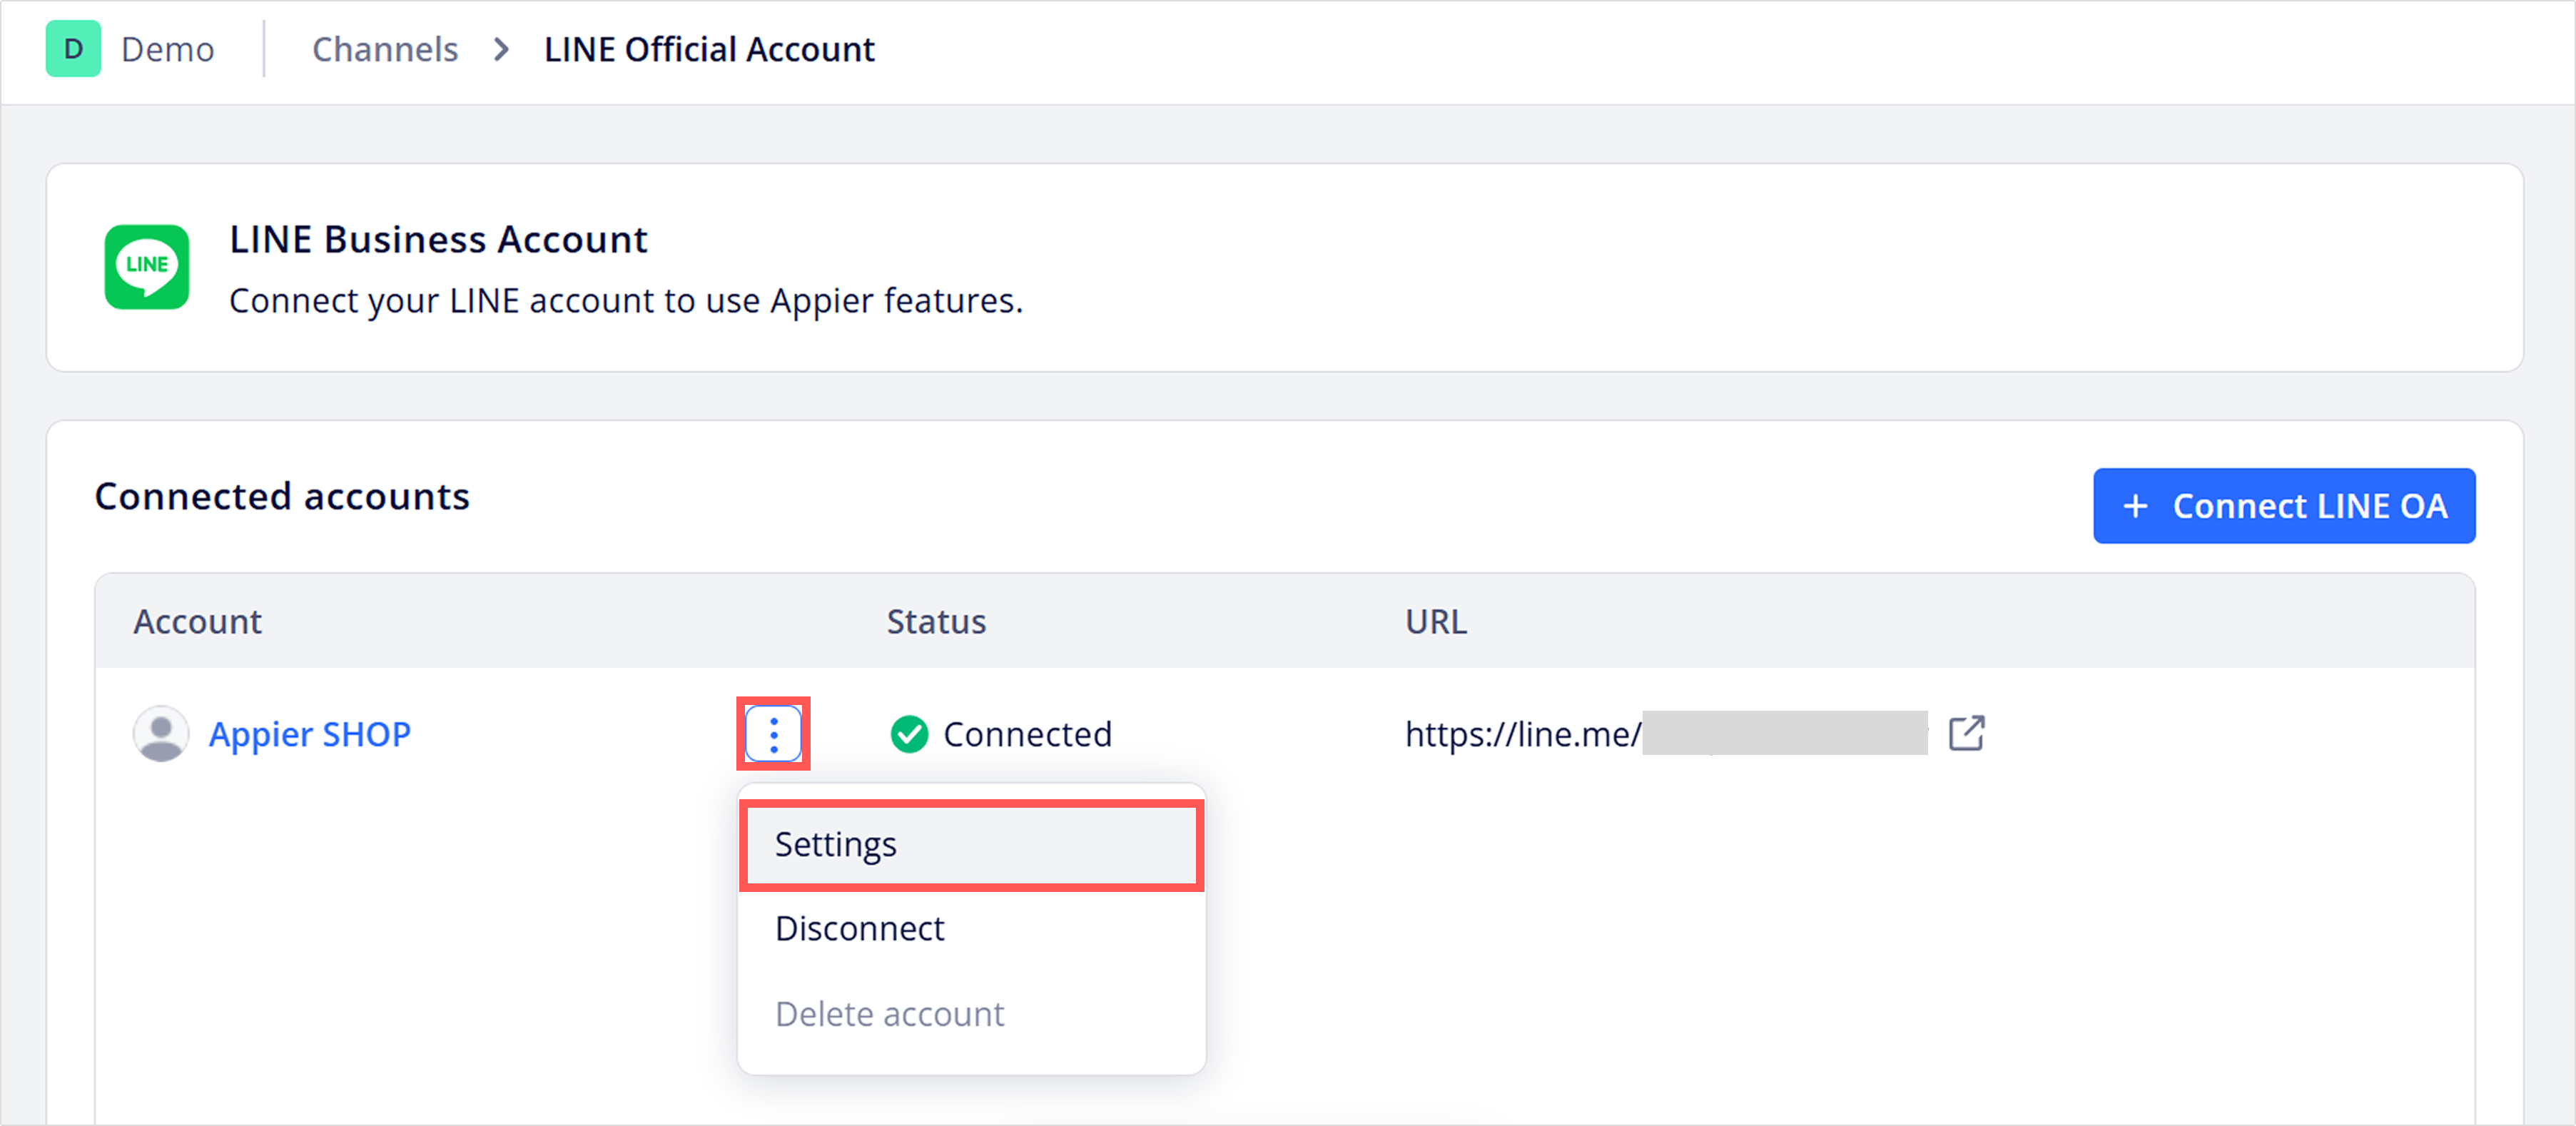
If the LINE OA is connected to another bot, you can click the vertical three dots next to the LINE OA and select Connect to connect it to the current bot.

Advanced kits and growth tools are not working properly
In order to use advanced kits or growth tools with the LINE OA, the LINE Login channel needs to be connected to the bot.
- Make sure the channel ID and channel secret of the LINE Login channel are entered correctly. To check the channel settings you entered, go to Channels > LINE, click the vertical three dots next to the LINE OA and select Settings.

- Make sure the LINE Login channel you connected is under the same provider as the Messaging API channel.
If your issues cannot be resolved, contact your customer success manager for assistance.
Enabling live agent chatroom for LINE
The BotBonnie live agent chatroom lets you manage one-on-one user interactions on LINE without incurring messaging fees. When users enter the chatroom, it opens in a LIFF web view within the LINE app.
Follow the steps below to enable this feature:
- Go to Channels on the sidebar and click the LINE card.
- Click the vertical three dots next to the LINE OA and select Settings.
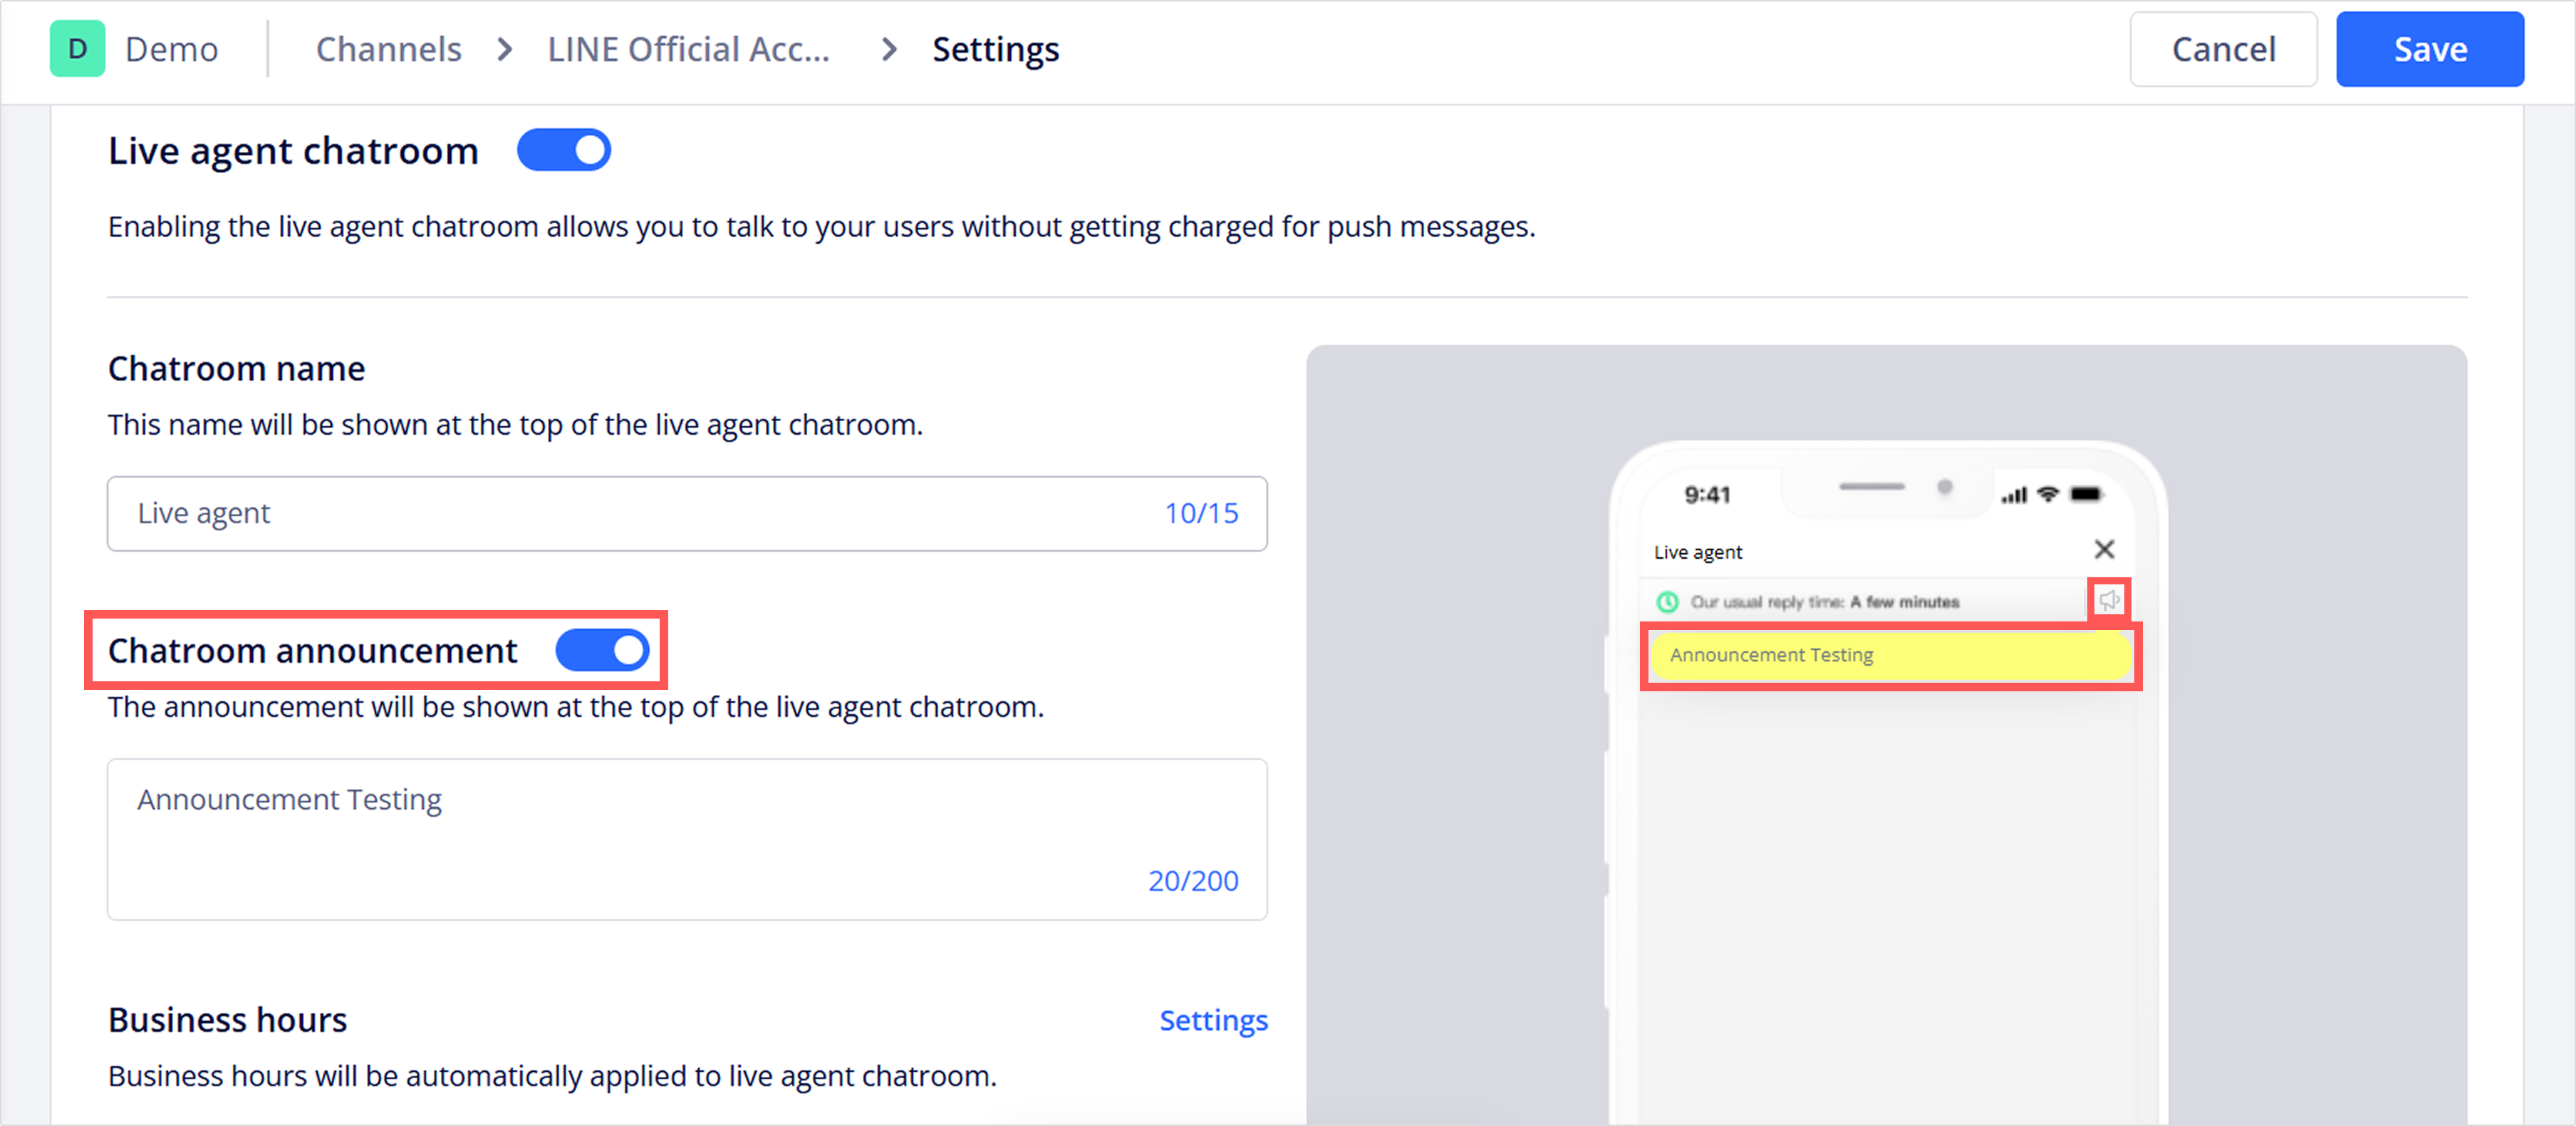
- Next, click on Live agent chatroom tab, toggle the Live agent chatroom switch to allow your live agent to chat with users.
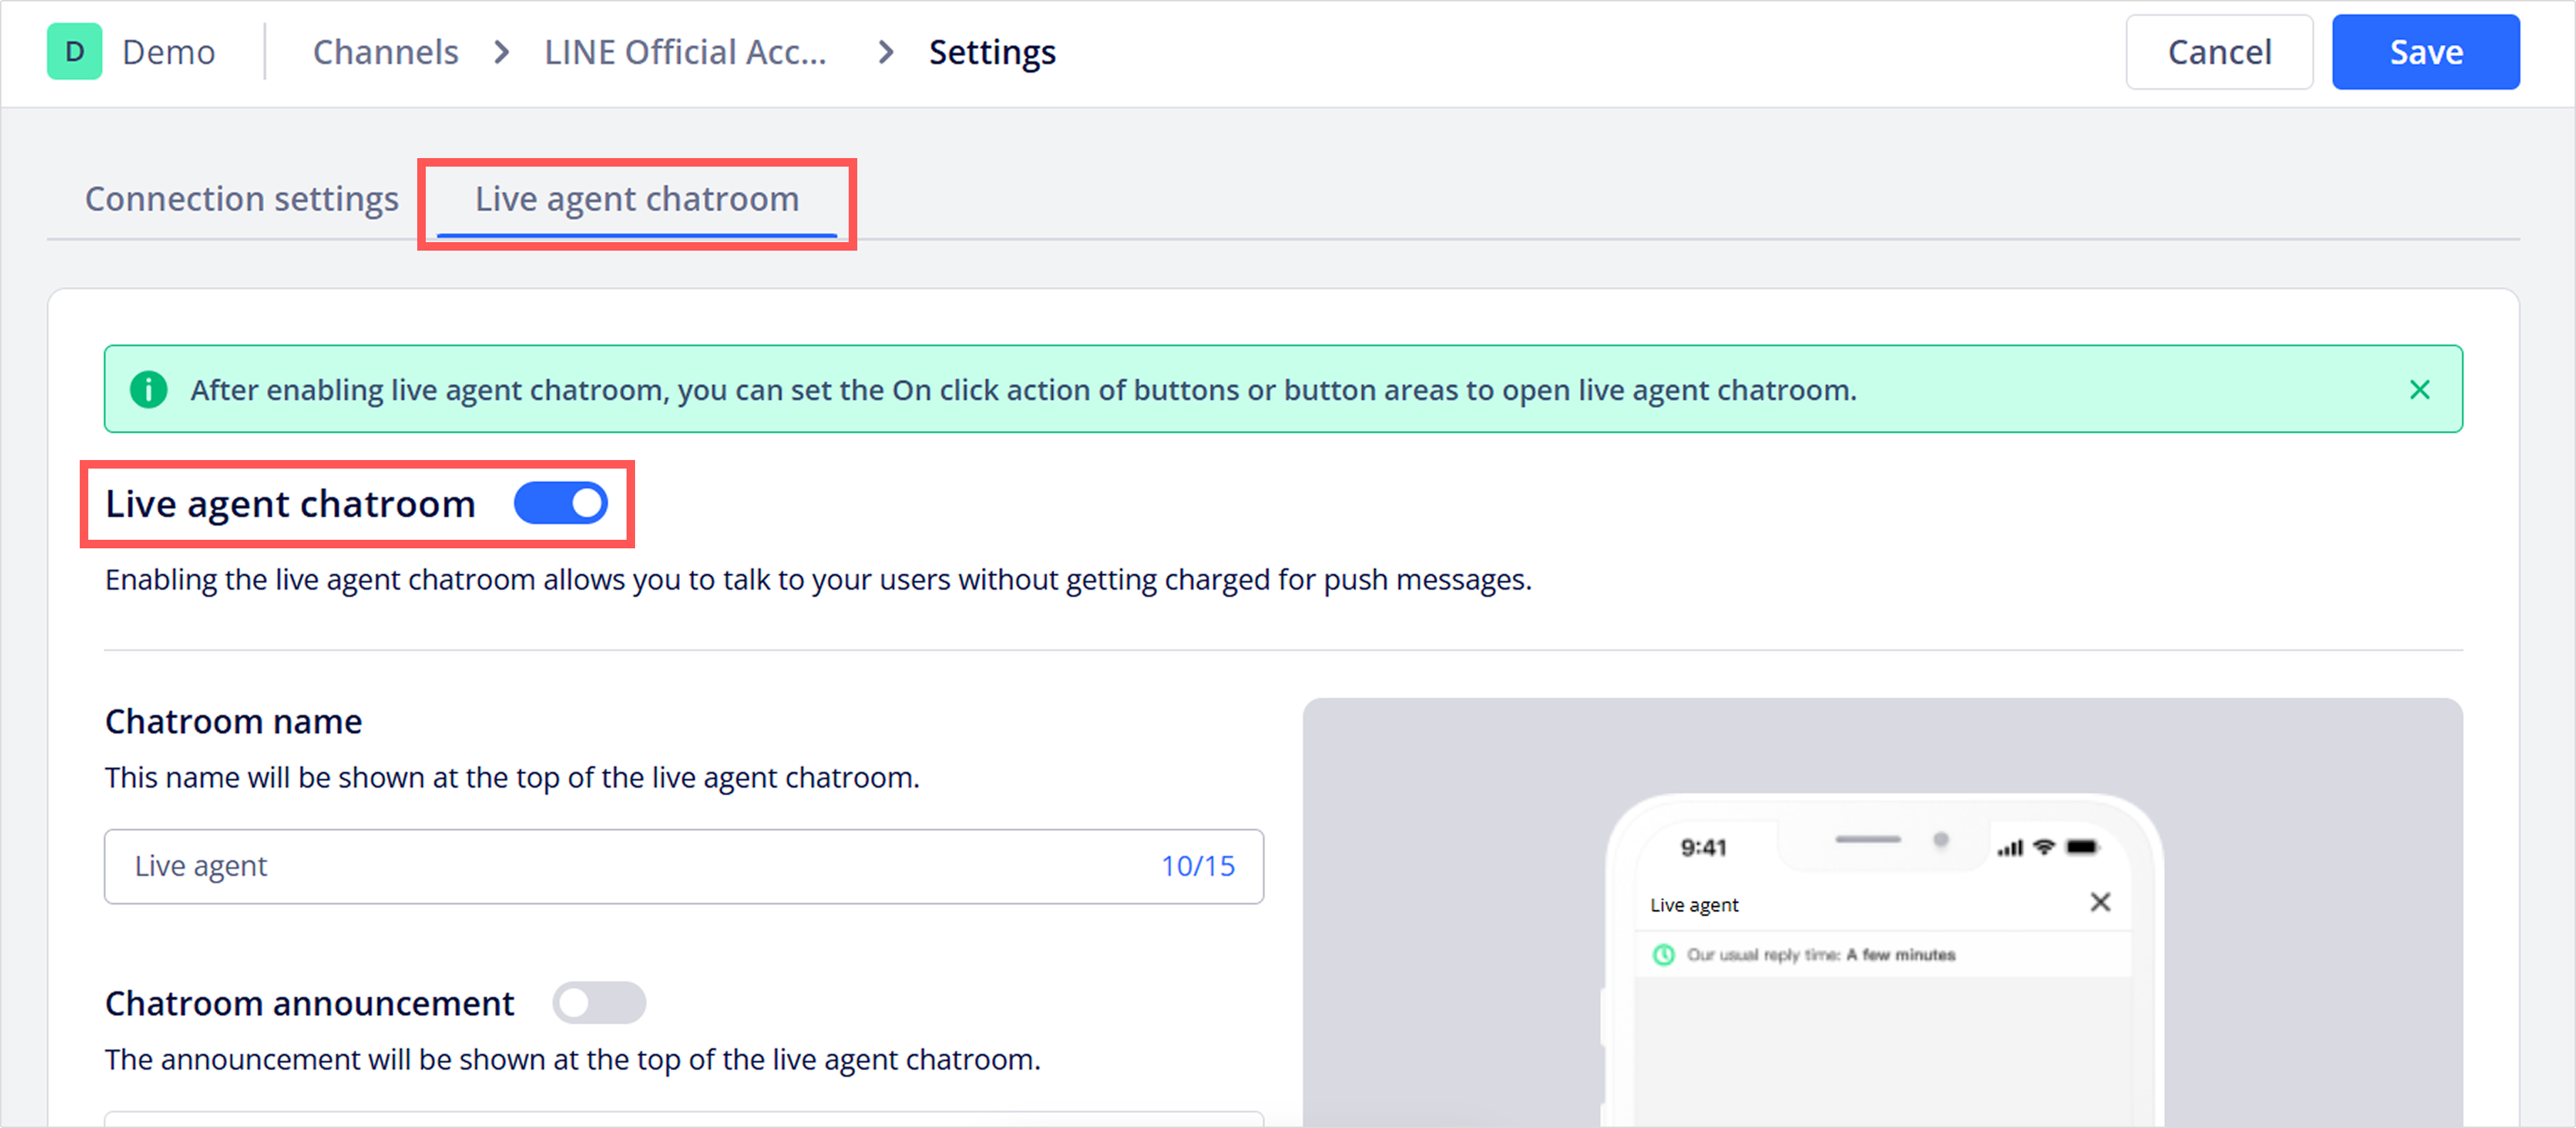
- Enter a chatroom name to appear at the top of the chatroom.
- Enable the Chatroom announcement to display a message at the top of conversation when needed.
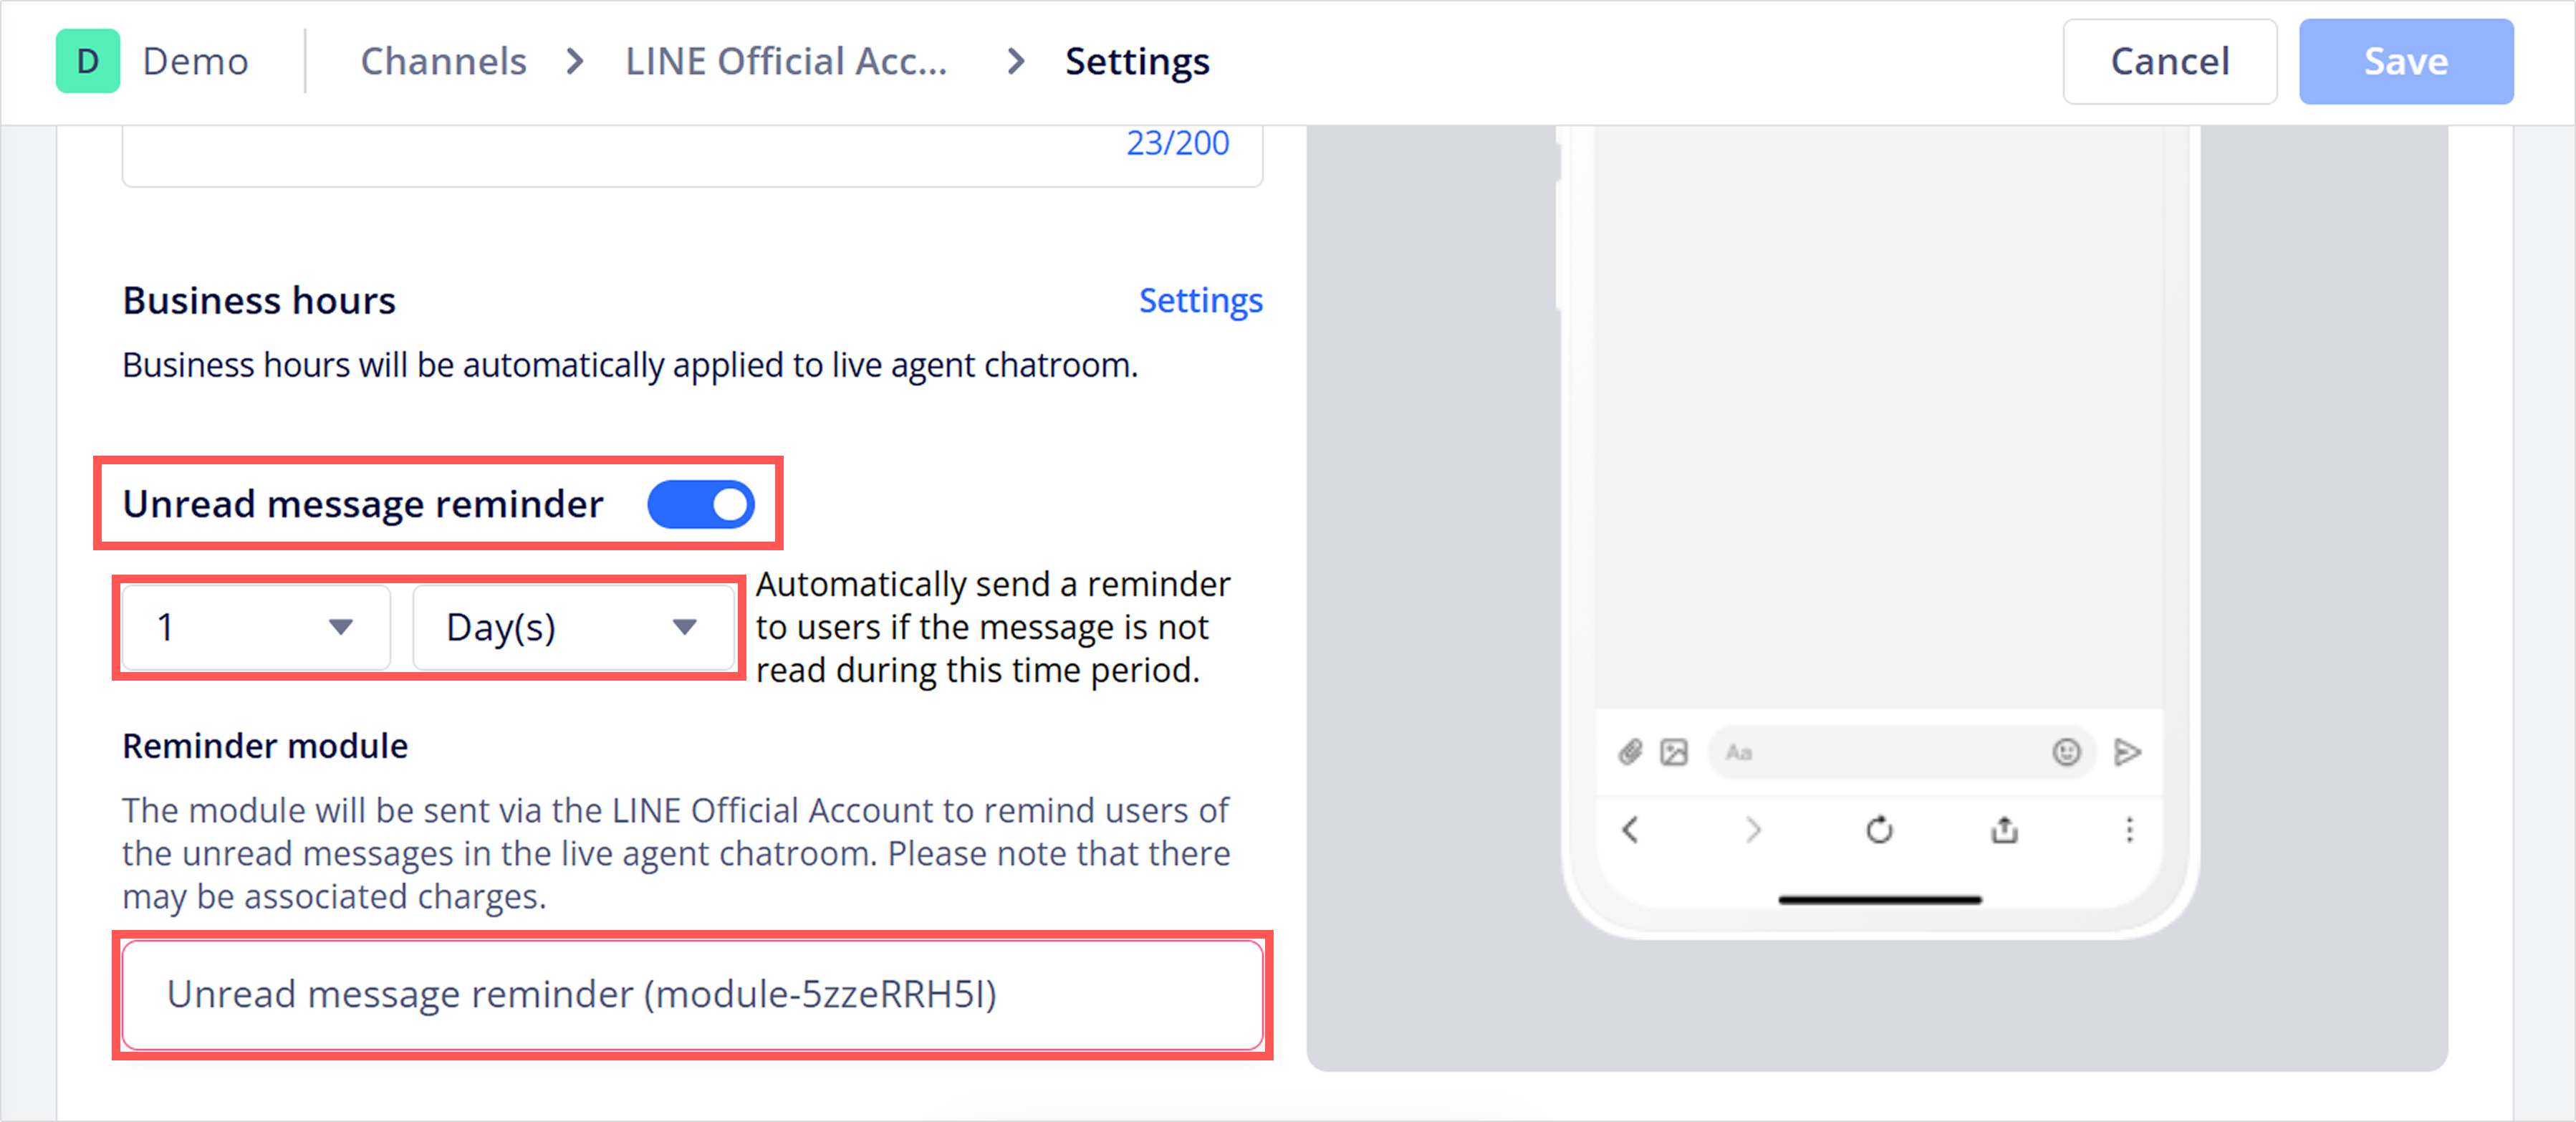
- Turn on the Unread message reminder and set it up to remind users when they haven't read a message for a specified period of time.
- Set the reminder period and select a time unit (minutes, hours, or days) from the dropdown.
- Configure the Reminder module to define the message users receive when reminded.
NoteThe unread message reminder is sent via a LINE OA and may incur LINE messaging fees. Customer service agents can manage the unread message reminder for each live chat chatroom as needed.
After enabling this feature, you can add the button to chatbot flows by selecting Open live agent chatroom on click action and initiating live agent chatroom within live chat.
Updated 24 days ago