Advanced Node
Overview
Use advanced nodes to implement more complex functionalities in your journey, such as integrating with external APIs and services.
Webhook node
A webhook is an automated HTTP request sent from one service to another when a specific event occurs. You can use webhooks to enhance your journey by integrating external APIs and services, enabling you to personalize the next steps in the journey.
When a user reaches the webhook node, an HTTP request is triggered to an external service to retrieve data which can be used to tailor the campaign in real time, supporting use cases such as:
- Fetching location-based data such as weather.
- Retrieving customer profile details.
- Checking inventory status.
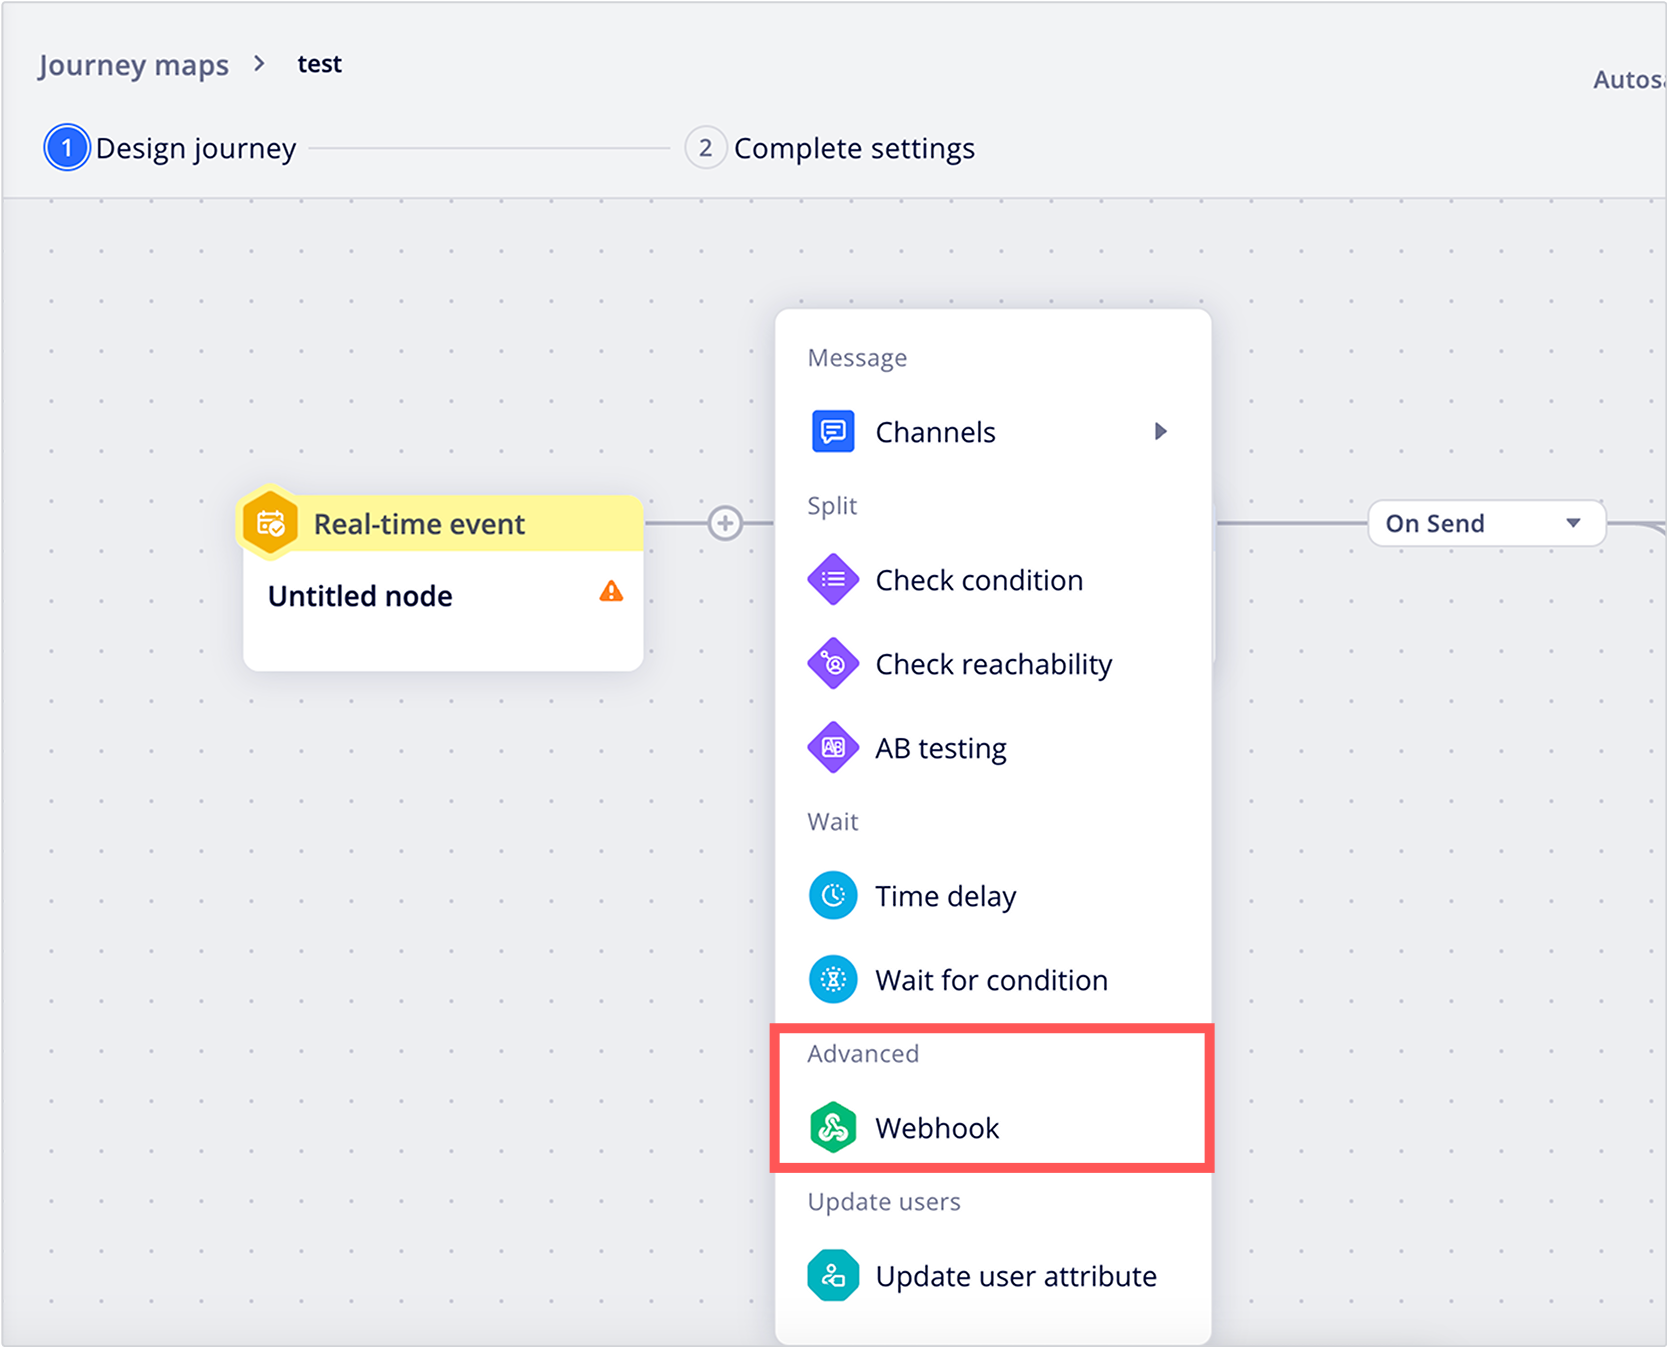
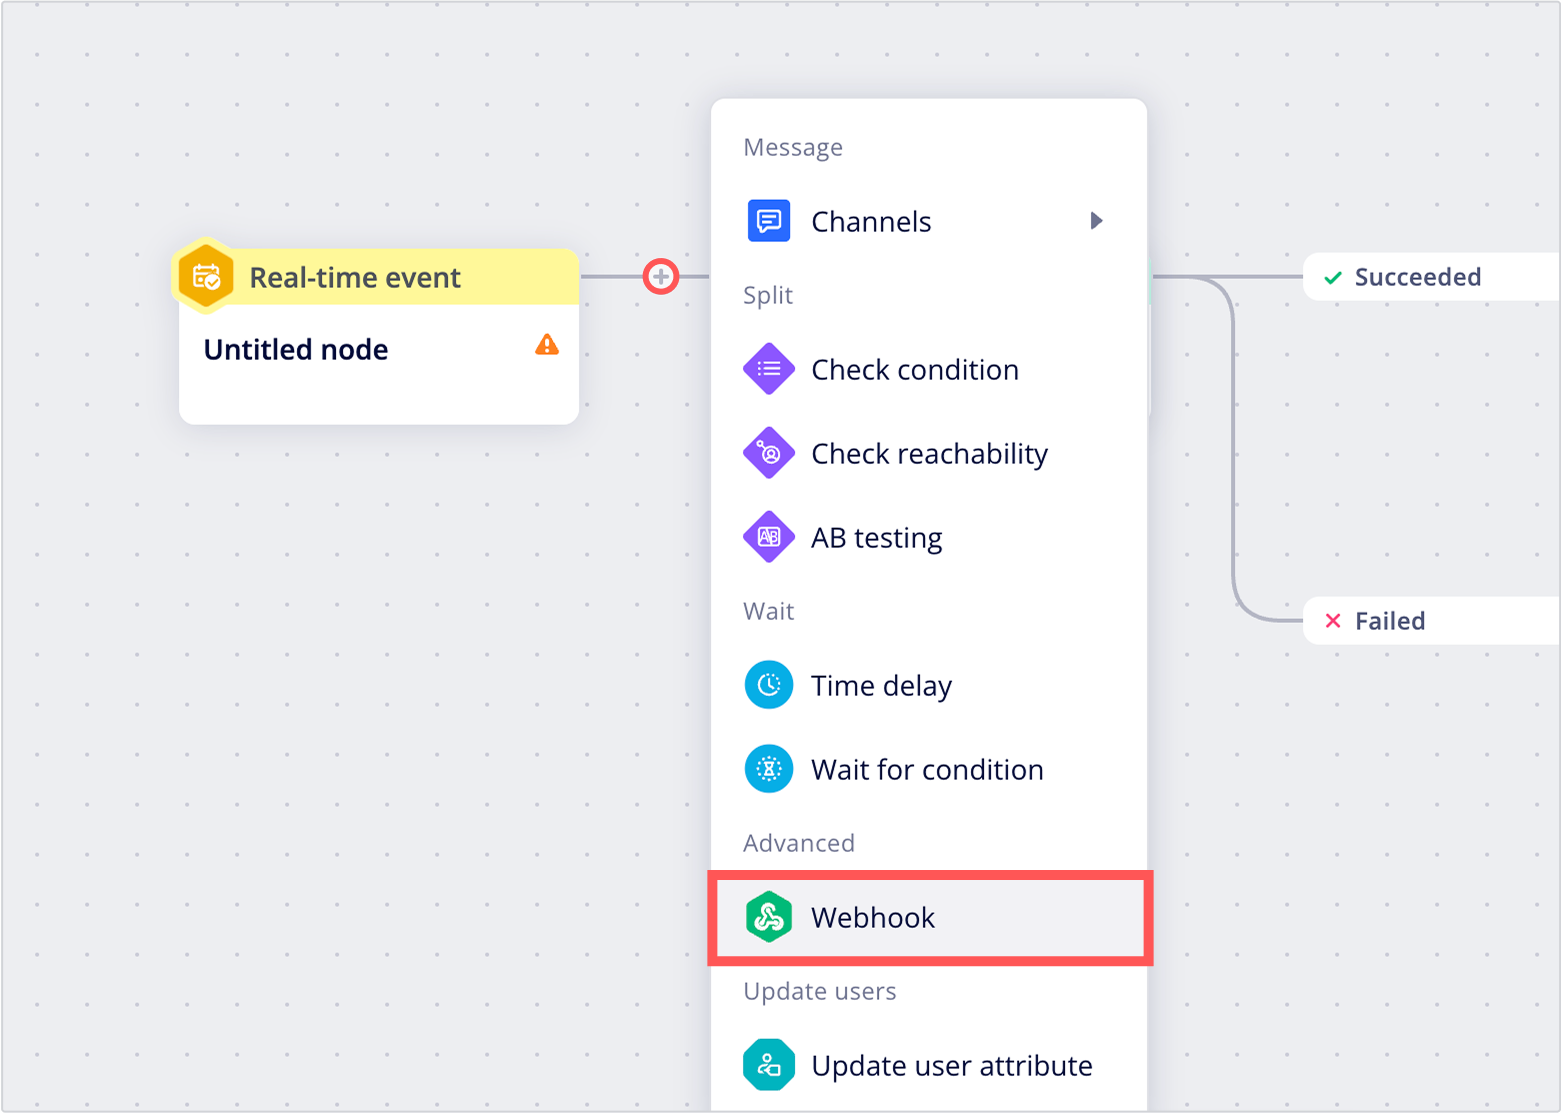
To create a webhook node, click on any + icon that appears between and after nodes, then click Advanced > Webhook.
Clicking the newly added node opens the settings panel with the following fields:
| Name | Required | Description | Example |
|---|---|---|---|
| Node name | Yes | Enter a name for this node. | "Send coupon" |
| Target URL | Yes | Enter the API's endpoint URL. | https://www.example.com/coupon_endpoint |
| HTTP method | Yes | Select an HTTP method from the dropdown. | GET |
| QPS | No | Enter the maximum number of queries to send. | 10 |
| Batch requests enabled Batch size Batch – Minimum interval | No | Batch multiple API calls into a single request. Batch requests enabled: To enable batching, enter "true" into the input field. Batch size: Enter the maximum number of requests to batch together. Batch – Minimum interval: Specify the interval (in milliseconds) at which the batch request will be sent, regardless if the batch size has been met. | 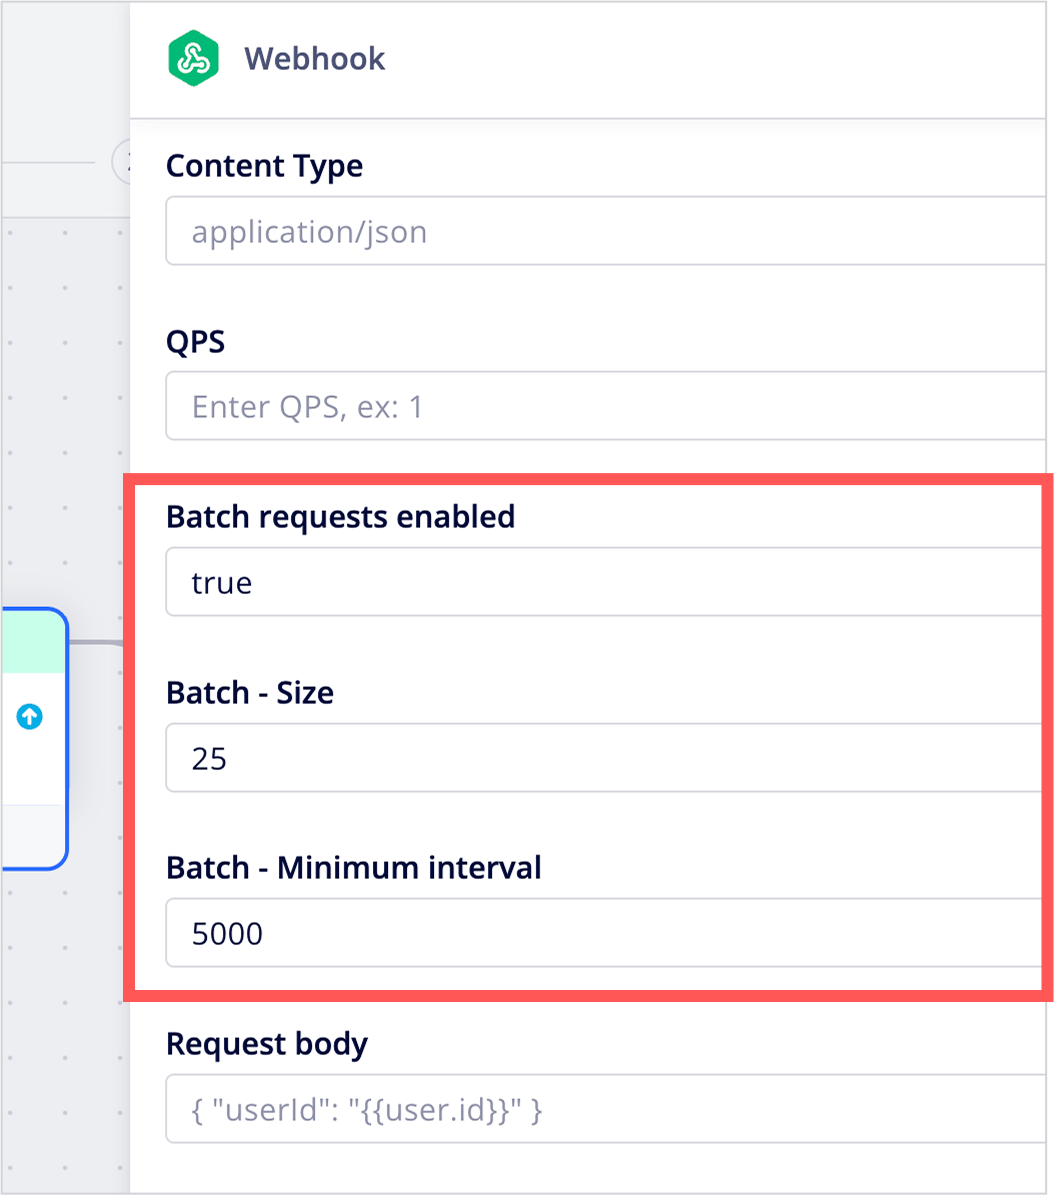 |
| HTTP header | No | Enter any required HTTP headers. | {"Authorization": "Bearer TOKEN"} |
| Content type | No | Specify the request's content type. | application/json |
| Request body | No | Enter the request body content. To dynamically insert user attributes in the request body, use {{ }}. For example, to insert the value of the user's email attribute, use {{email}}. | {"membership_email":"{{email}}"} |
| Response field mapping | No | Create a mapping between webhook response field names and the name you'd like to use when creating conditions or for use in dynamic content. Tip: Use dot notation to map nested fields. | {"coupon.code": "coupon_code", "coupon.discount_pct": "discount"} |
After completing the webhook settings, you can:
- Create conditions based on webhook responses which determine the path users should take next in the journey.
- Use webhook fields to populate dynamic content in the journey's subsequent campaigns.
Creating conditions based on webhook responses
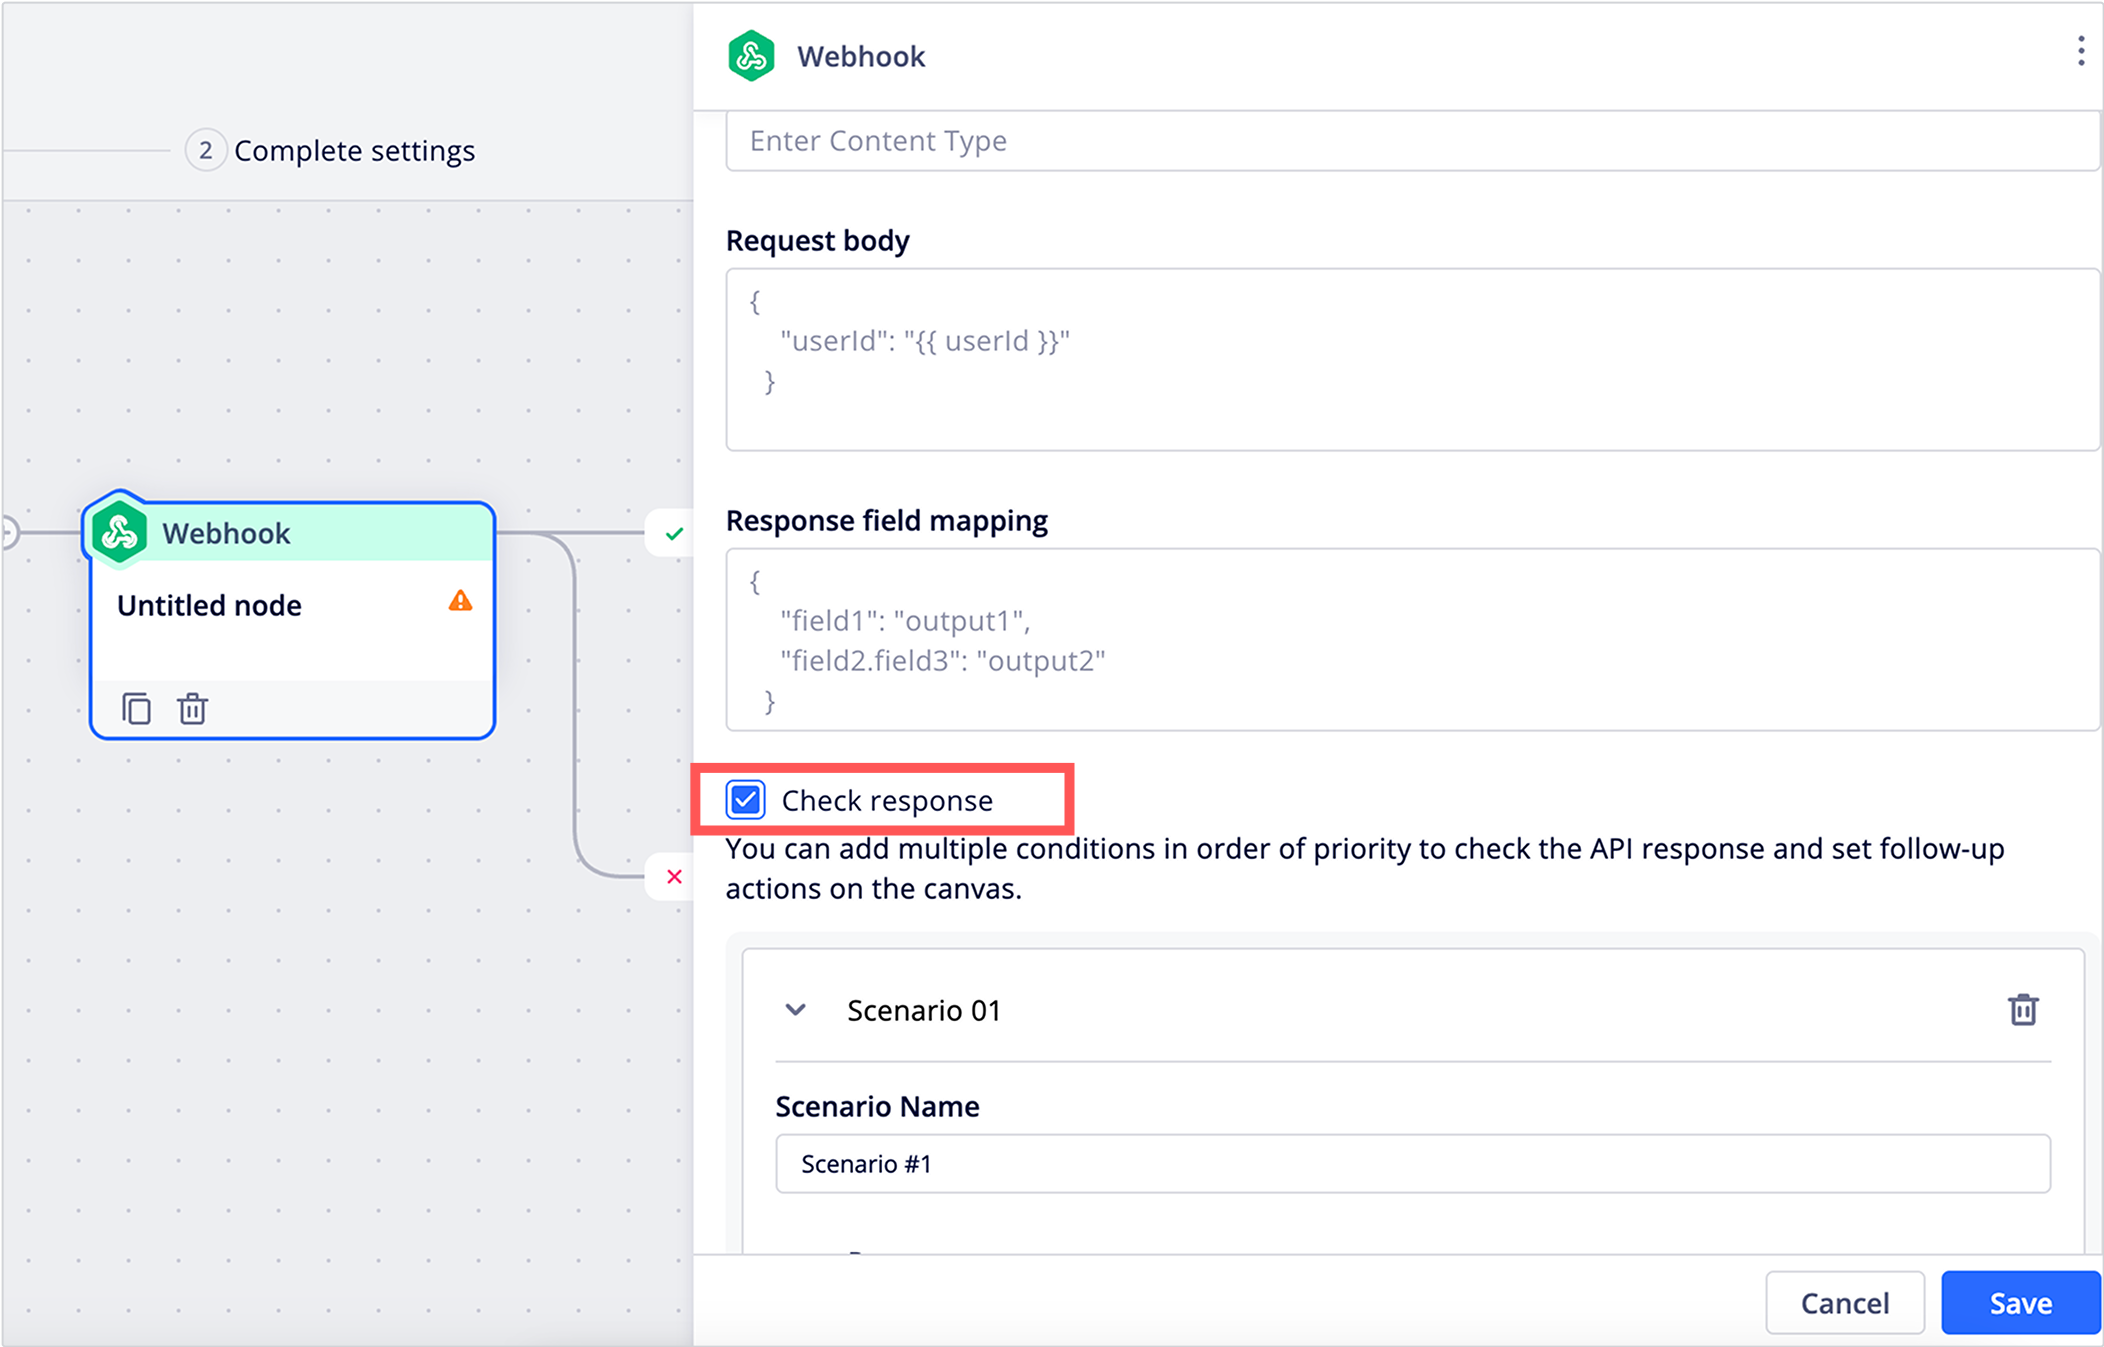
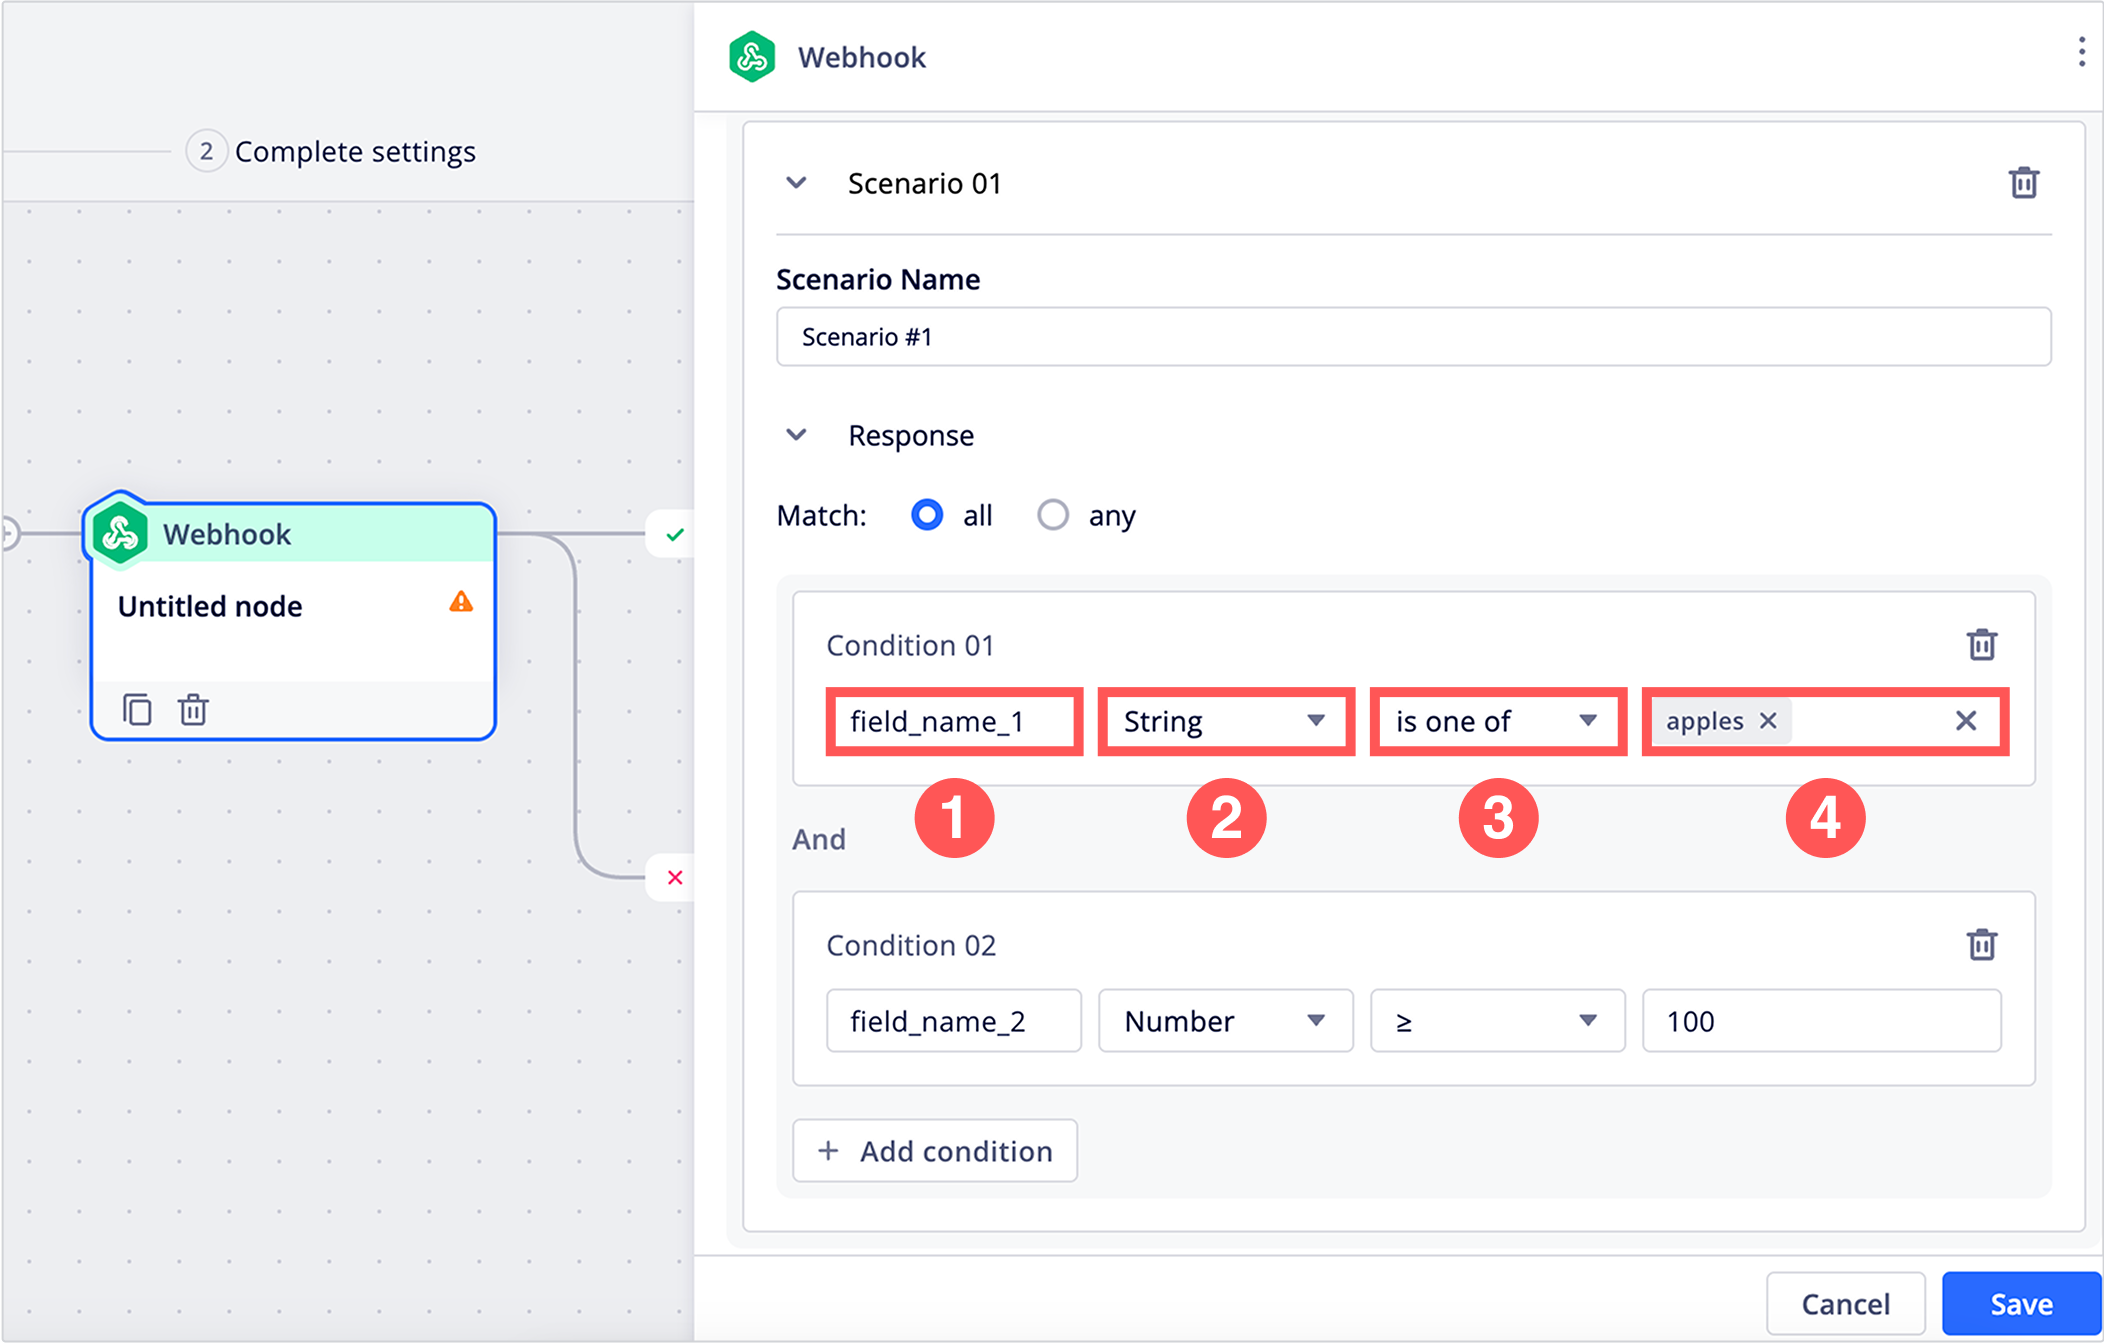
Select Check response to start creating scenarios to split users by. In a scenario, you can add one or more conditions based on the webhook's responses.
In each scenario, next to Match, determine whether users need to satisfy all conditions or any conditions in the scenario to split into the scenario.

Next, for each condition in the scenario, configure the following:
- Field name: Enter the name of the field in the webhook response.
- Data type: Select the field's data type.
- Operator: Select the operator used to evaluate the field's value. The data type you selected determines what operators are available.
- Value: Enter the value to compare the field's value against.
After adding the desired scenarios and conditions, click Save.
Using webhook fields to populate dynamic content
Use the syntax provided in the following table to insert dynamic content in your campaign. Note that the syntax will differ depending on the campaign channel.
| Campaign channel | Dynamic content syntax |
|---|---|
| • Web push • App push • SMS • In-app • In-web | {{ctx_<WEBHOOK_RESPONSE_FIELD_NAME>}} Replace <WEBHOOK_RESPONSE_FIELD_NAME> with one of the values you specified in the response field mapping. 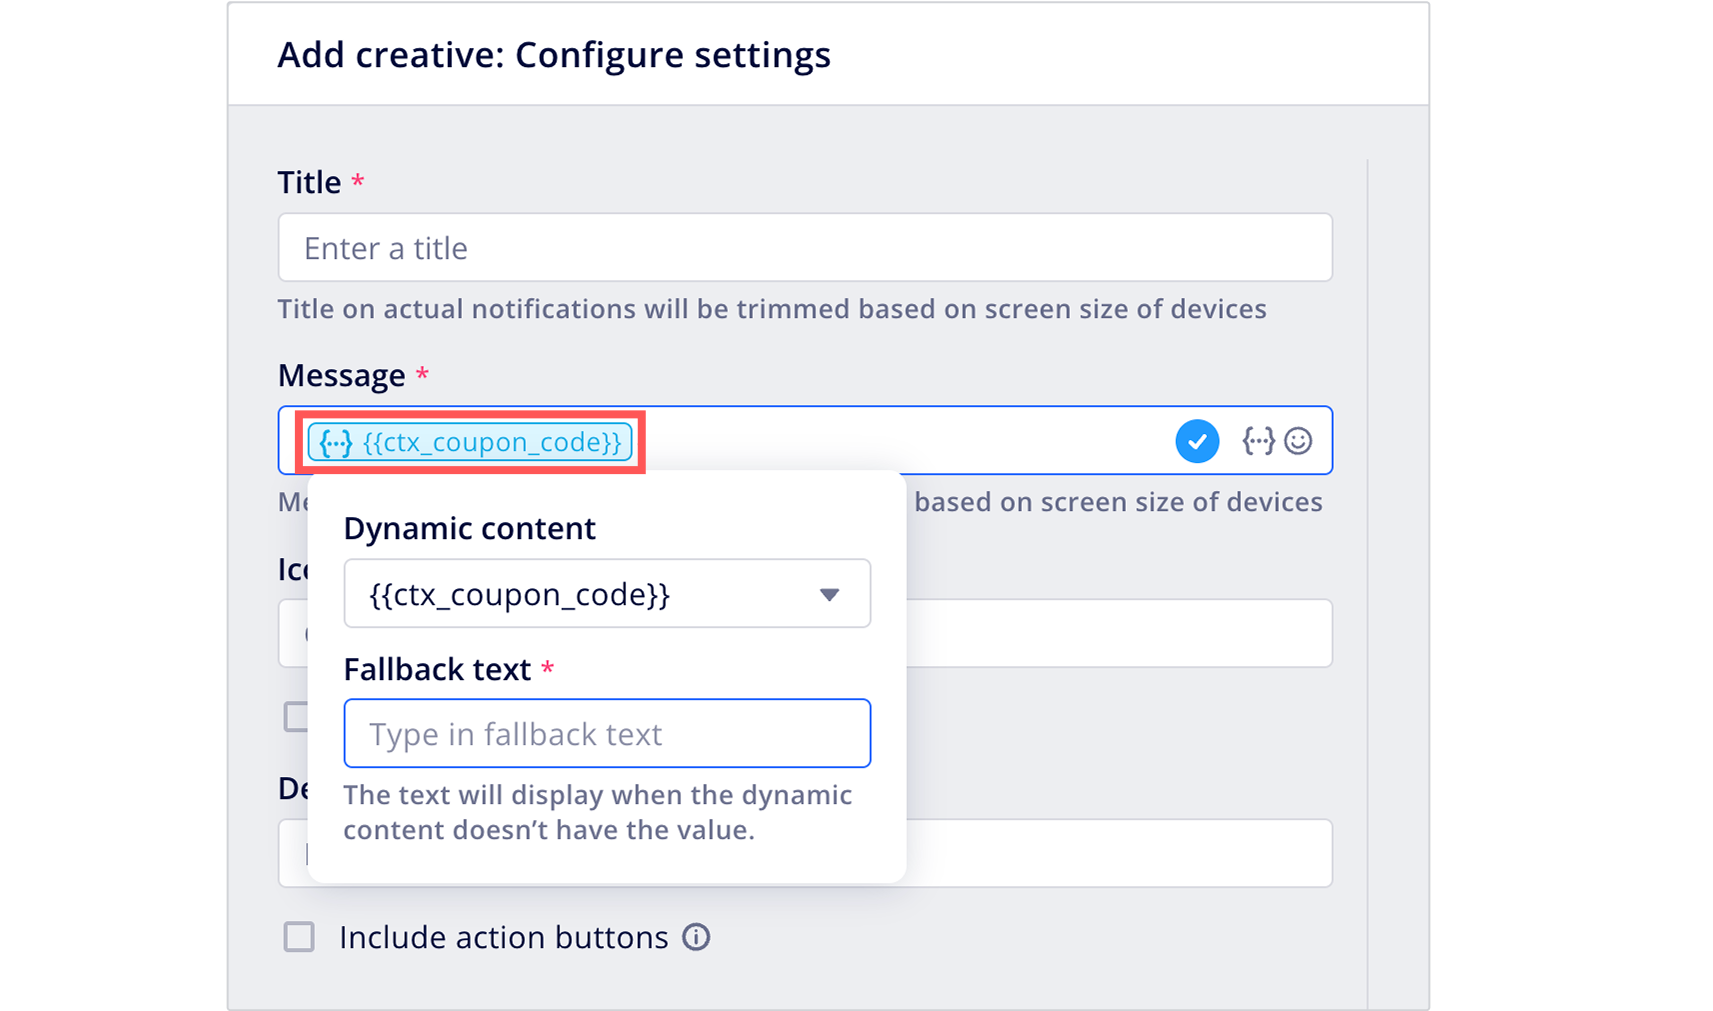 |
| • LINE • WebChat • Zalo • Viber | {{extra_params_<WEBHOOK_RESPONSE_FIELD_NAME>}} Replace <WEBHOOK_RESPONSE_FIELD_NAME> with one of the values you specified in the response field mapping. 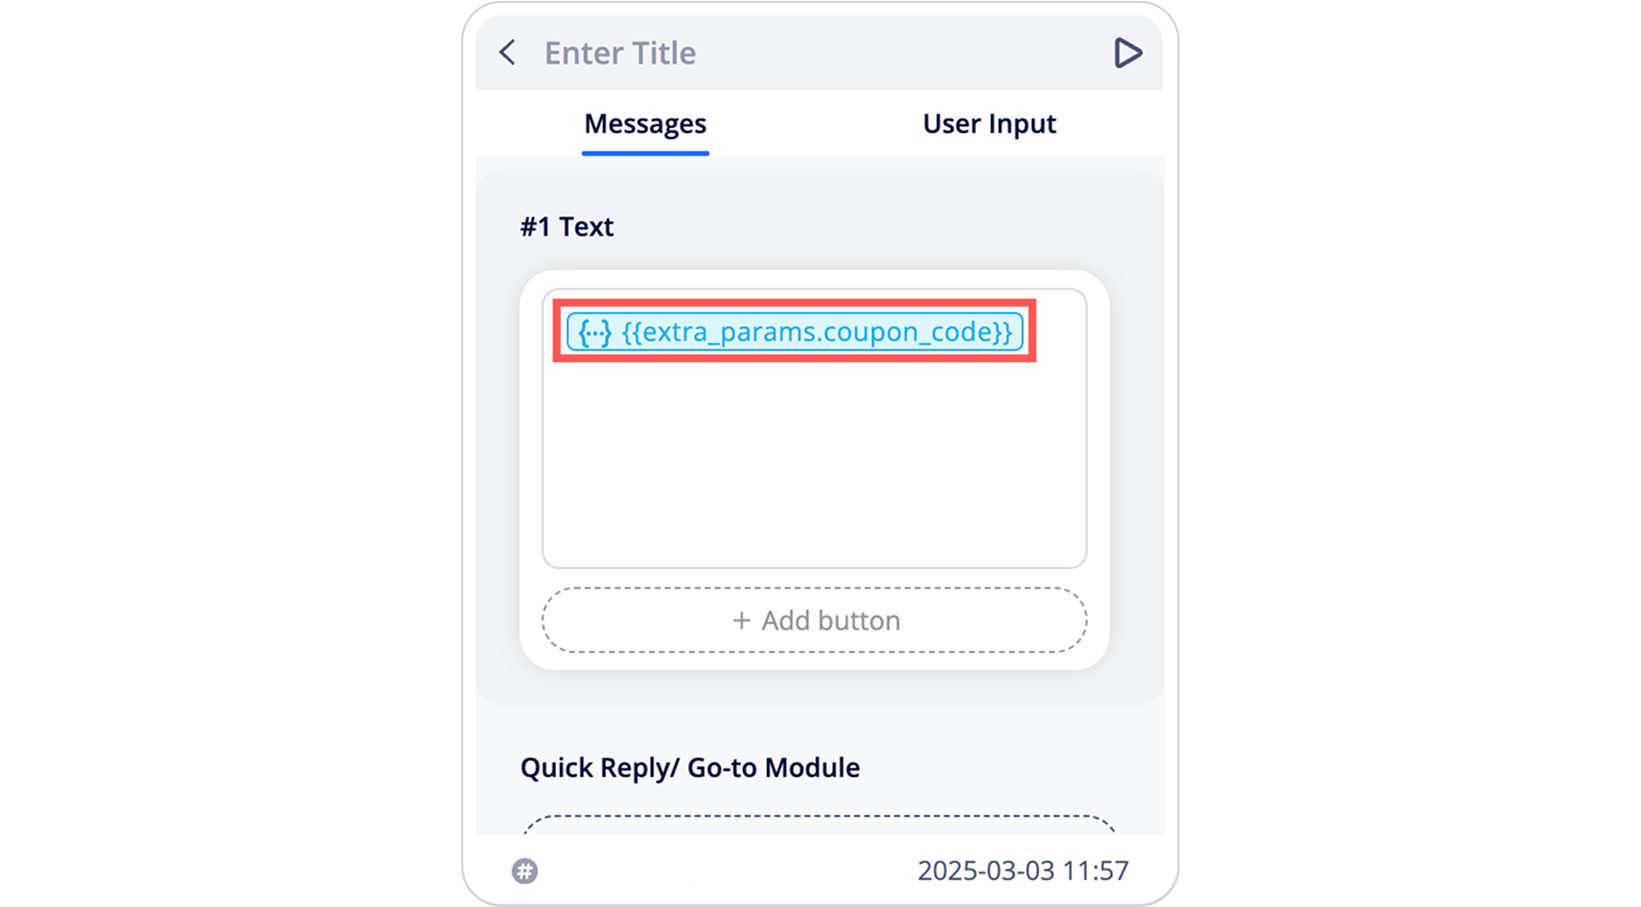 |
Updated 11 months ago