Deliver personalized onboarding journeys
Background
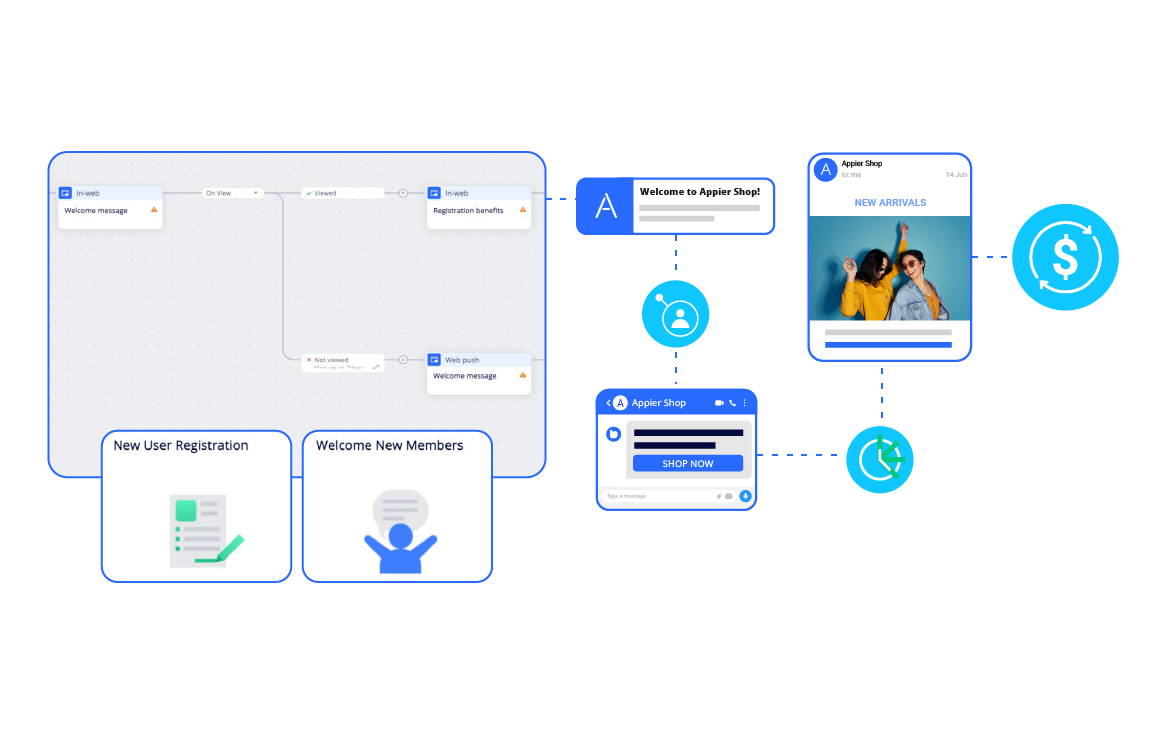
A user visiting your website is just the initial step in the customer journey. To truly convert visitors into valuable customers for your brand, it's imperative to provide personalized engagement at the right moment. This personalized approach ensures that customers feel valued and understood, increasing the likelihood of conversion and fostering long-term brand loyalty.
Objective
How can I provide personalized onboarding journeys to new visitors?
Challenges
- Identifying the right timing to engage with new users based on their real-time behavior.
- Inability to offer a scalable cross-channel onboarding journey.
Appier's solution
- Products: AIQUA + BotBonnie
- Feature: Journey map
- Appier's journey maps utilize an omni-channel customer journey builder, enabling you to quickly launch personalized, comprehensive campaigns across Appier's supported marketing channels.
- Strengths:
- Enables comprehensive cross-channel user journeys, allowing for personalized engagement based on individual user behavior and preferences.
- Seamlessly integrates user data across various channels to provide a holistic, 360-degree customer view of user profiles, allowing for more targeted engagement strategies.
- Provides a user-friendly drag-and-drop editor that facilitates intuitive customization without the need for coding expertise.
Setup guide
TipTo learn more about different ways to create journey maps, and how to configure settings in detail, see Creating a Journey Map.
1. Create a "New user registration" journey map
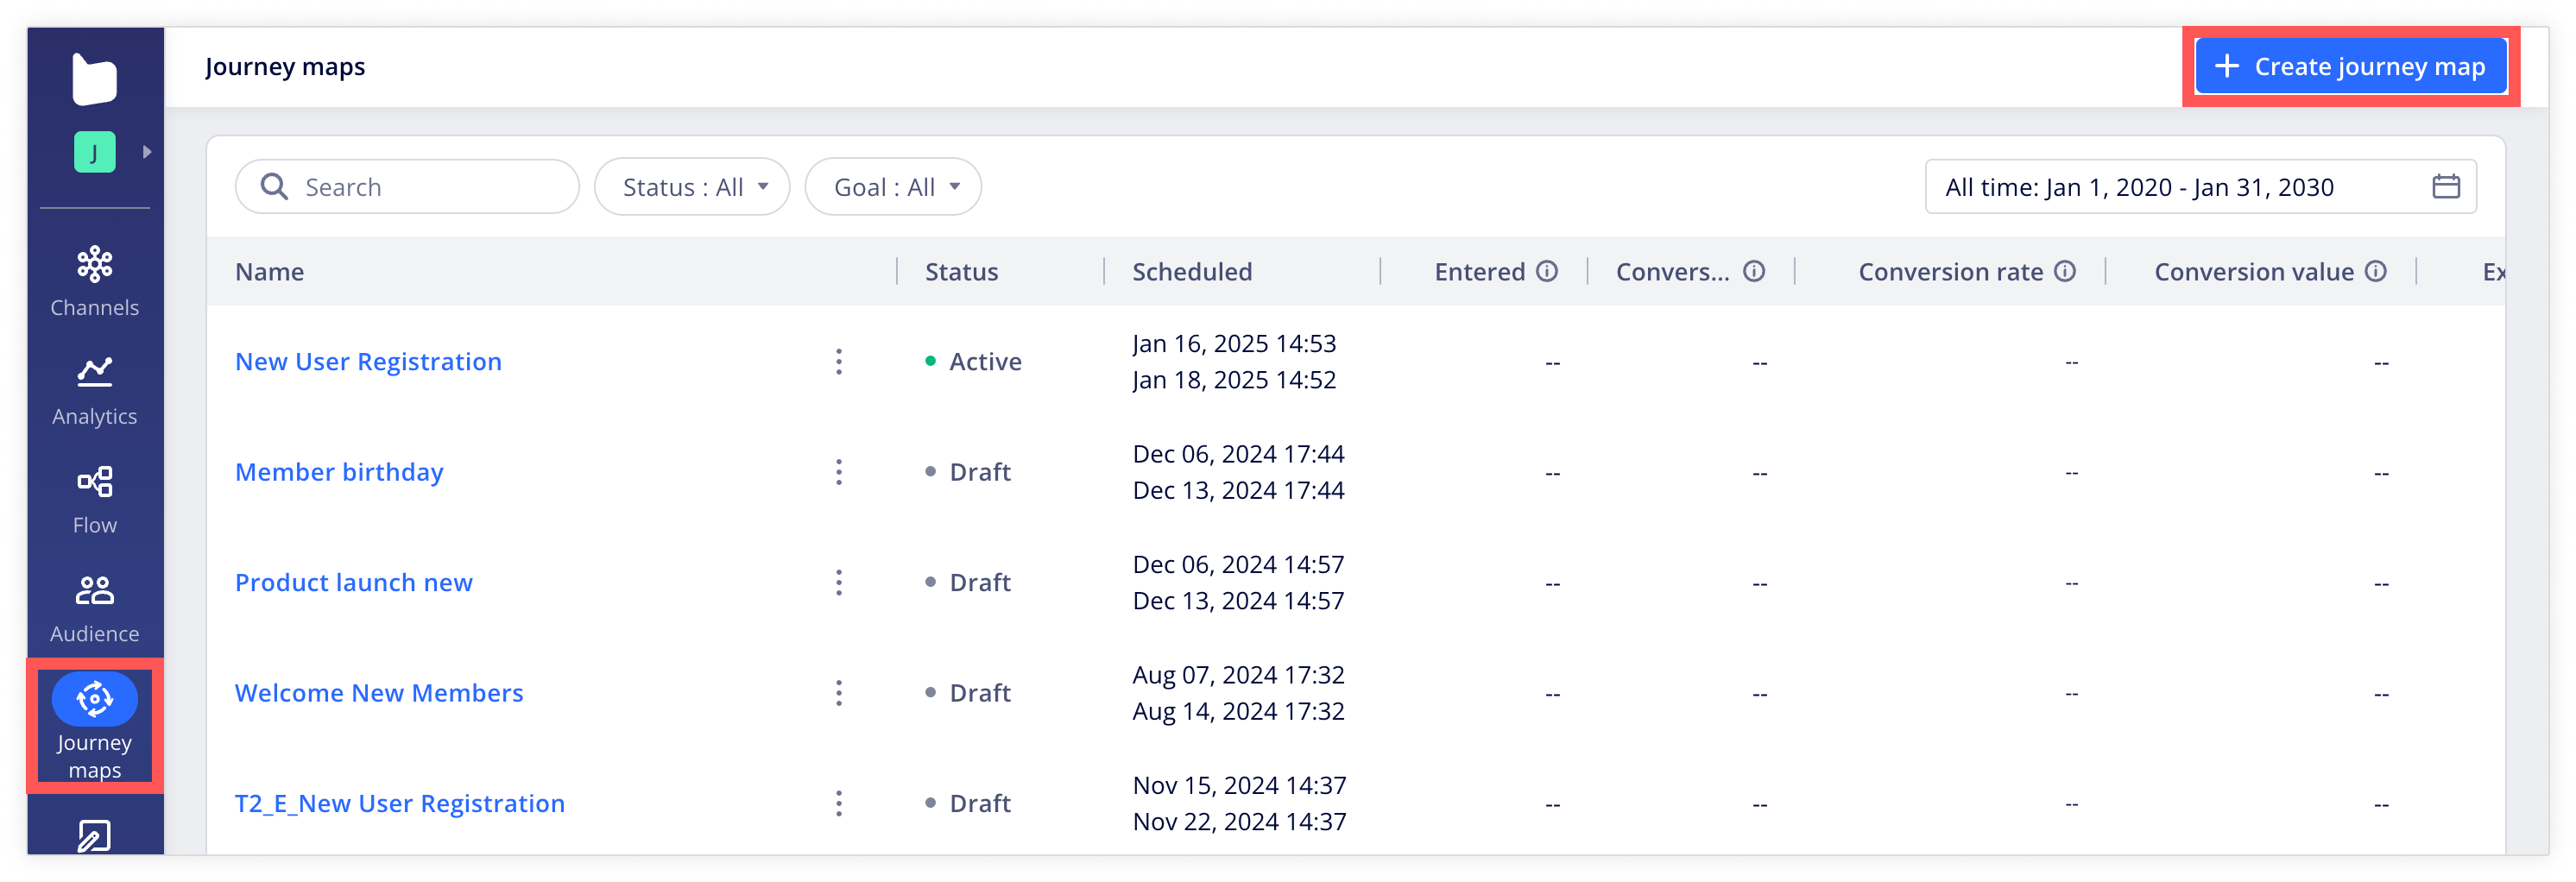
From the navigation sidebar, click Journey maps > + Create journey map.
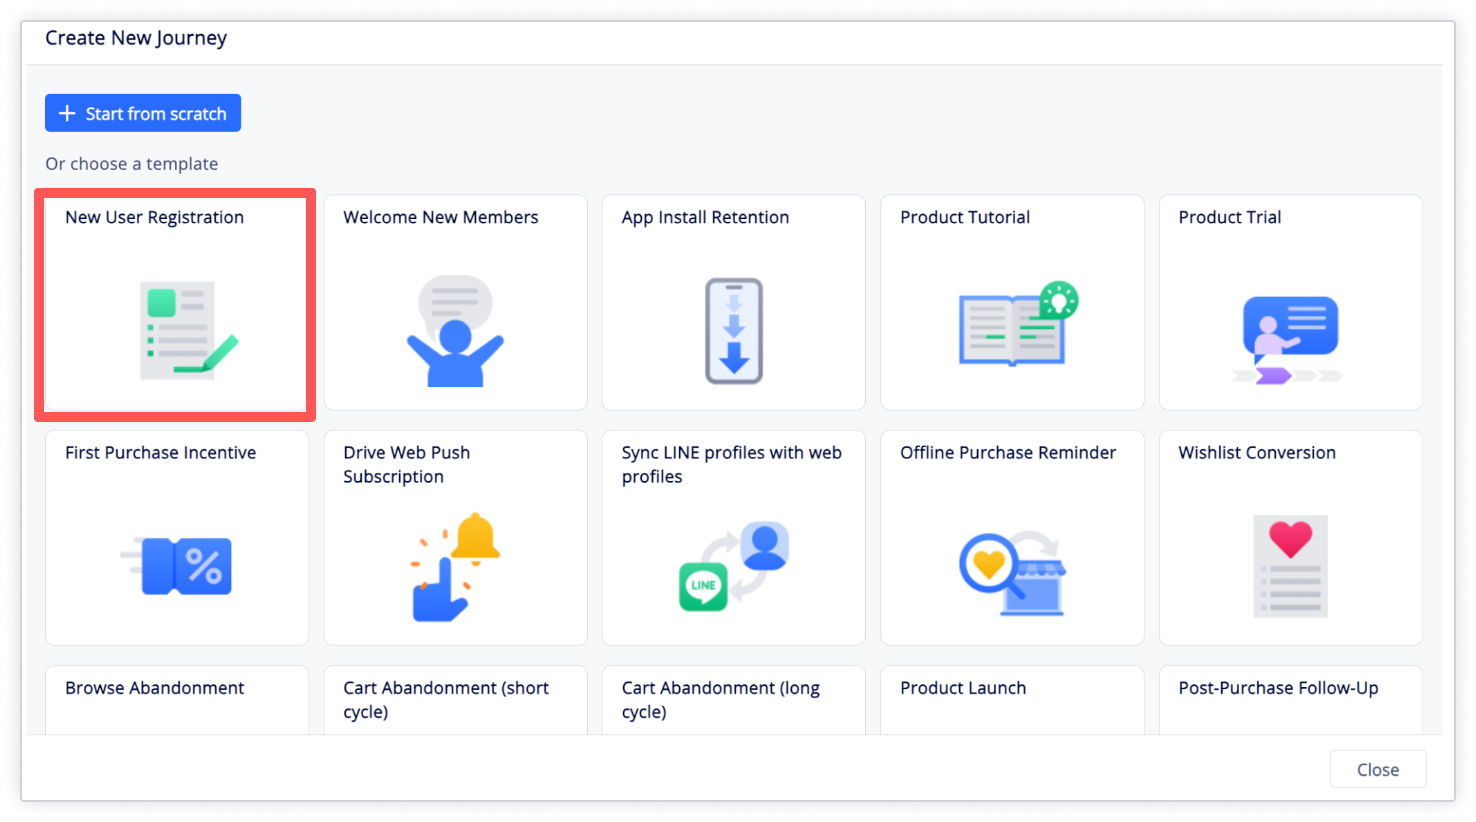
Next, choose a journey creation method by selecting the New User Registration template.
2. Customize the "New user registration" journey map
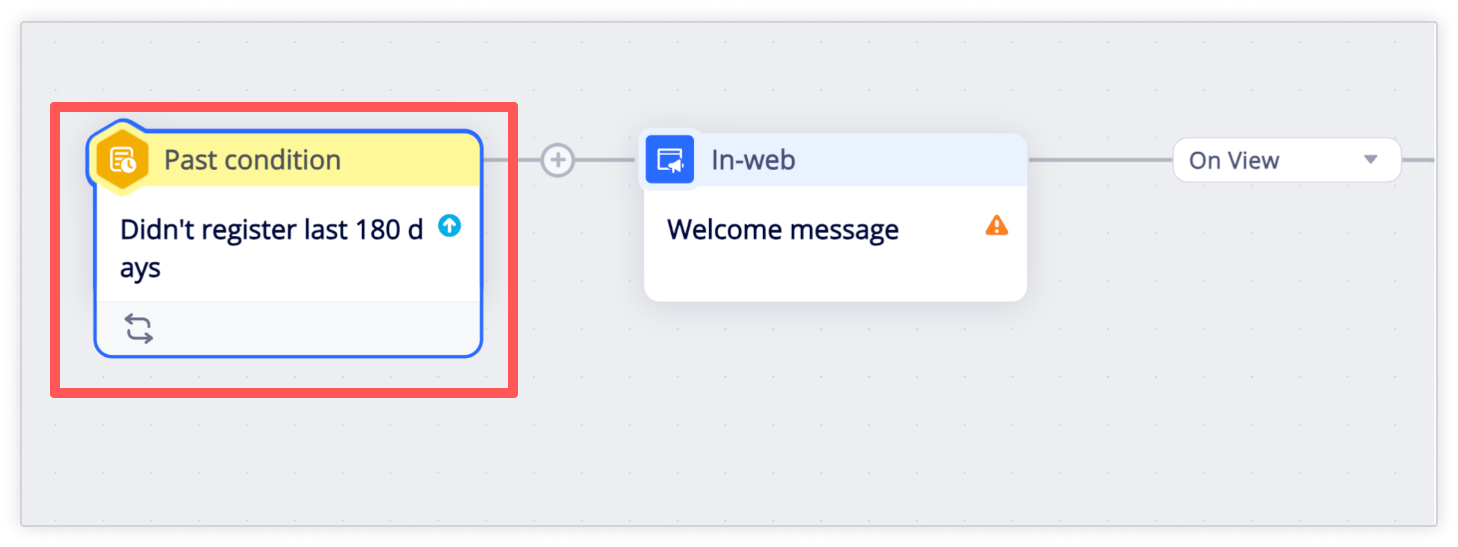
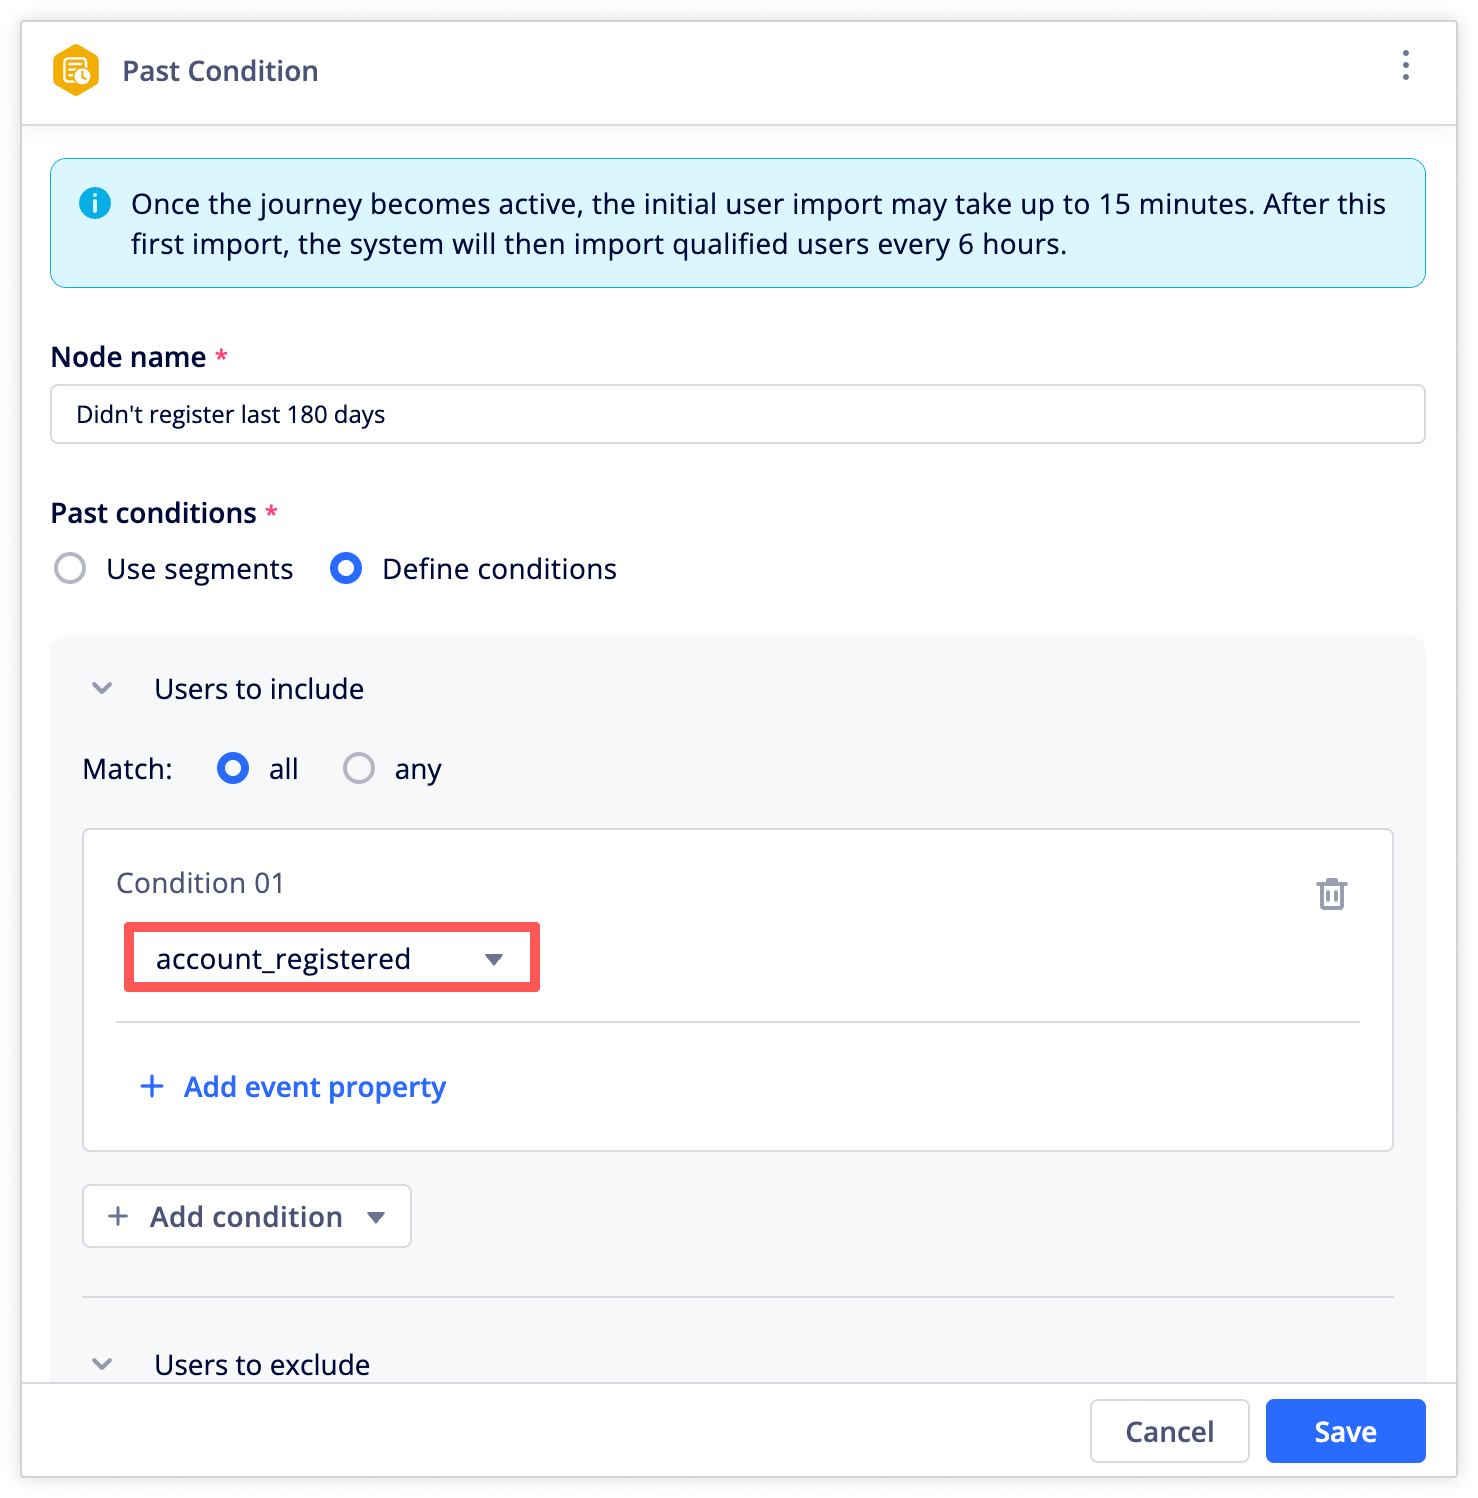
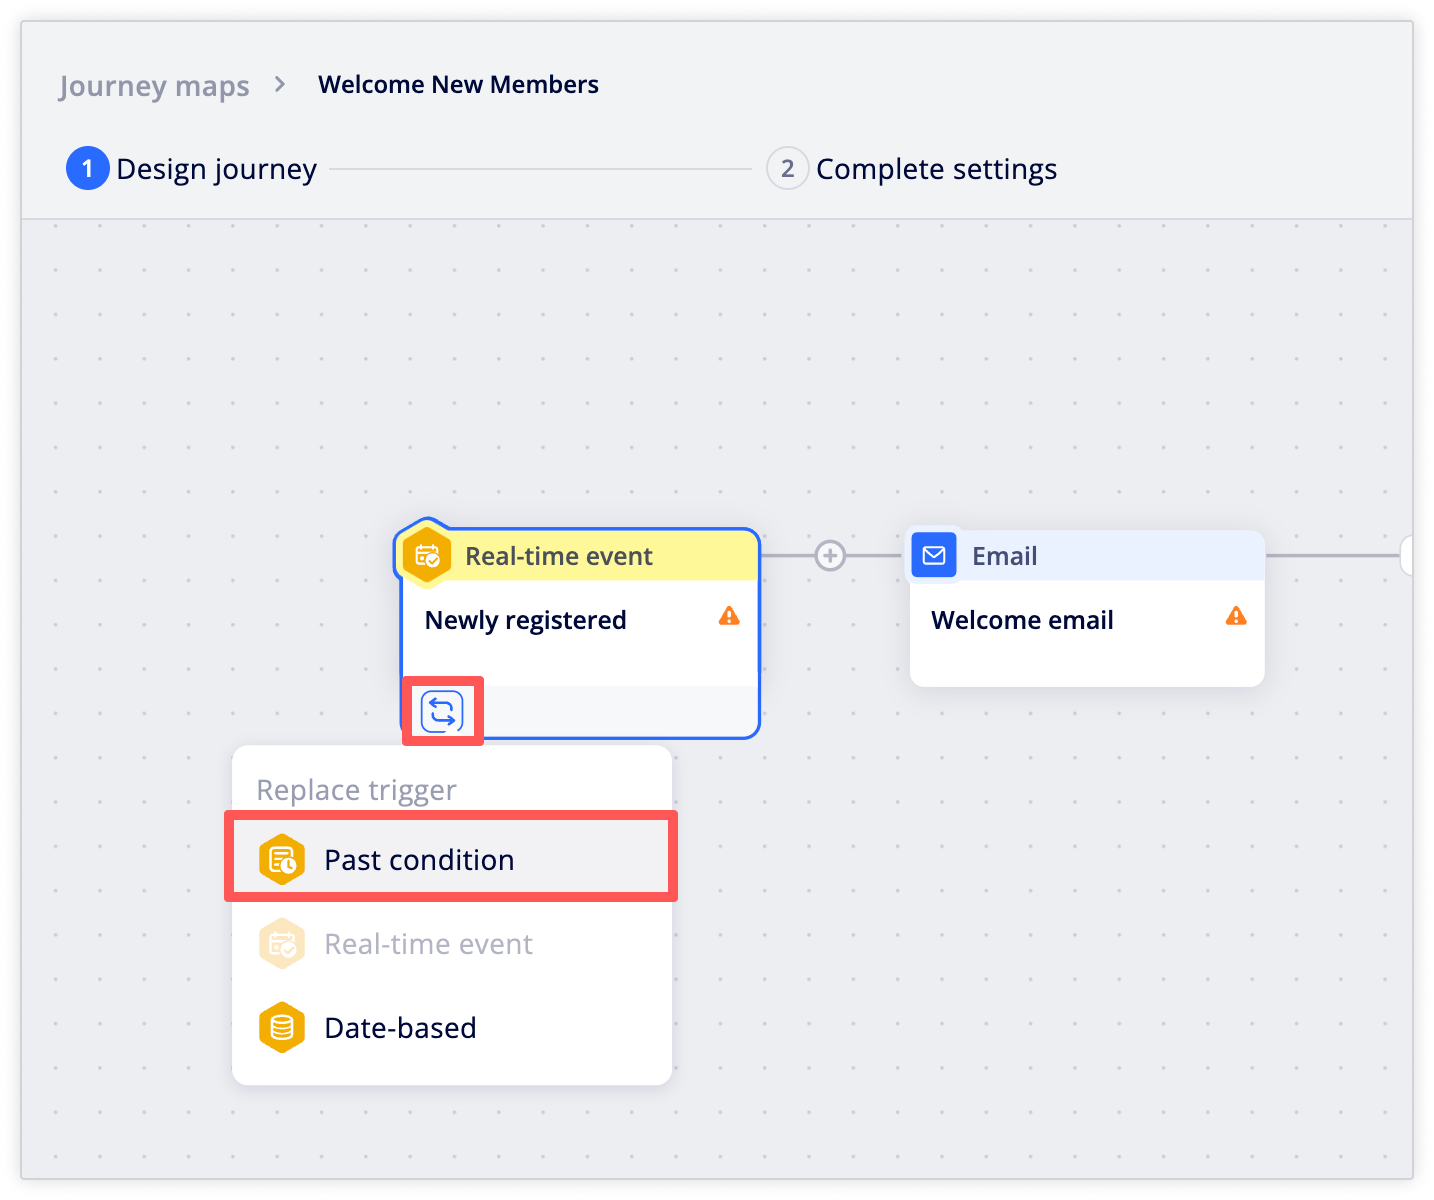
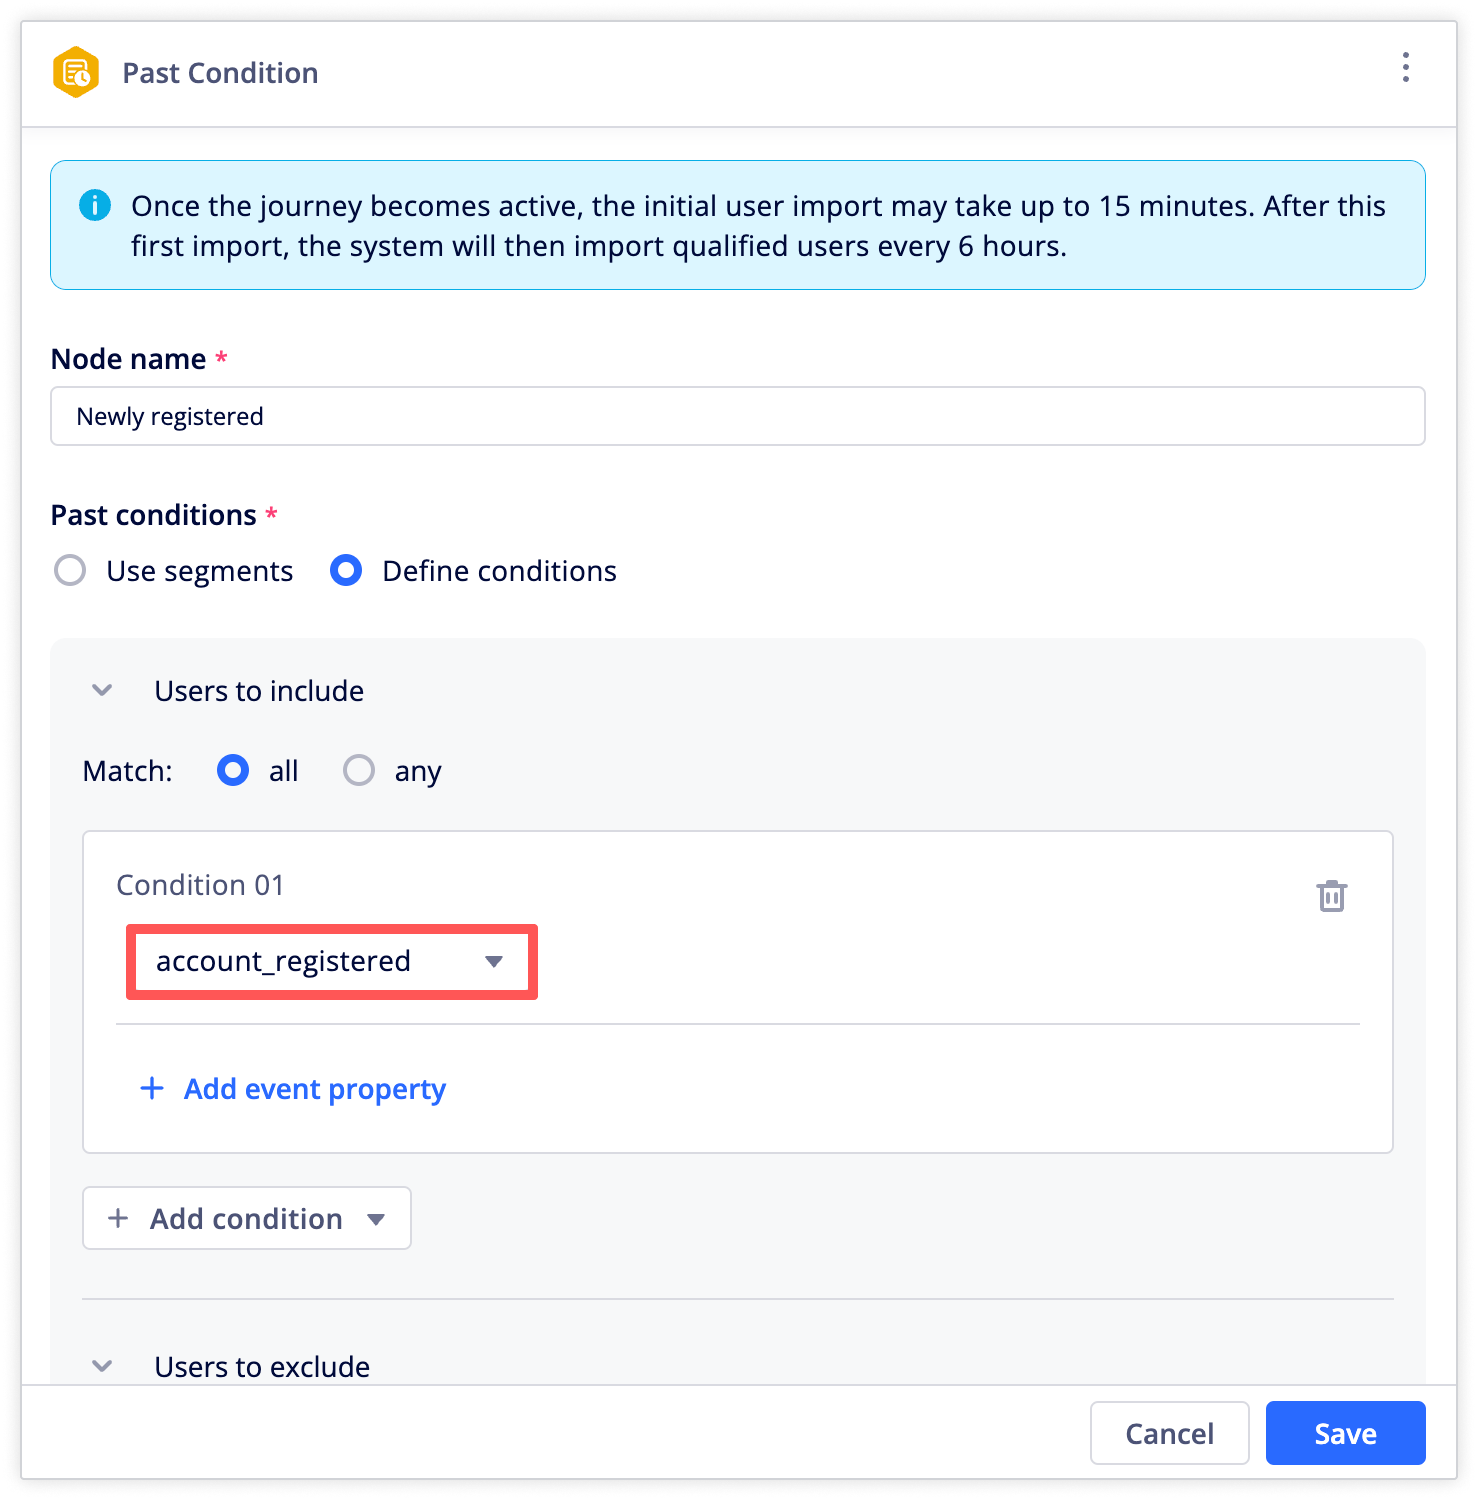
- Set an entry point. In this example, we select Past condition to exclude users who have registered within the last 180 days.
Logging eventsTo complete this node's setting, you’ll need to log a user registration event from your website in advance. For more information on how to log user events on your website, please refer to Logging User Data for Web.
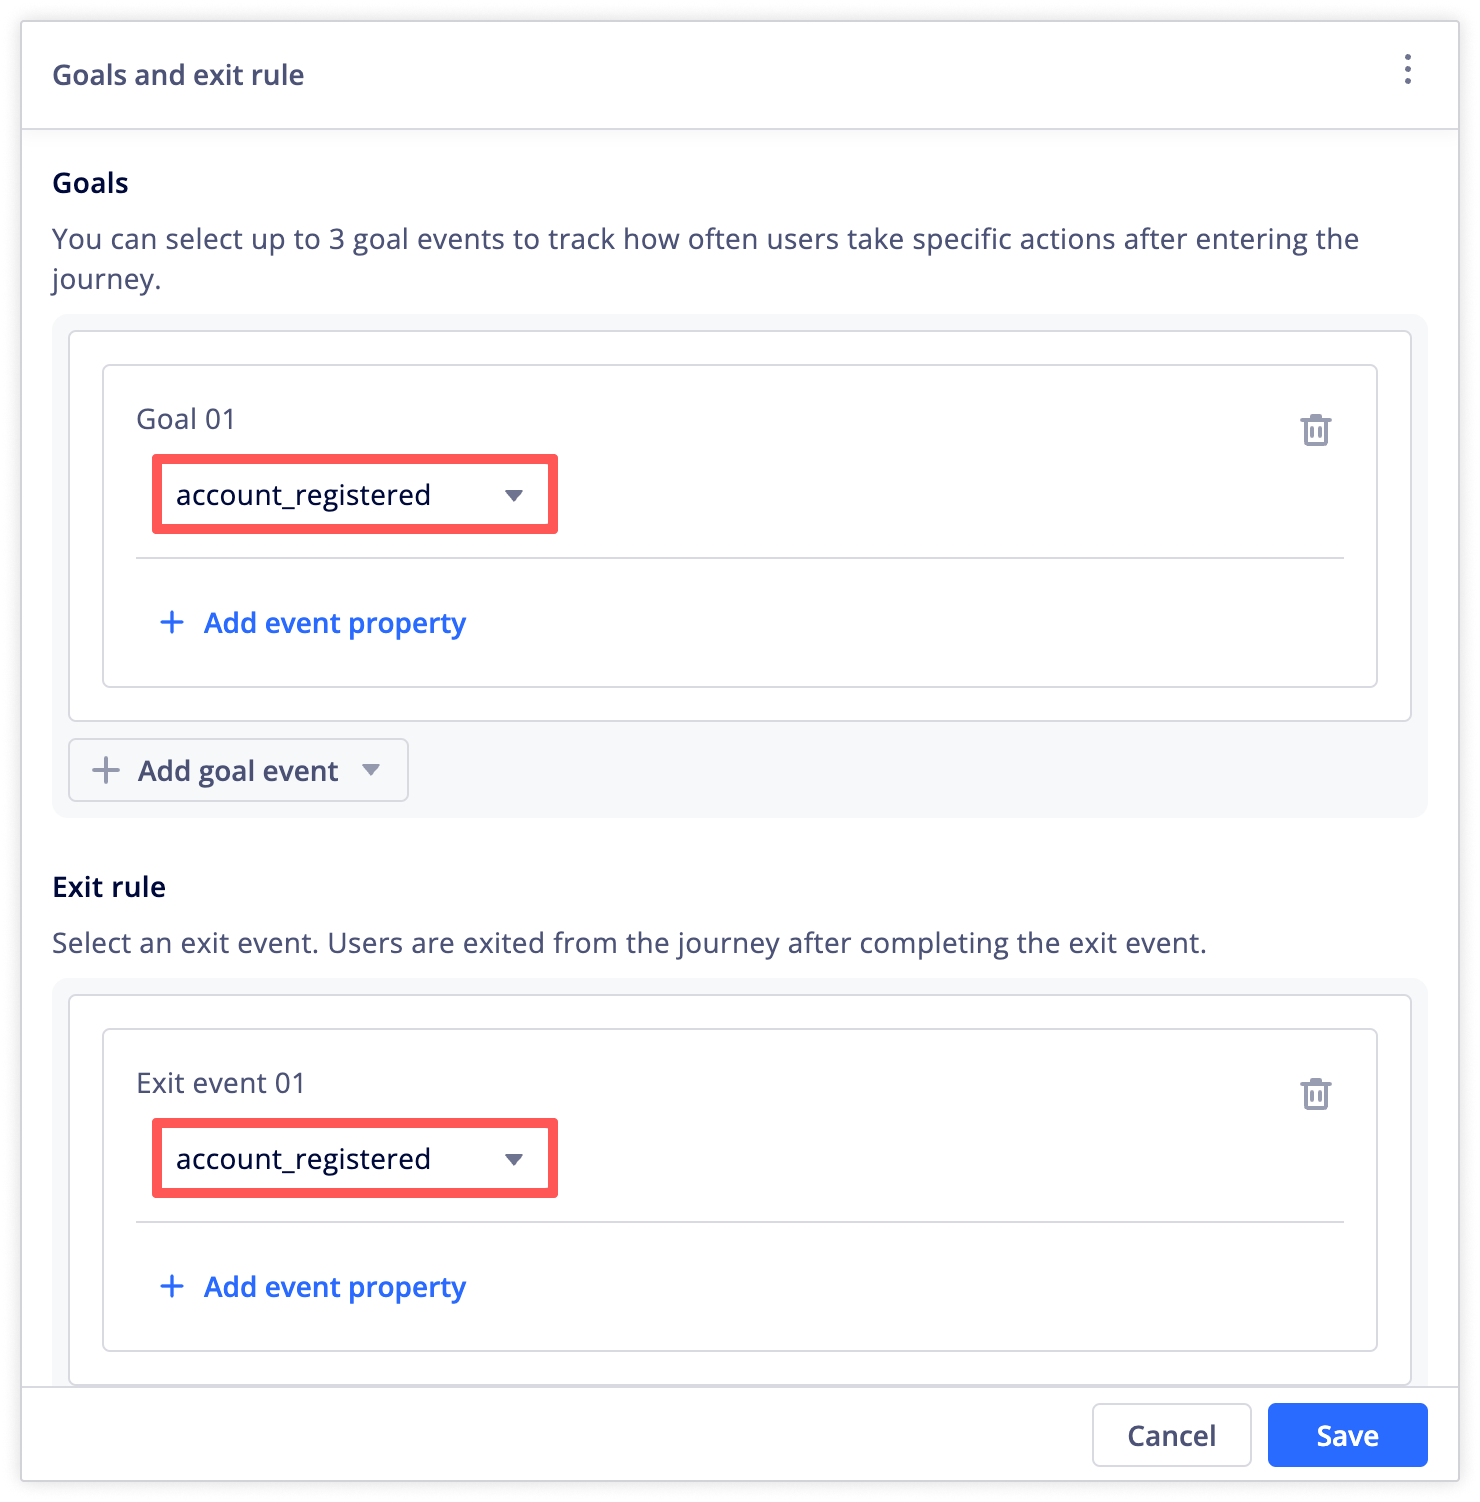
- Set up goal events for performance tracking. In this example, we set
account_registeredas the goal event and exit rule, allowing users to exit the journey after registering an account.
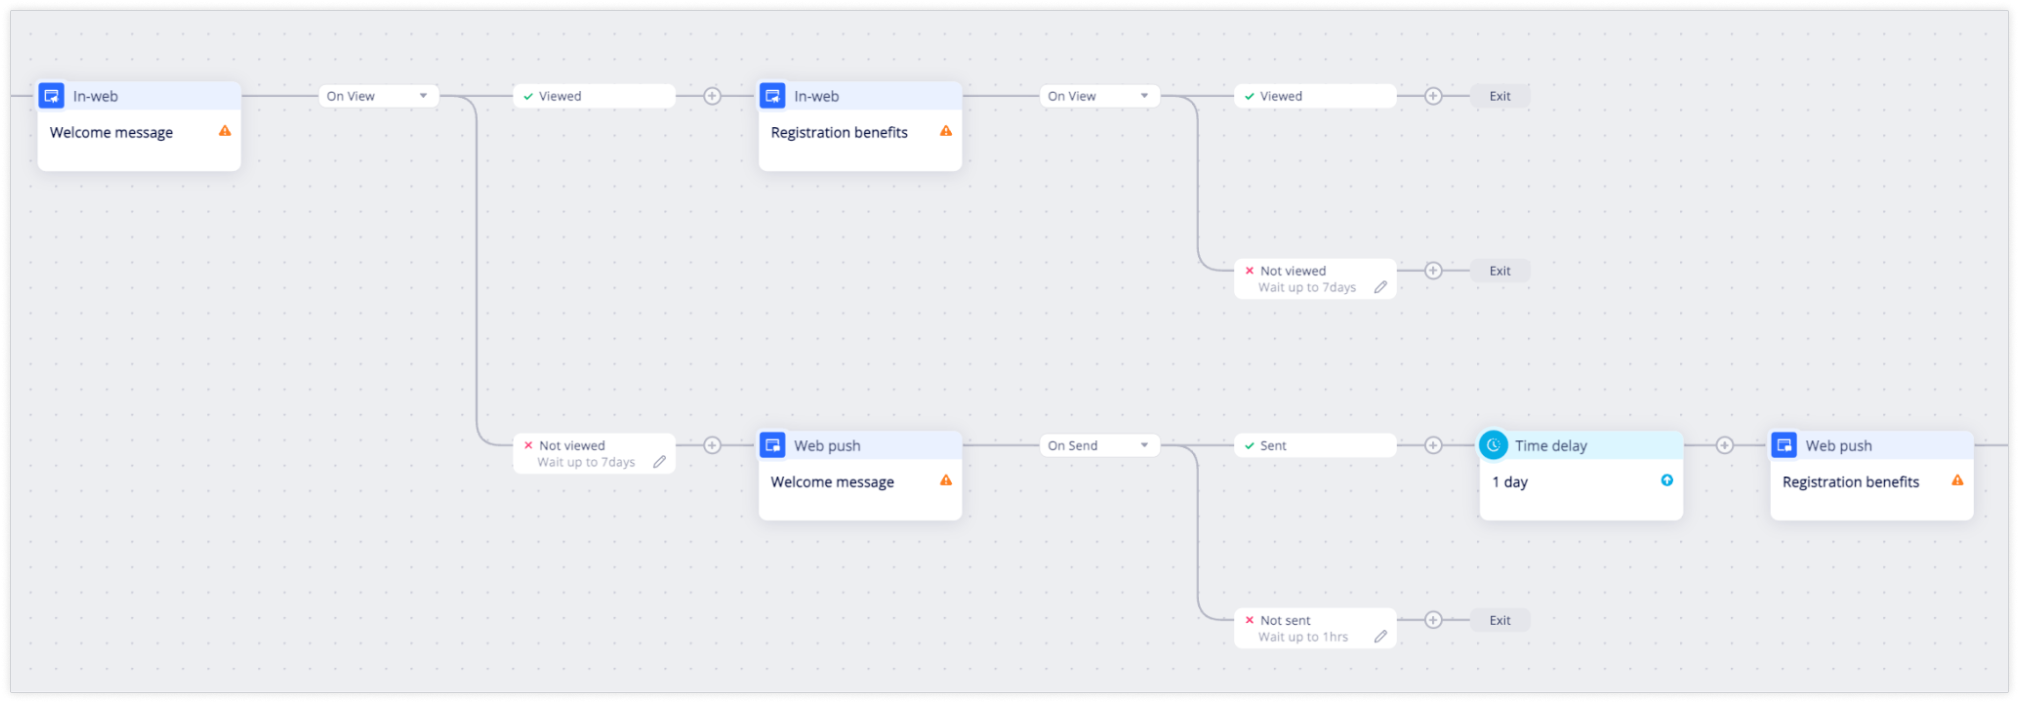
- Finally, customize the messages in the nodes for each channel. For instance, begin with a warm welcome message followed by a promotion highlighting the benefits of registering to encourage users to join as members.
3. Create a "Welcome new members" journey map
Once the user has successfully registered, you might want to deliver a welcome journey to educate the newly registered user about your brand and products to drive the first conversion.
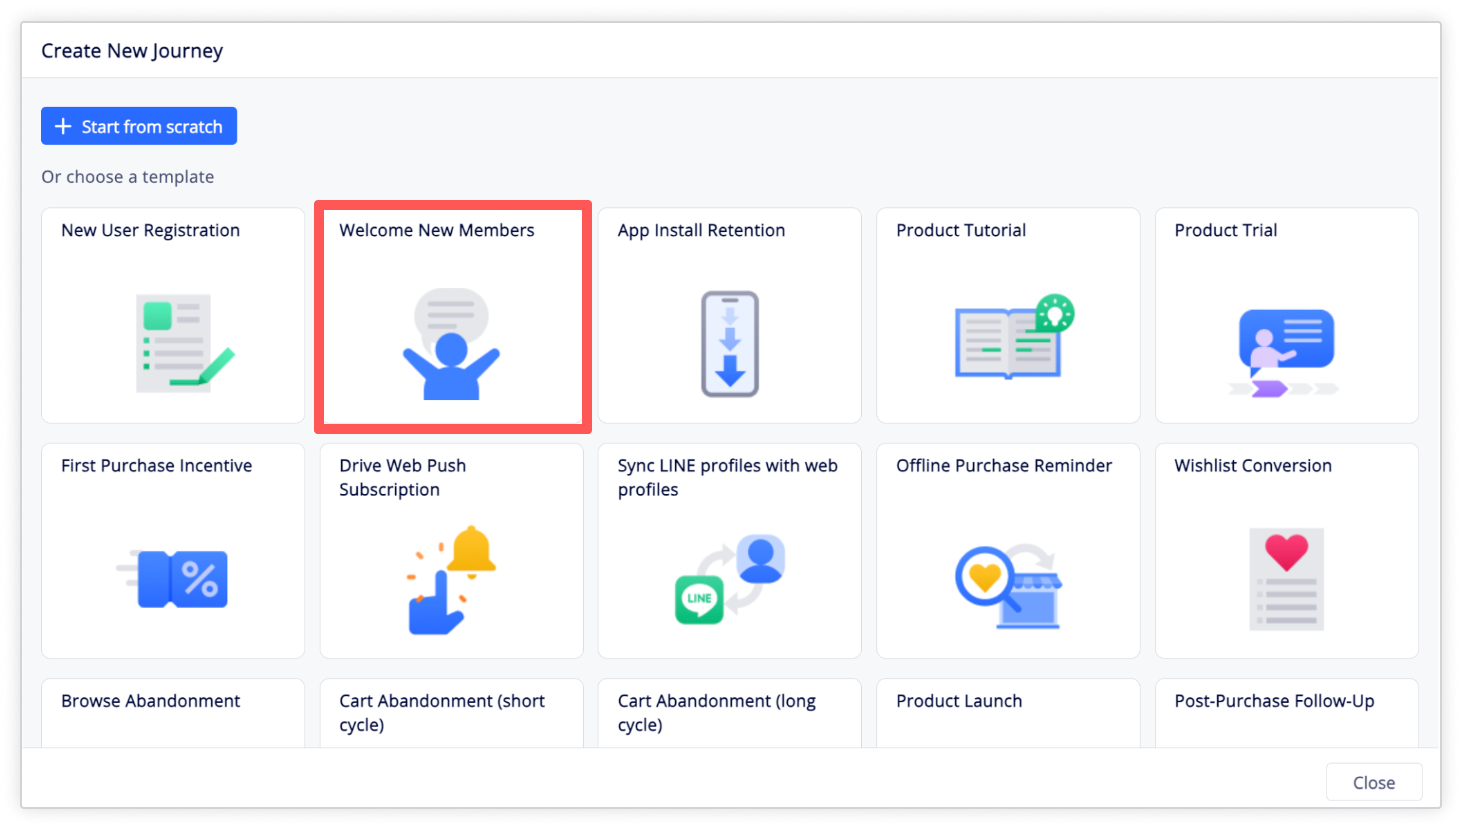
From the left navigation bar, click Journey maps, then click + Create journey map.
Next, select the Welcome new members template.
4. Customize the "Welcome new members" journey map
- Set an entry point. In this example, we modify the template's entry trigger to a Past condition that only allows users who registered in the last 10 days to enter the journey.
- Set up goal events for performance tracking. In this journey, the goal events used for performance tracking are
checkout_completedandproduct_added_to_cart. The exit rule is based on thecheckout_completedevents, so users exit the journey after completing a checkout.

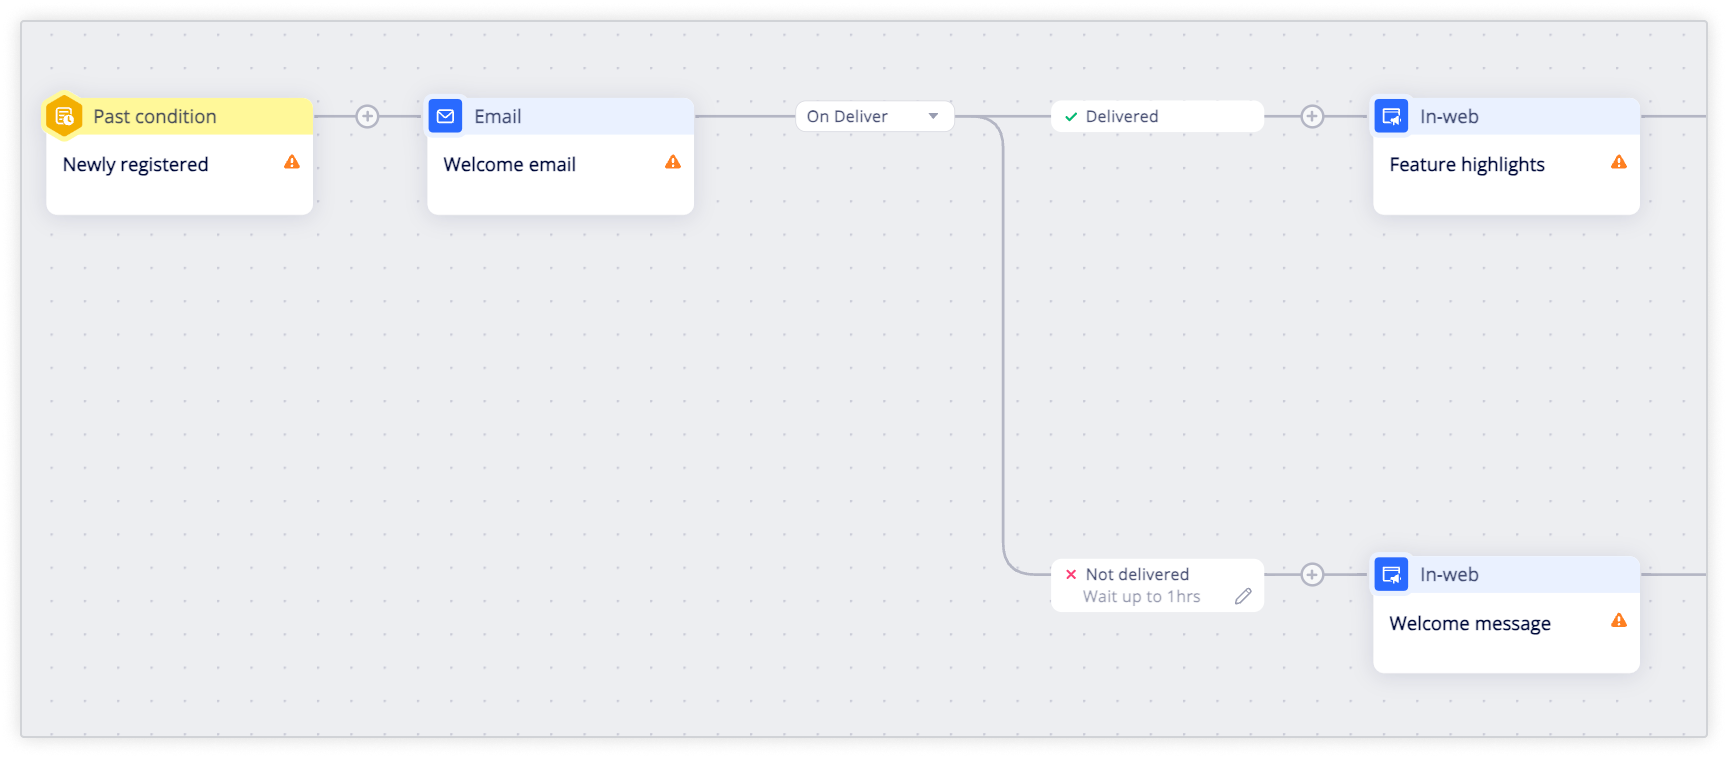
- Finally, customize the messages in the nodes for each channel. For instance, begin with a welcome email followed by an in-web pop-up campaign highlighting key product features. Enhance the journey further by adding messages such as product recommendations, first-purchase incentives, or pop-up sales promotions.
5. Track each journey's performance
Appier’s journey maps provide comprehensive performance metrics and analytics that enable you to understand the effectiveness of your journeys. To learn more, see Journey Performance and Analytics.
Updated over 1 year ago