Add Journey Nodes
Overview
Each node in the journey map is a step in the user journey, and each node contains settings related to its specific purpose. For example, a message node contains campaign creative settings, while a split node contains logic for splitting users into different paths.
The first step in creating your journey is to add an entry trigger node, which specifies how users enter the journey. Next, continue customizing your journey by:
Add nodes
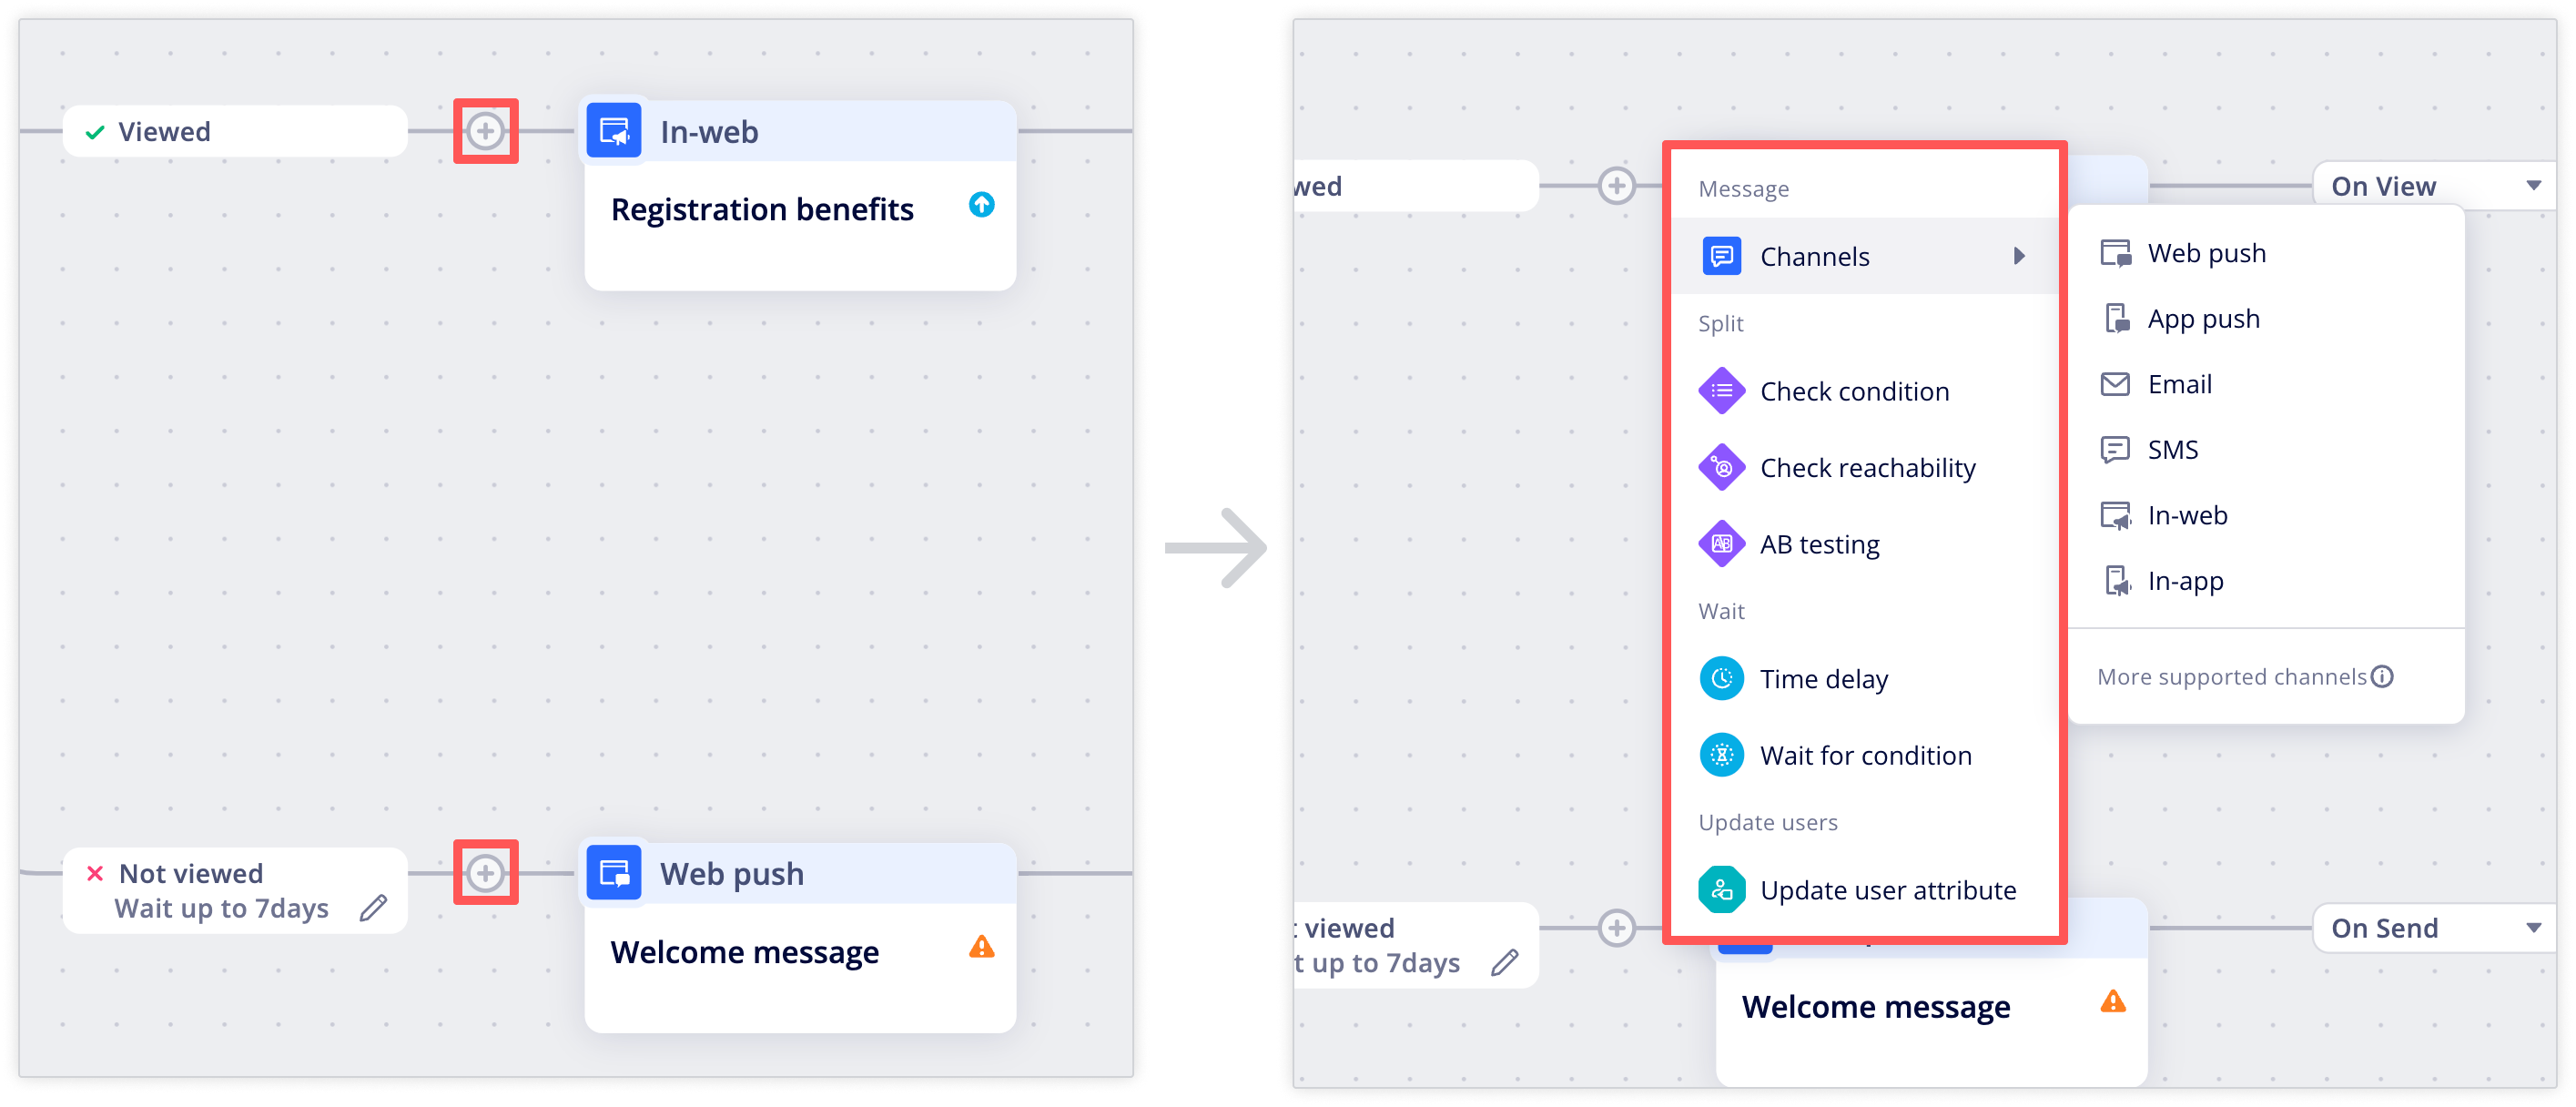
To add a node, click on the + that appears in the journey map. After clicking the add button, you'll be able to select one of the following node types:
- Entry trigger node: Specify how users will enter the journey. Only available as the first node in the journey. For details, see Entry Trigger Node.
- Message: Reach out to users across different channels. In a message node, you can set up the creative you want to send. For details, see Message Node.
- Split: Specify a condition that splits users into different paths. For details, see Split Node.
- Wait: Wait for a certain amount of time before continuing to the next node. For details, see Wait Node.
- Update users: Update user-related information. For details, see Update Users Node.
Edit nodes
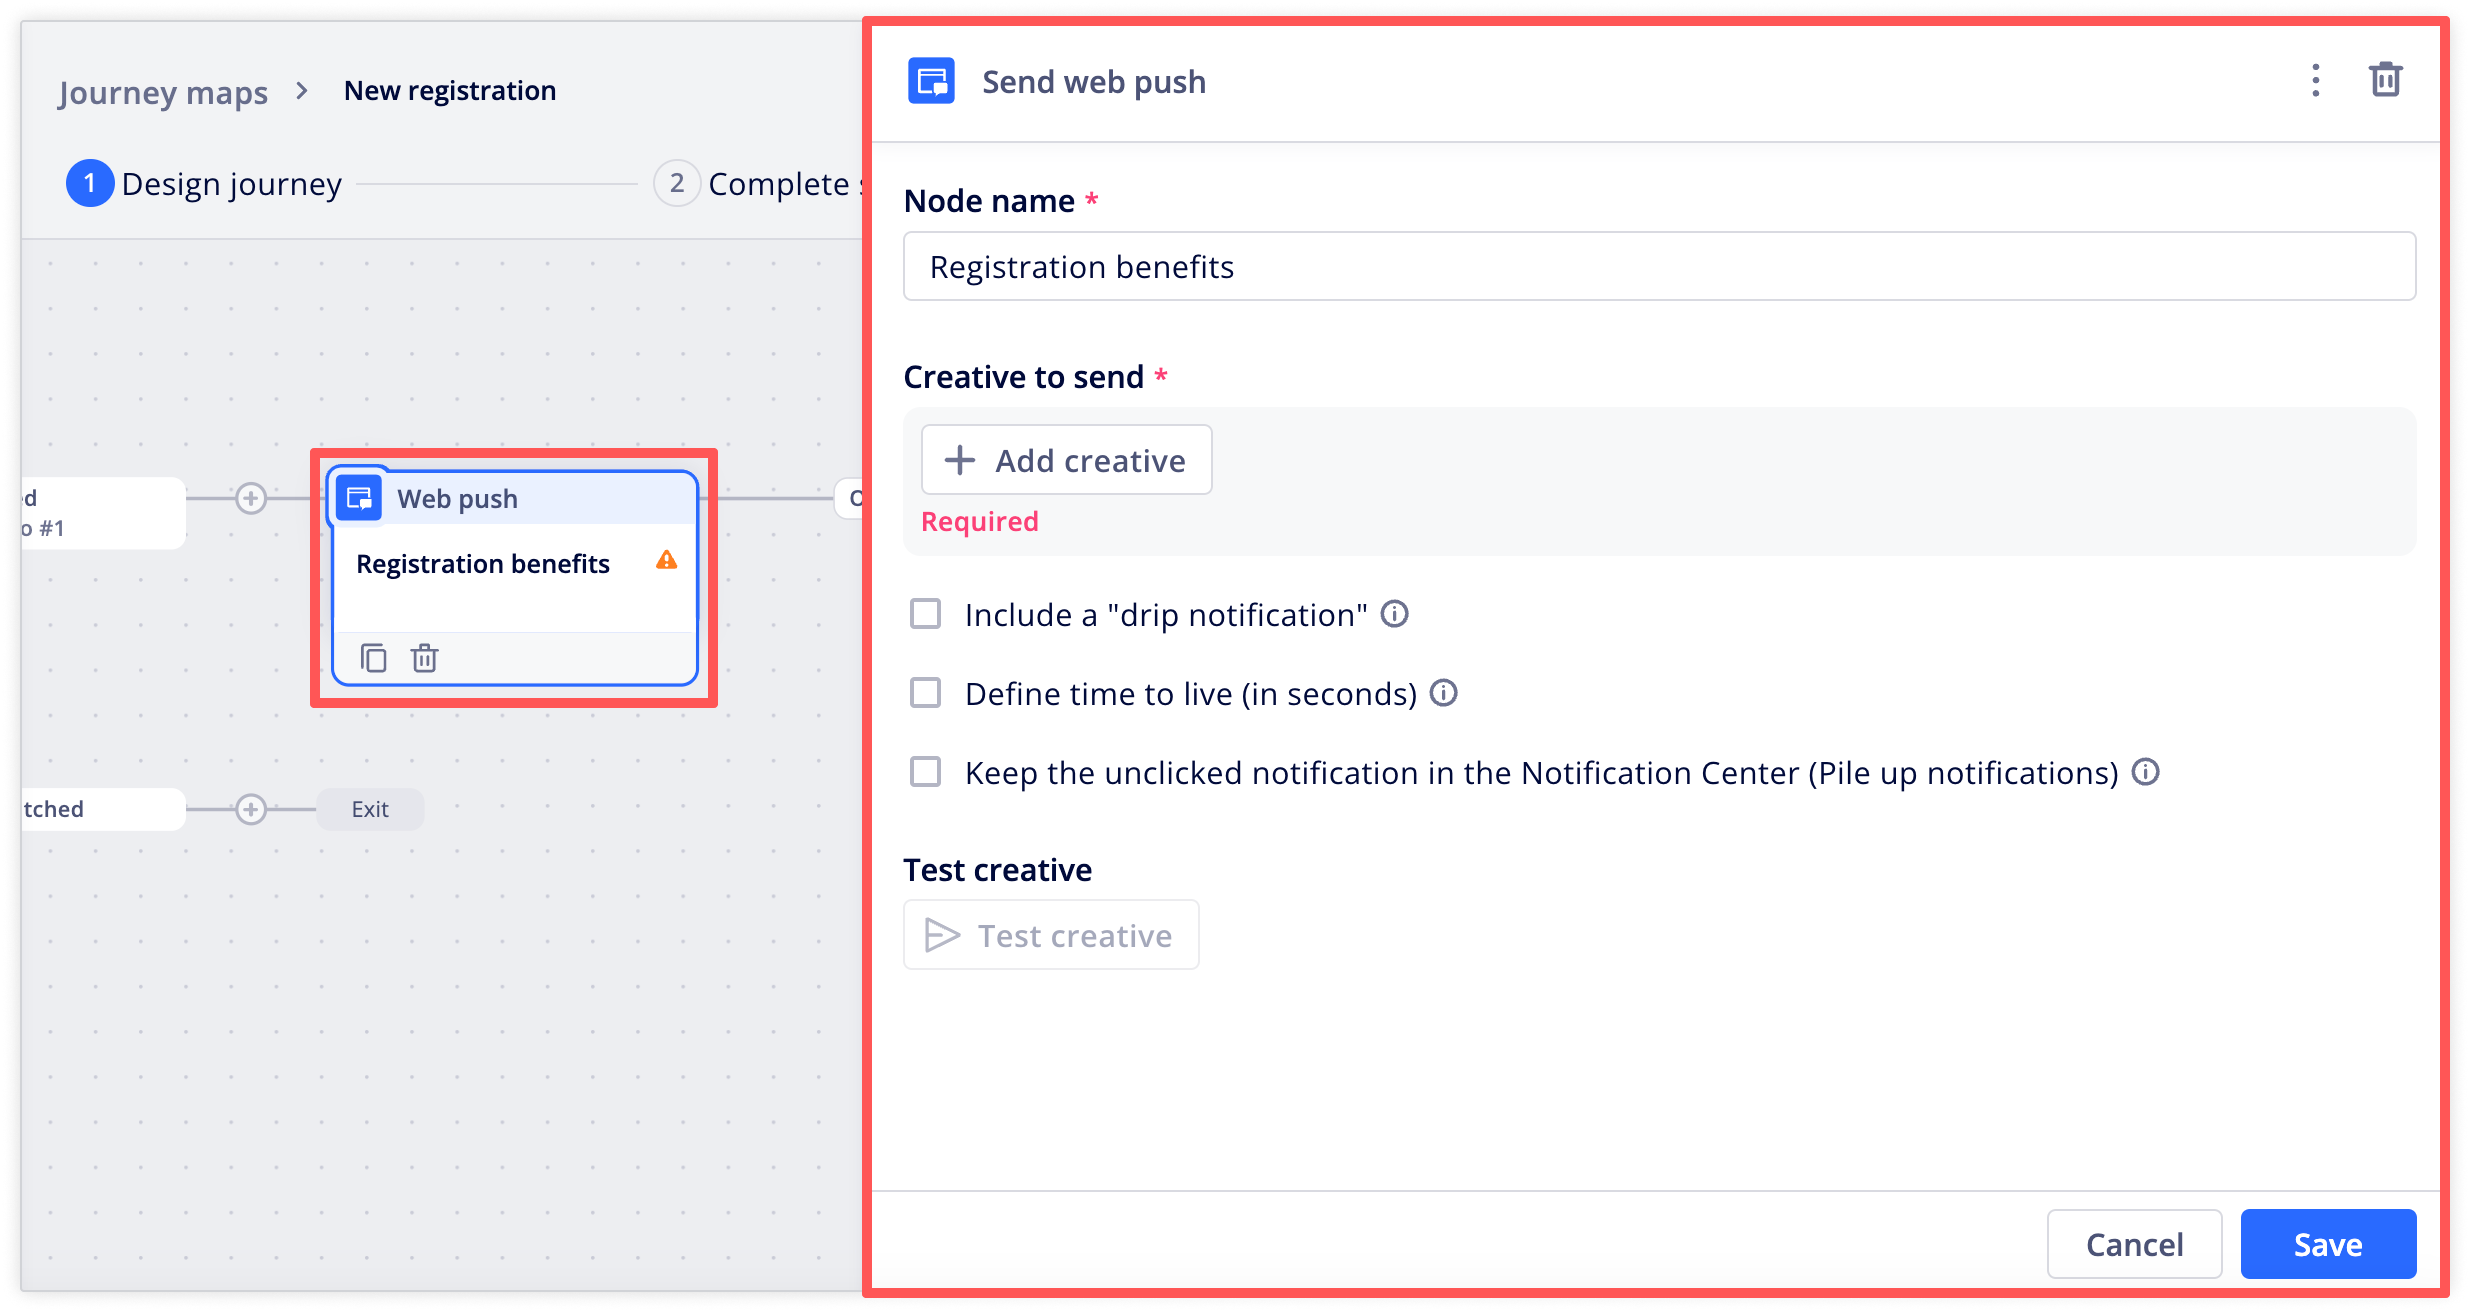
To edit a node, simply click on it, and its settings panel will open on the right. Then, you can modify its settings and click Save to apply the changes.
Comparison operators
Some nodes support comparison operators that evaluate user events and attributes. For example:
- Wait for condition nodes allow you pause users at a specific step in the journey until they satisfy a condition, such as completing a
checkout_completedevent for a product with an ID equal to123. - Check condition nodes allow you to split users to different paths depending on the conditions they satisfy, for example, splitting users to different paths based on their membership level.
Different comparison operators are available for strings and numbers.
String comparison operators
| Operator | Usage | Example |
|---|---|---|
| is one of | True if the operand is an exact match of at least one of the specified values. Specifying multiple comma-separated values is supported. | deviceType is one of mobile, tablet |
| equals | True if the operand matches the specified value exactly. | product_id equals A123 |
| exists | True if the operand exists, regardless of its value. Note that empty values also evaluate to true. | custom_attribute exists |
| contains | True if the operand contains the specified value. You can only specify one value to compare—specifying multiple values is not supported. | product_category contains electronics |
| matches regex | True if the operand matches the specified regular expression. Regular expressions are patterns used to match character combinations in strings. | email matches regex ^\[a-zA-Z0-9.\_%+-]+@(example.org\|example.com)$ |
Numerical comparison operators
| Operator | Usage |
|---|---|
≥ | True if the operand is greater than or equal to the specified value. |
≤ | True if the operand is less than or equal to the specified value. |
> | True if the operand is greater than the specified value. |
< | True if the operand is less than the specified value. |
= | True if the operand is equal to the specified value. |
exists | True if the operand exists, regardless of its value. |
between | True if the operand falls within the specified range (inclusive). |
Delete nodes
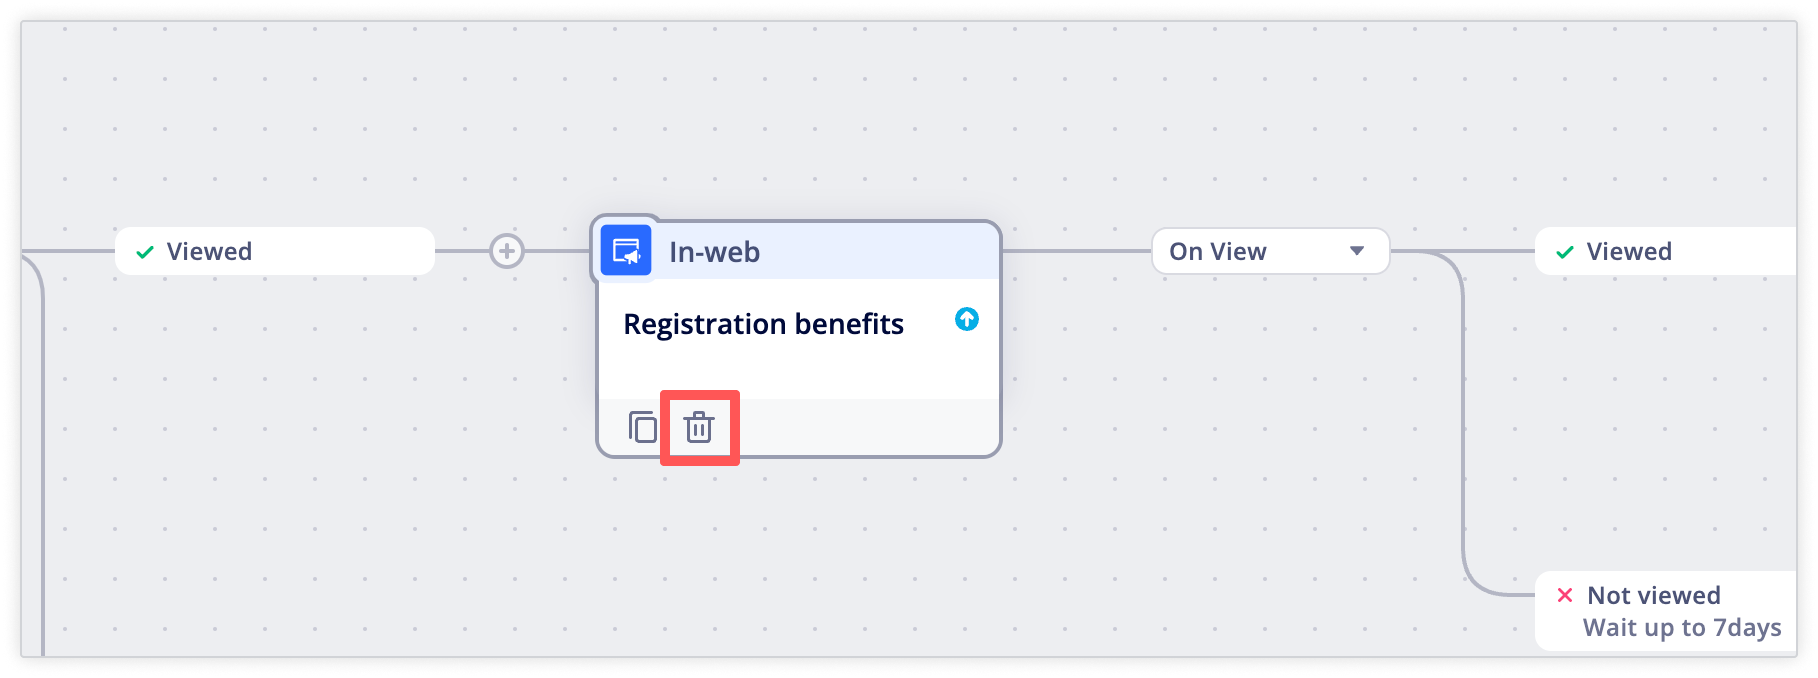
To delete a node, hover over it and click the trash can.
Next, choose how to handle the path after the node you're deleting, then click Confirm.
The available deletion options will differ depending on the node type. For example, if you're deleting a message node, you can choose whether to delete the path for reachable users, the path for non-reachable users, or both.

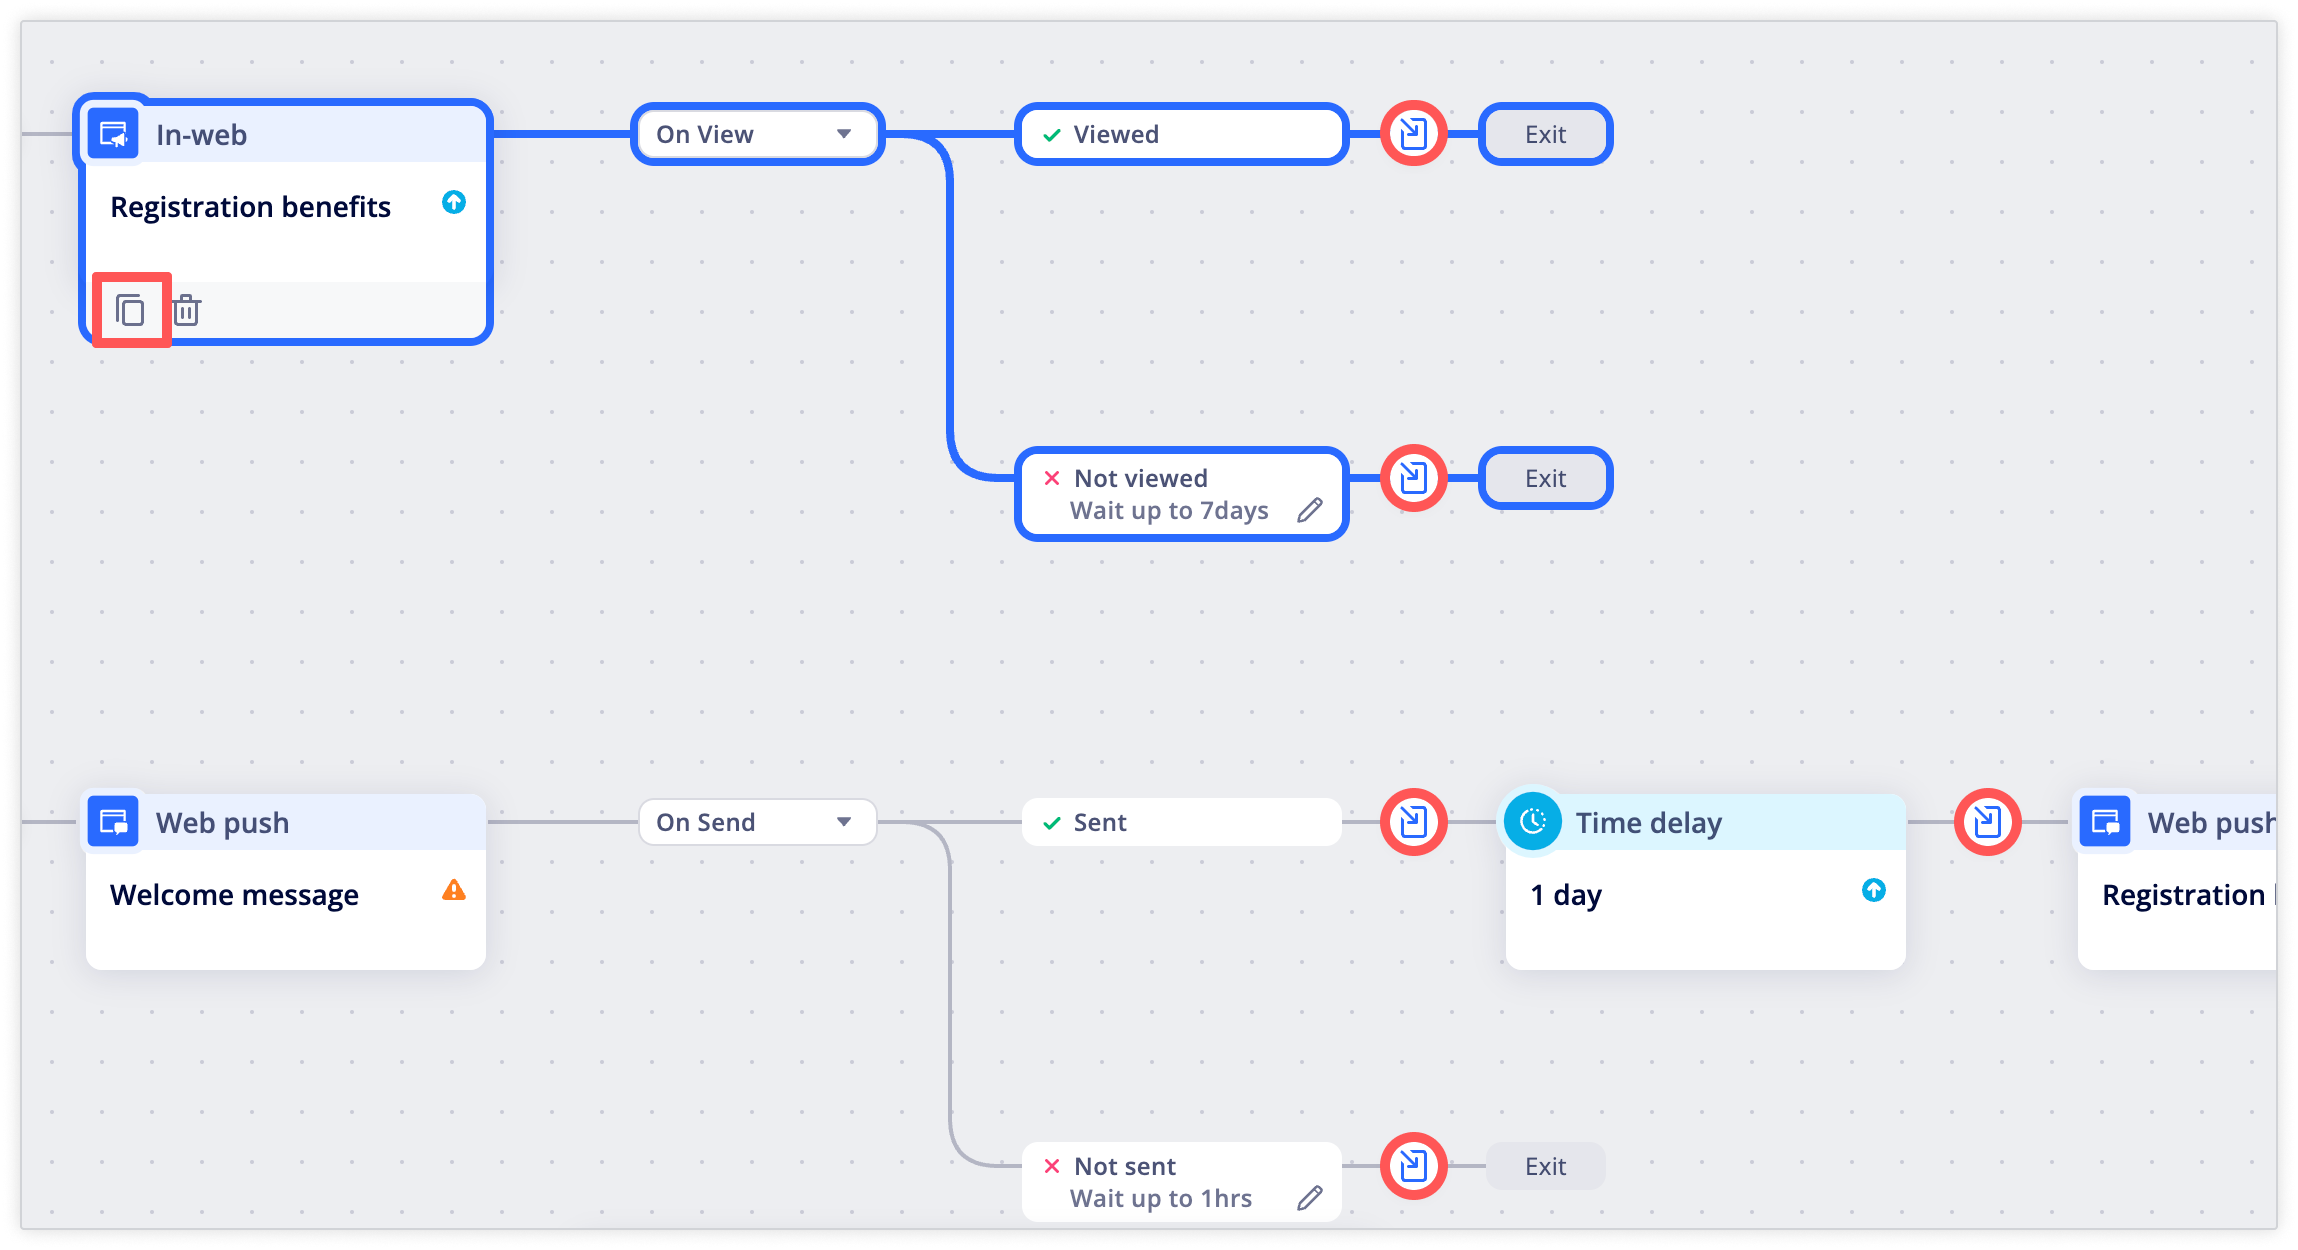
Copy nodes
To copy a node and its subsequent branches, hover over the node and click on the copy button. After clicking the copy button, you can copy the node into any of the available positions shown in the journey.
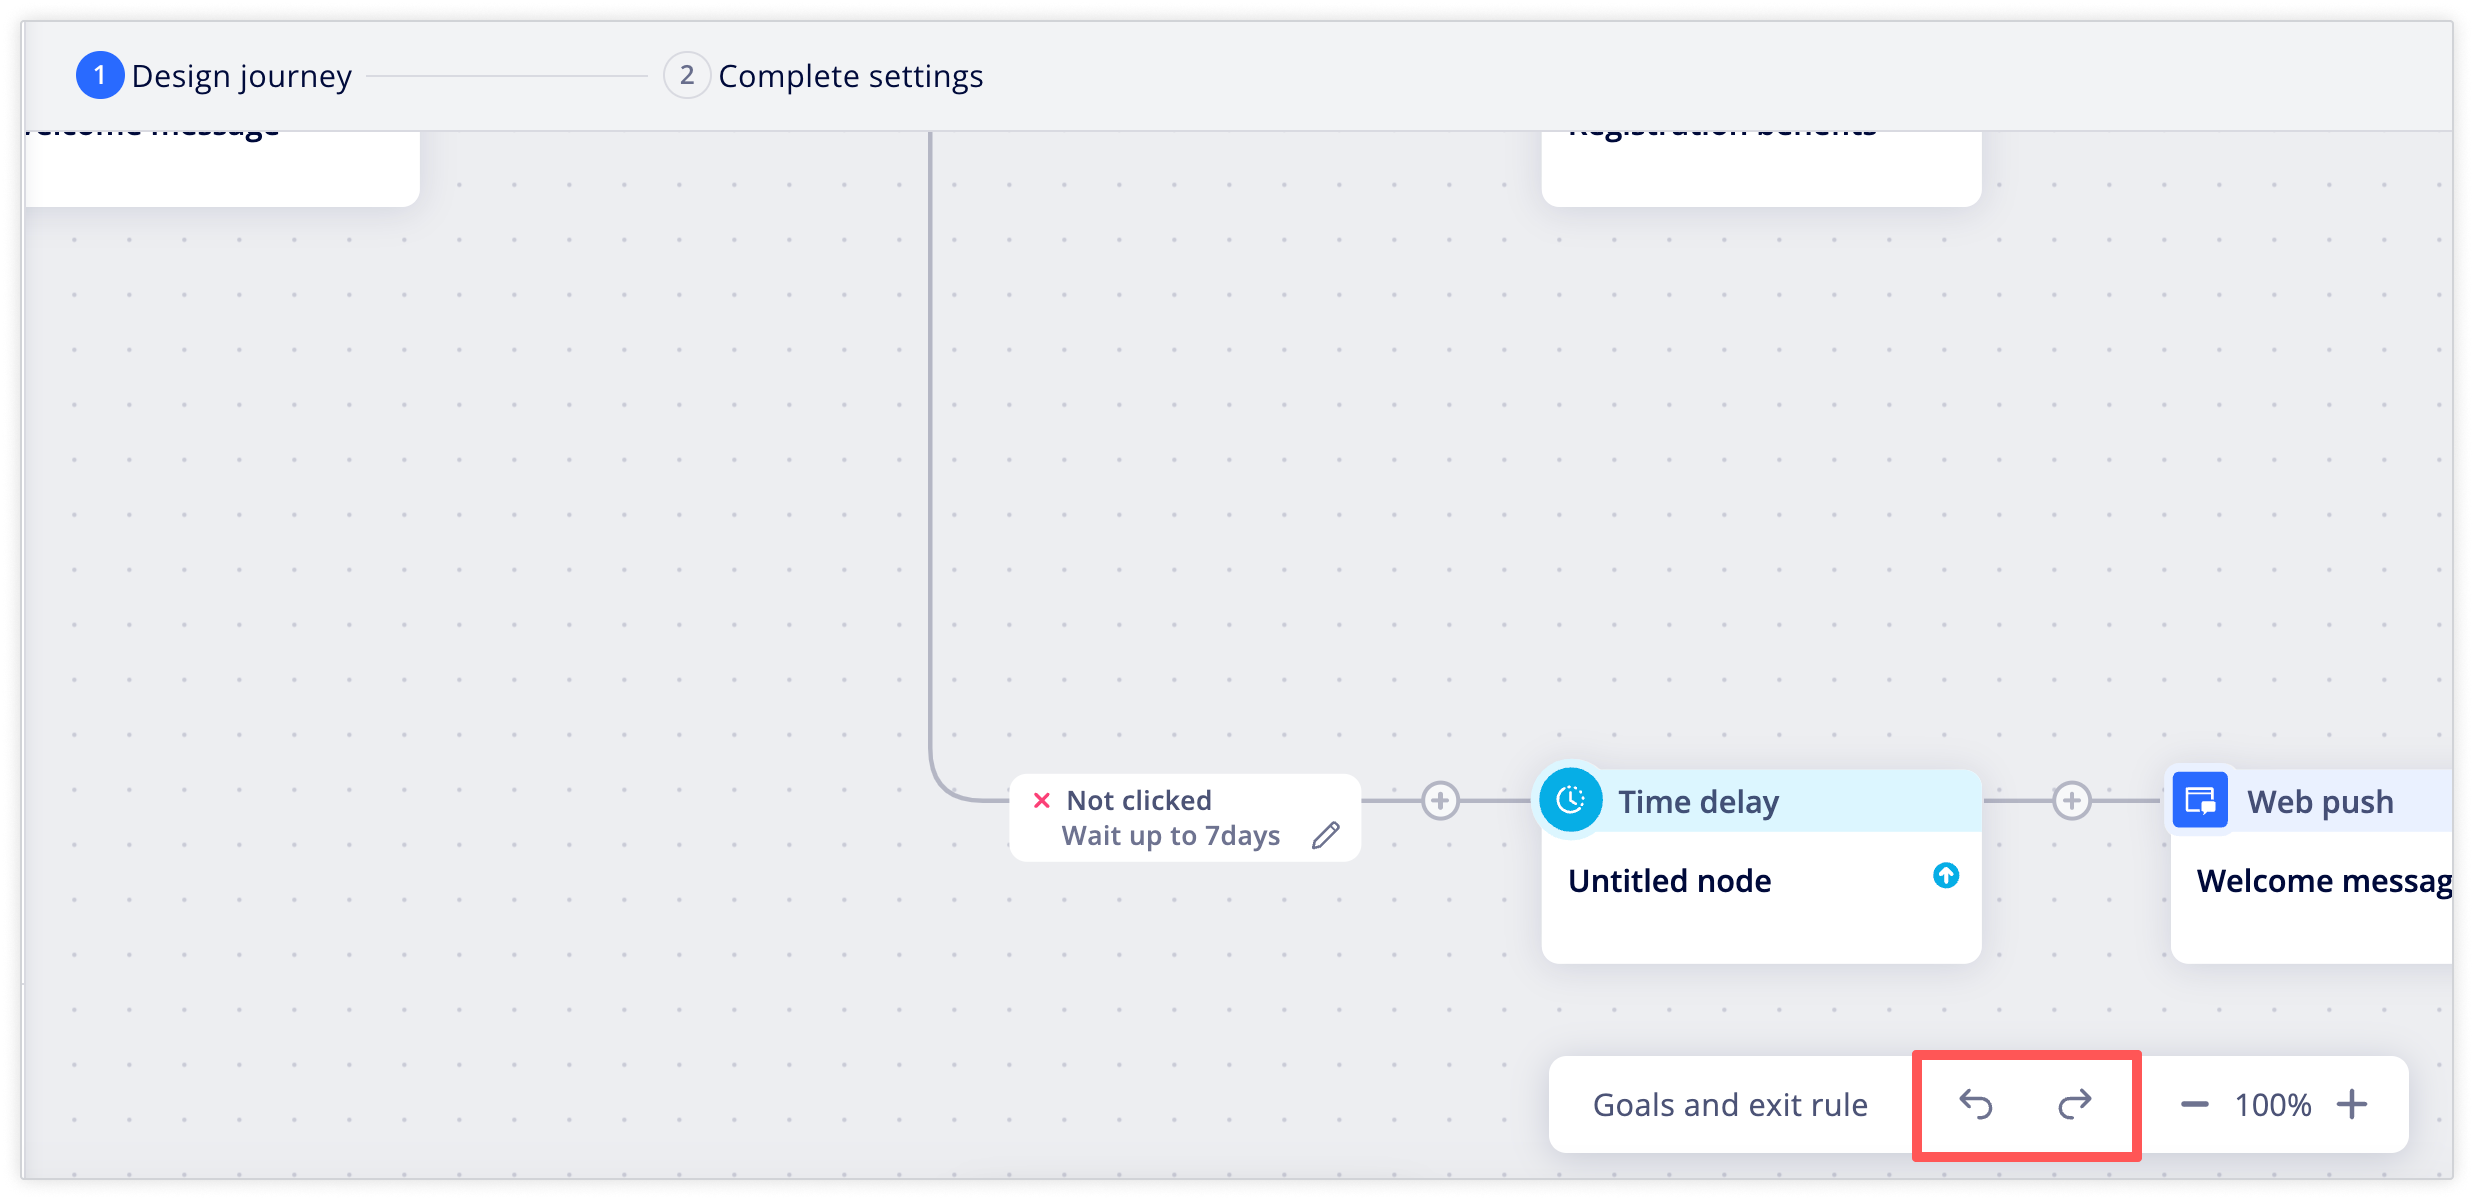
Undo and redo changes
In the bottom right corner of the canvas, you'll find undo and redo buttons, which allow you to revert or reapply the following operations:
- Adding a node
- Deleting a node
- Copying and pasting a node
Updated about 1 year ago