Cyberbiz
Supported channels
- LINE
- Facebook Messenger
Connect your Cyberbiz store to BotBonnie chatbot so users can view their shopping information and receive notifications through supported messaging channels. With this integration, users who link their accounts can:
- View their transaction history
- Receive automatic status notifications
Follow these setup steps to add a connection:
- Obtain credentials
- Connect with Cyberbiz
- Set up account linking
- Enable automatic status notifications
1. Obtain credentials
Before you start the integration, you'll need your API credentials (username and secret) from Cyberbiz. Contact the Cyberbiz support team to request these credentials.
2. Connect with Cyberbiz
Follow these steps to connect your Cyberbiz store to BotBonnie.
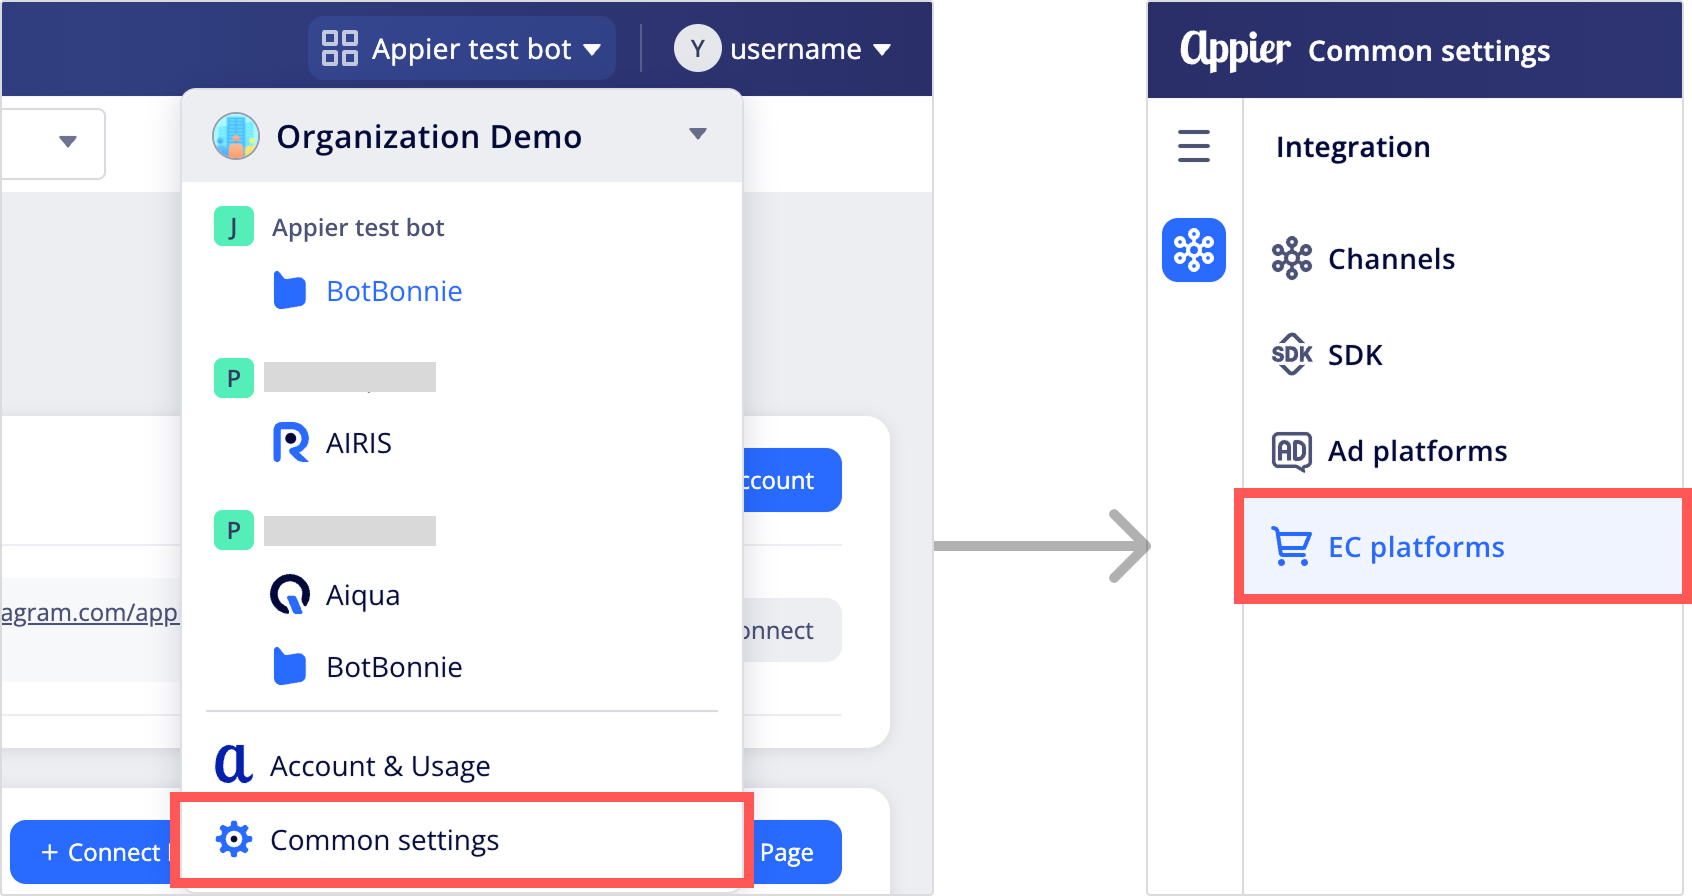
- Open the project launcher dropdown in the top navigation bar, select Common settings, and then click EC platforms in the left navigation panel.
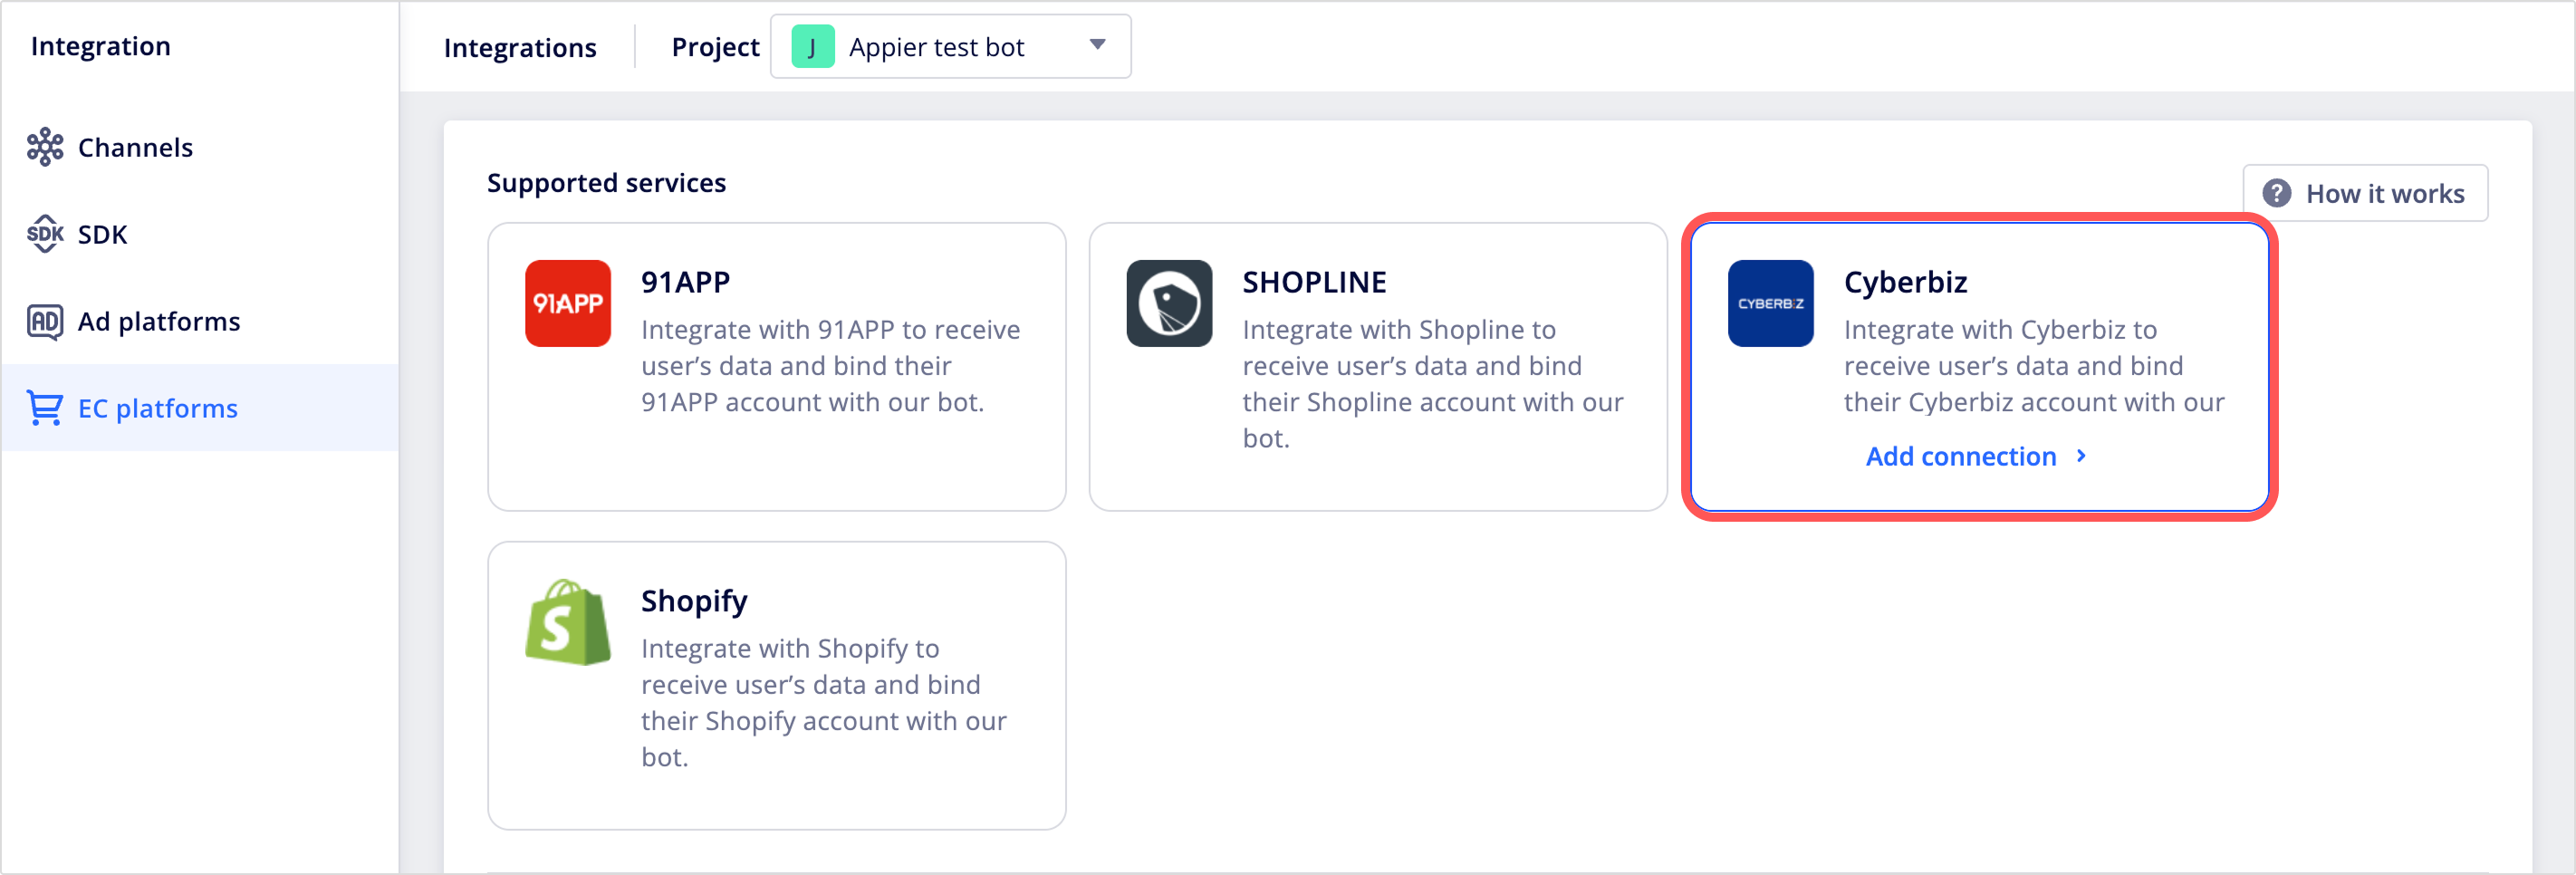
- Click the Cyberbiz card to start the connection.
- Enter a name for your connection. Then, click + Choose page(s) to select the Facebook Messenger or LINE Official Account you want to connect.
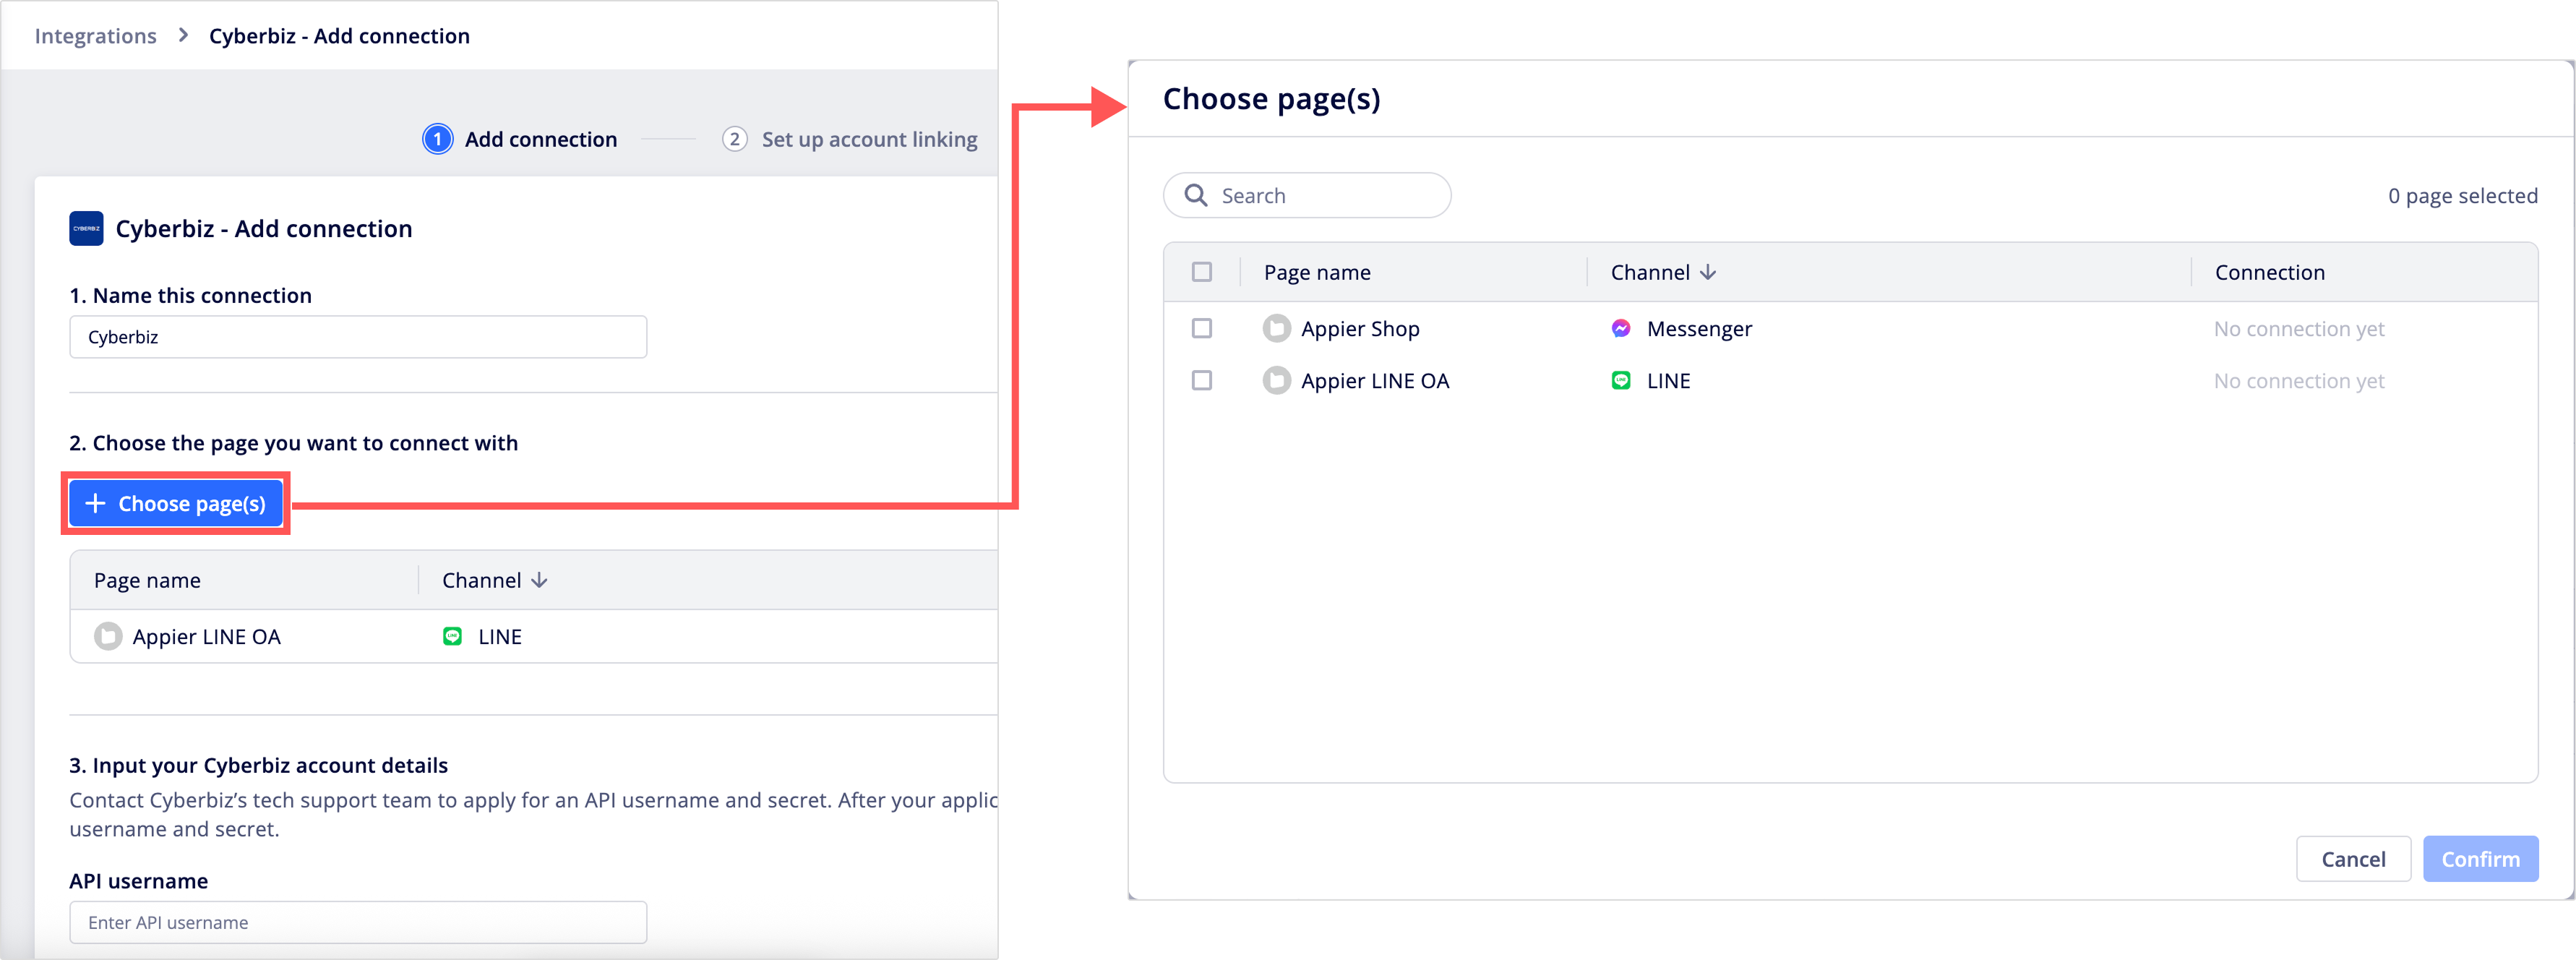
- Enter the following Cyberbiz credentials:
- API username
- API secret
NoteContact the Cyberbiz support team to get these API credentials.
- When you're done, select Next in the upper-right corner to continue to set up account linking.
3. Set up account linking
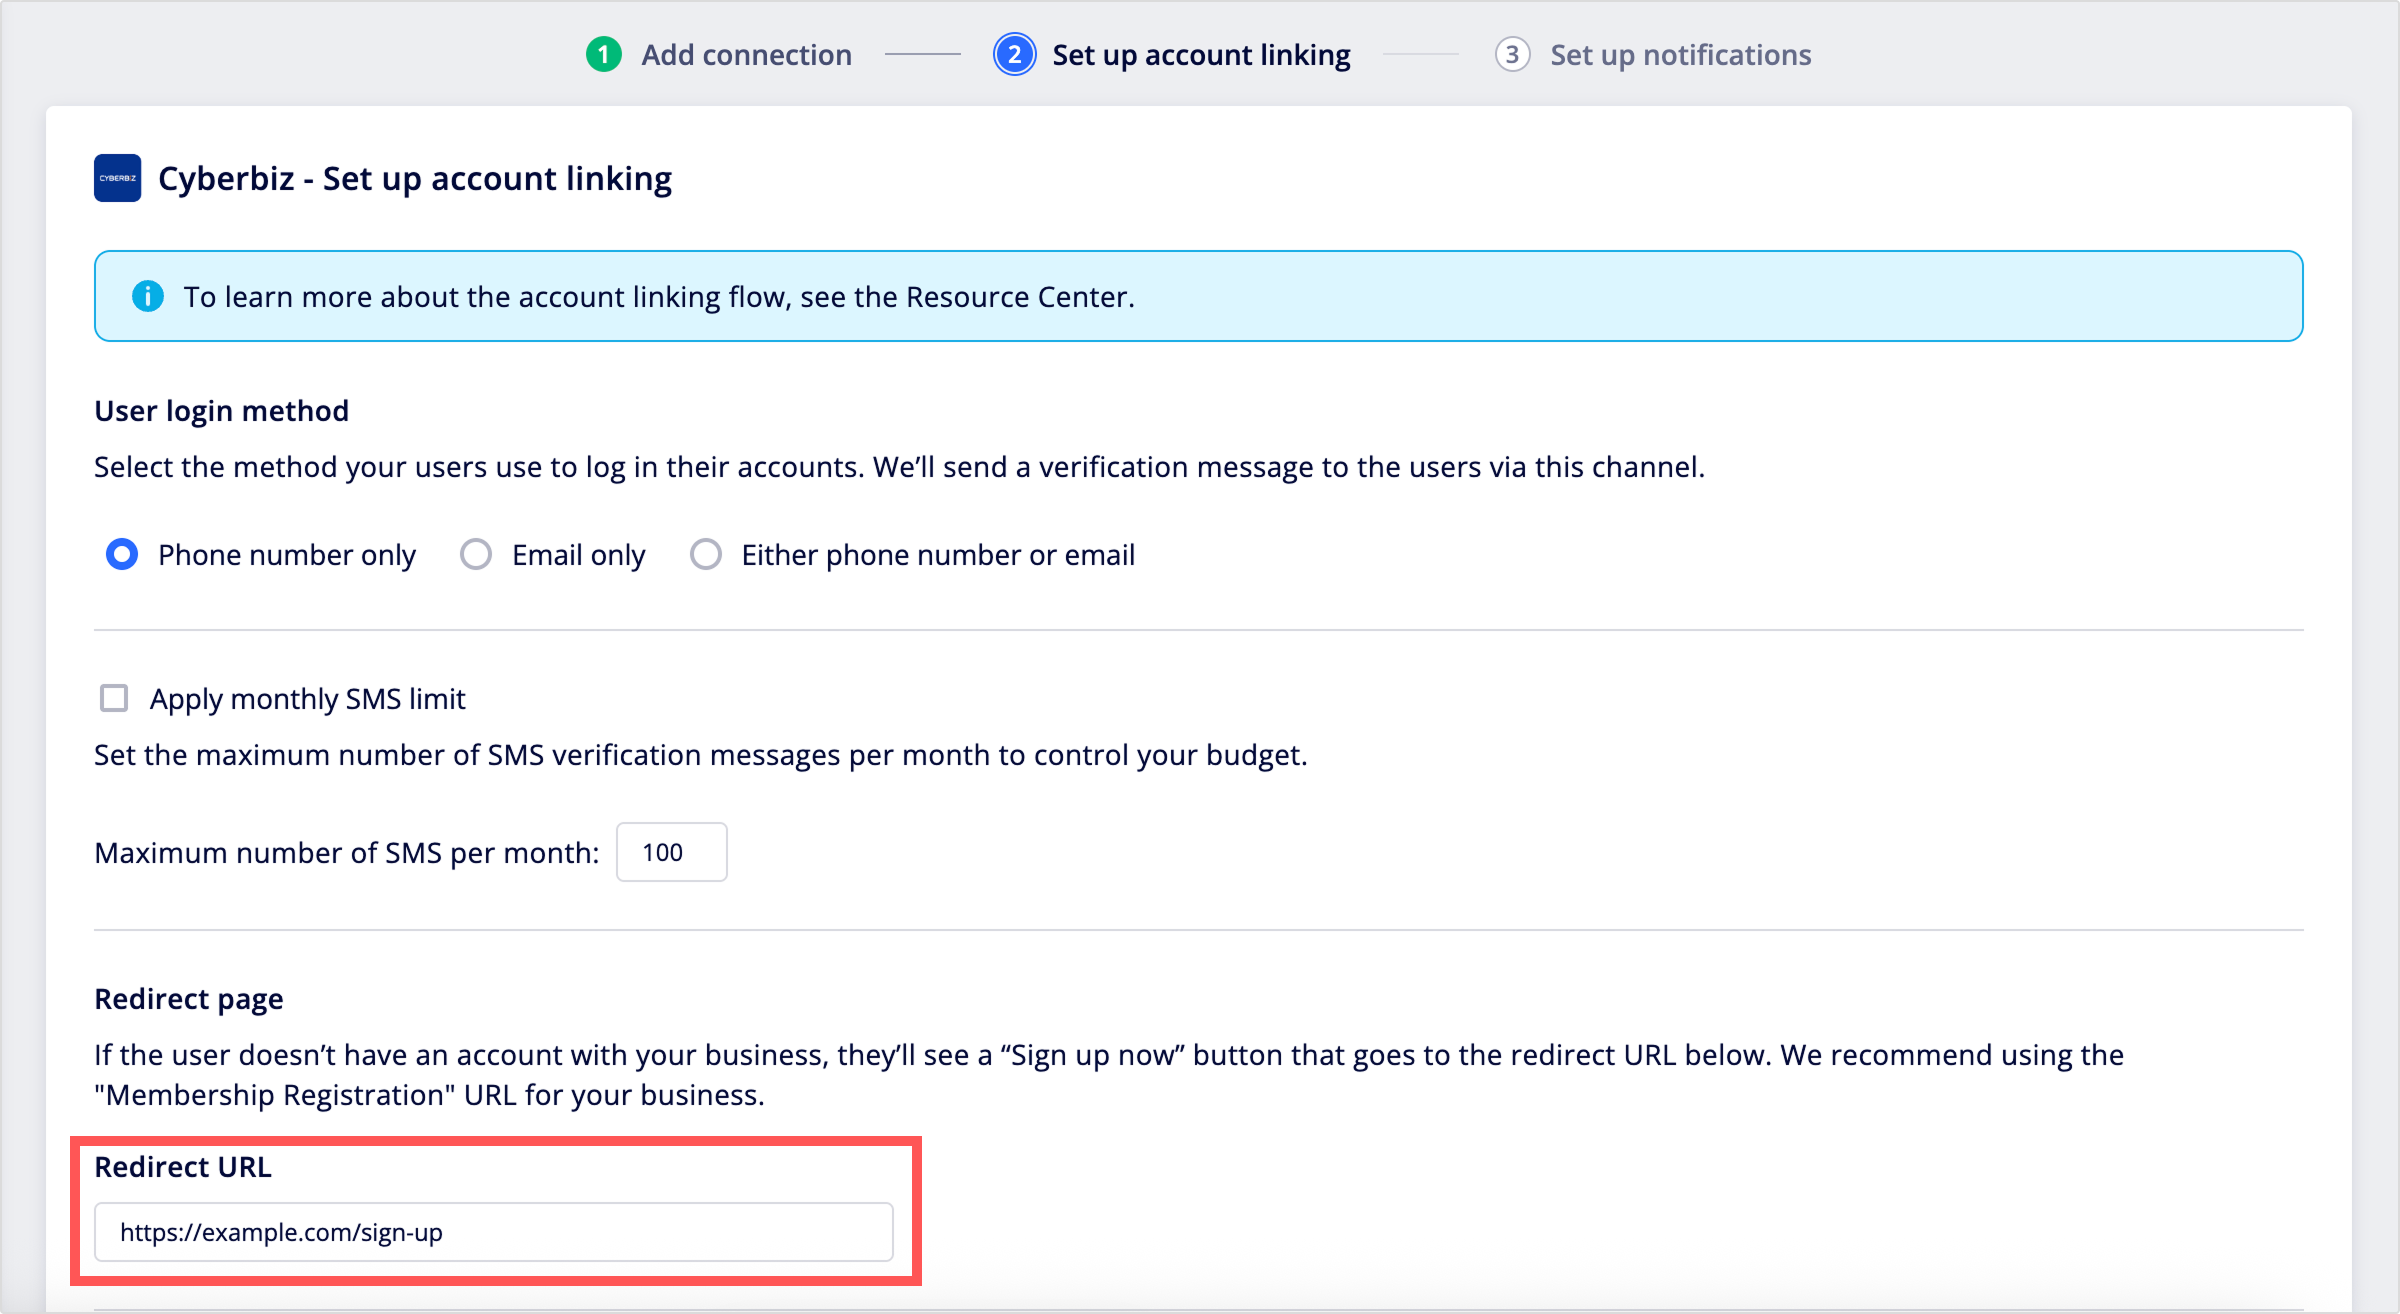
- Under User login method, select how users authenticate: Phone number only, Email only, or Either phone number or email.
- (Optional) Check the Apply monthly SMS limit box and specify the maximum number of SMS verification messages per month to control your budget.
- Enter a Redirect URL where users can register as members. This URL is essential for initiating the account linking process via chatbot flows or menus.
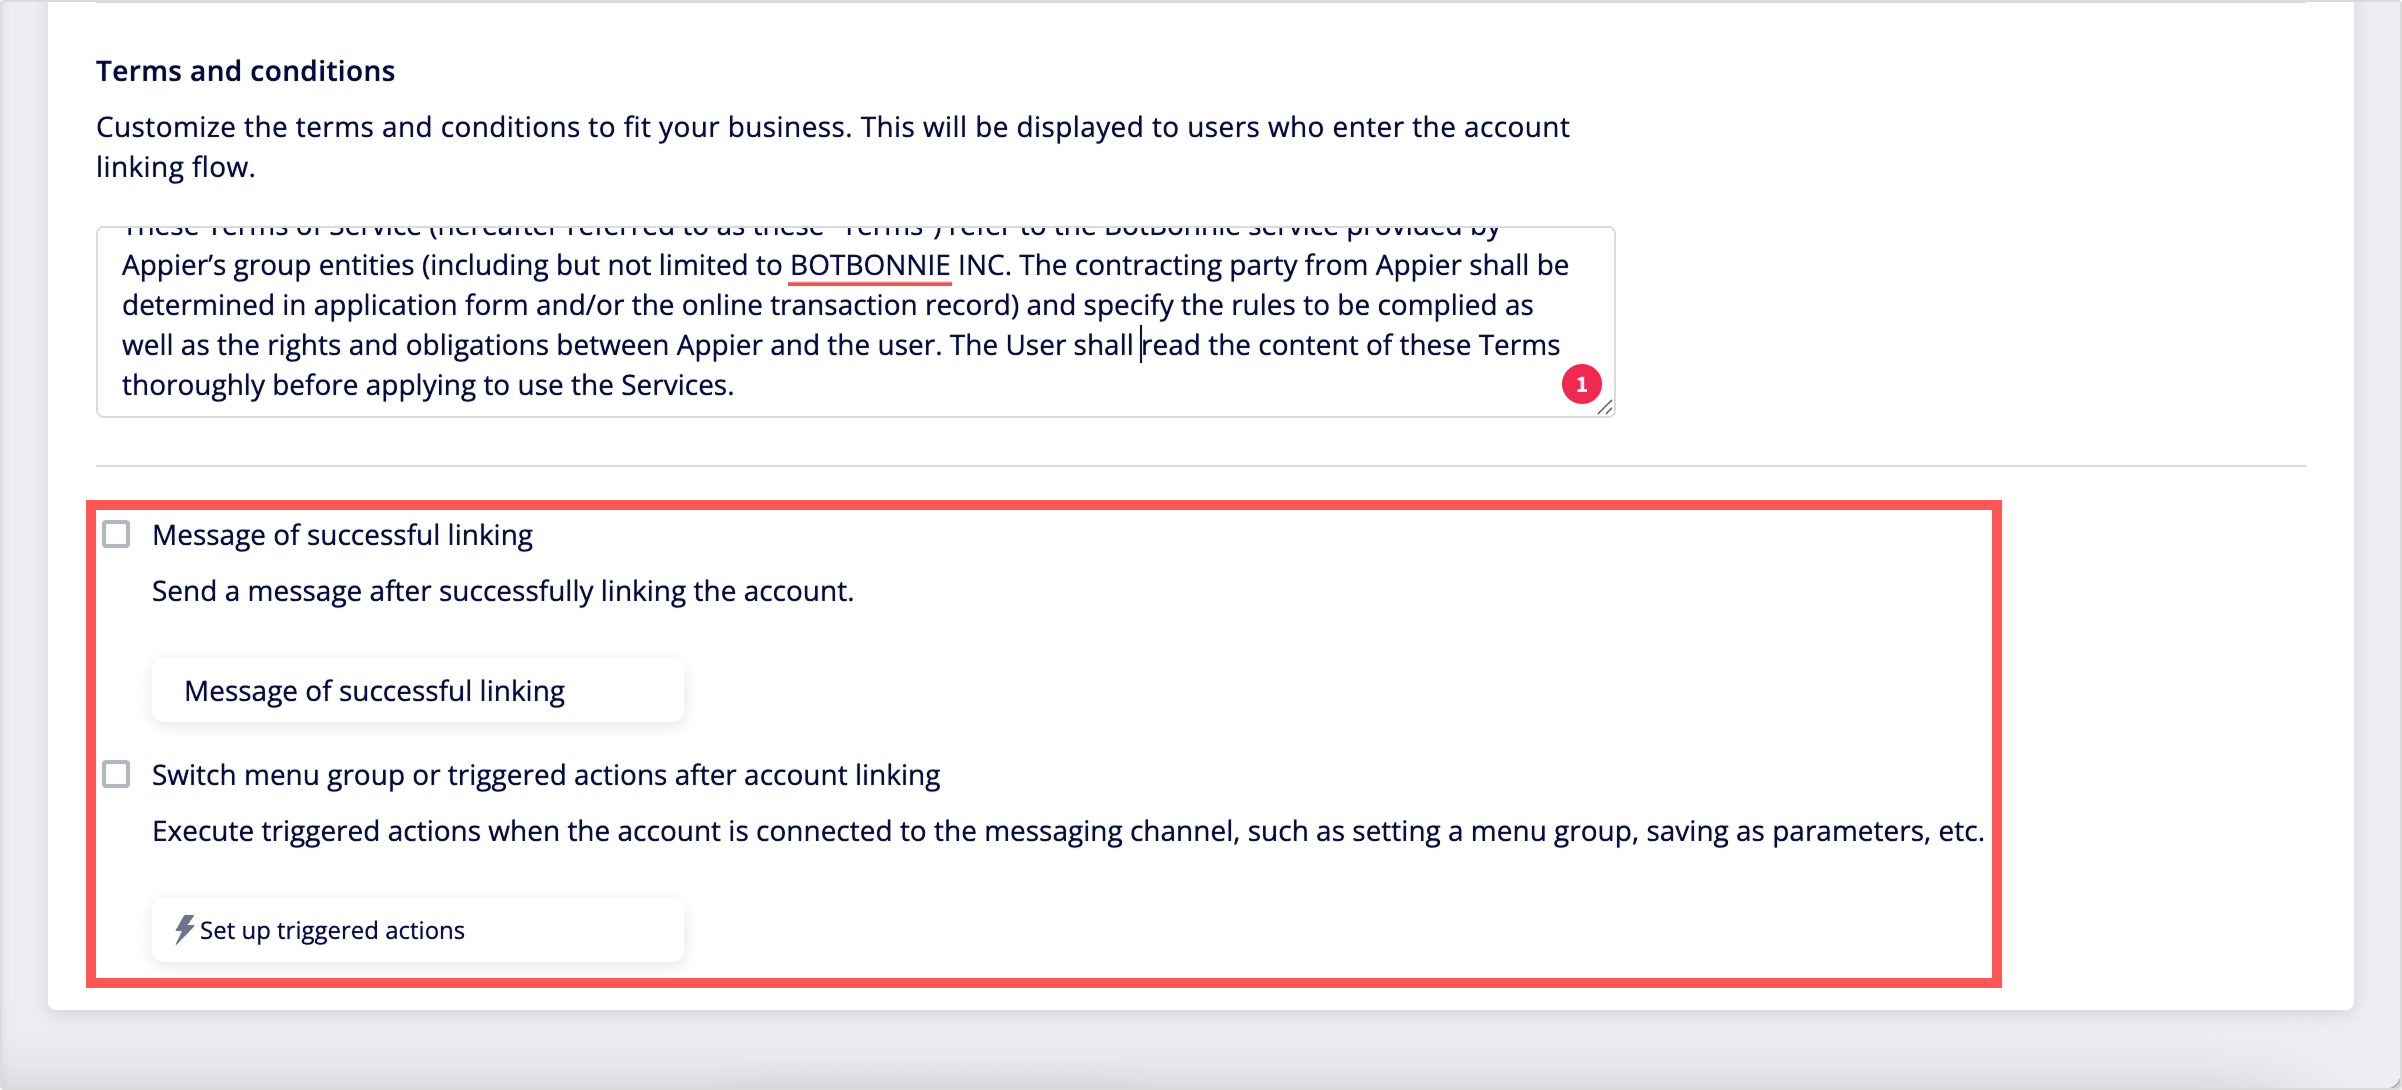
- Customize the Terms and conditions text to display during the account linking flow.
- Configure the following options:
- Message of successful linking: Enable this to send a confirmation message when the system successfully links an account.
- Switch menu group or triggered actions after account linking: Enable to trigger specific actions after successful linking.
- When you're done, select Next in the upper-right corner to continue to enable automatic status notifications.
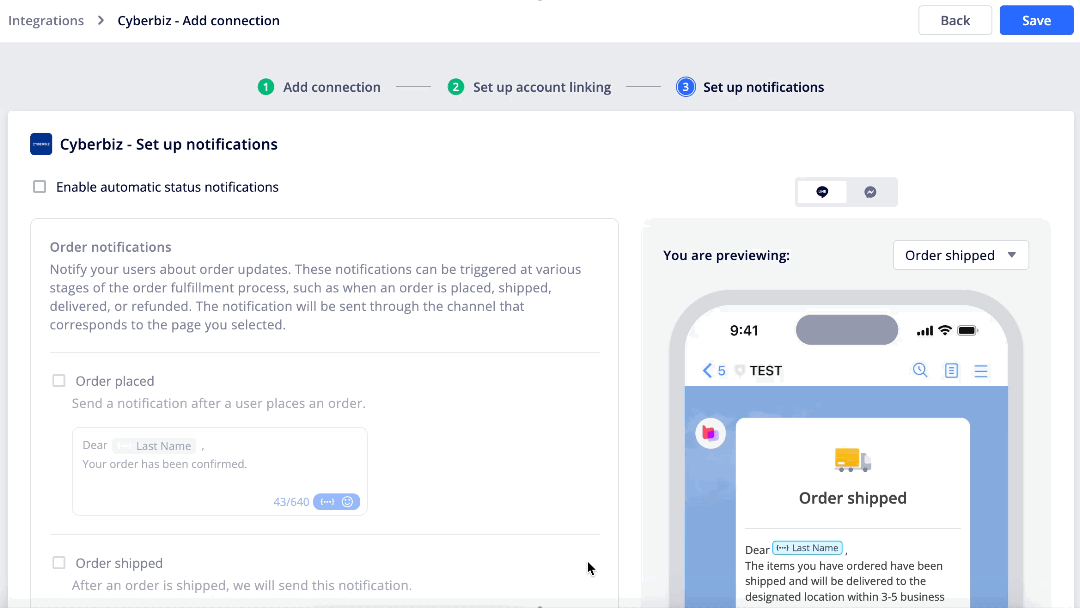
4. Enable automatic status notifications
After users link their accounts, you can enable the following automatic notifications to keep them informed on status update across different messaging channels:
Category | Supported notifications | Supported messaging channels |
|---|---|---|
Orders | • Order placed | • LINE |
Points | • Points received | • LINE |
Coupons | • Coupon received | • LINE |
To enable and customize these notifications:
- Select the Enable automatic status notifications checkbox, then choose the specific notification types you want to activate, for example, Order placed.
- Customize the message content for each enabled notification type and preview how it will appear to users.
- When you're done, click Save in the upper-right corner to complete the connection setup and the connection will appear in the connection list.
Updated about 1 month ago