Schemas
Use schemas to define how your organization's data is interpreted. Each schema determines a field's data type, its display format, and how you can aggregate it across reports and segments. Use event schemas to keep track of user actions and user schemas to manage profile properties.


How schemas are created
Schemas are created in one of two ways:
| Method | Description |
|---|---|
| Auto | Appier automatically creates schemas when data is ingested, either by mapping recognized data to a pre-built definition or by inferring a new schema from unrecognized data. |
| Manual | If auto-created schemas don't meet your needs, you can manually create custom properties for event schemas and user schemas. |
NoteFor the full list of AIRIS system schemas, see System Event Schema and System User Schema.
Schema quota
Each organization can have up to 500 event schemas and 500 user schemas. System schemas don't count toward either limit. If you reach the event schema limit, user schema auto-generation still works, and vice versa.
When a schema type reaches either limit, auto-generation for that type ceases, and no new properties are automatically added. You can free up capacity by reviewing your existing schema fields and deleting any unused properties.
Editing a schema
Schema editing requires Admin permission. Otherwise, schemas are read-only. Contact customer support to request schema edits. Before making changes, note these system behaviors:
- You can make changes to user-defined fields, such as their names, descriptions, and data types.
- Appier automatically adds new properties to an existing schema when new data arrives. However, if you've manually edited an existing property, Appier won't overwrite your changes with incoming data. To update a property, either edit it directly or delete the schema and let the next tracked event regenerate it.
- Editing a schema only changes how tracked data is read and displayed. It doesn't affect the actual tracking of the raw data. For example, if a property was originally ingested as a Text type but should be Number, changing the data type displays the value correctly in reports (for example,
1000instead of"N/A"). - Use the AI tool to update the names and descriptions with clear semantic context, making the schema easier to understand and use in segments and reports.
ImportantIf you update a Schema key, update the same key in your tracking code to prevent duplicate events in your schemas.
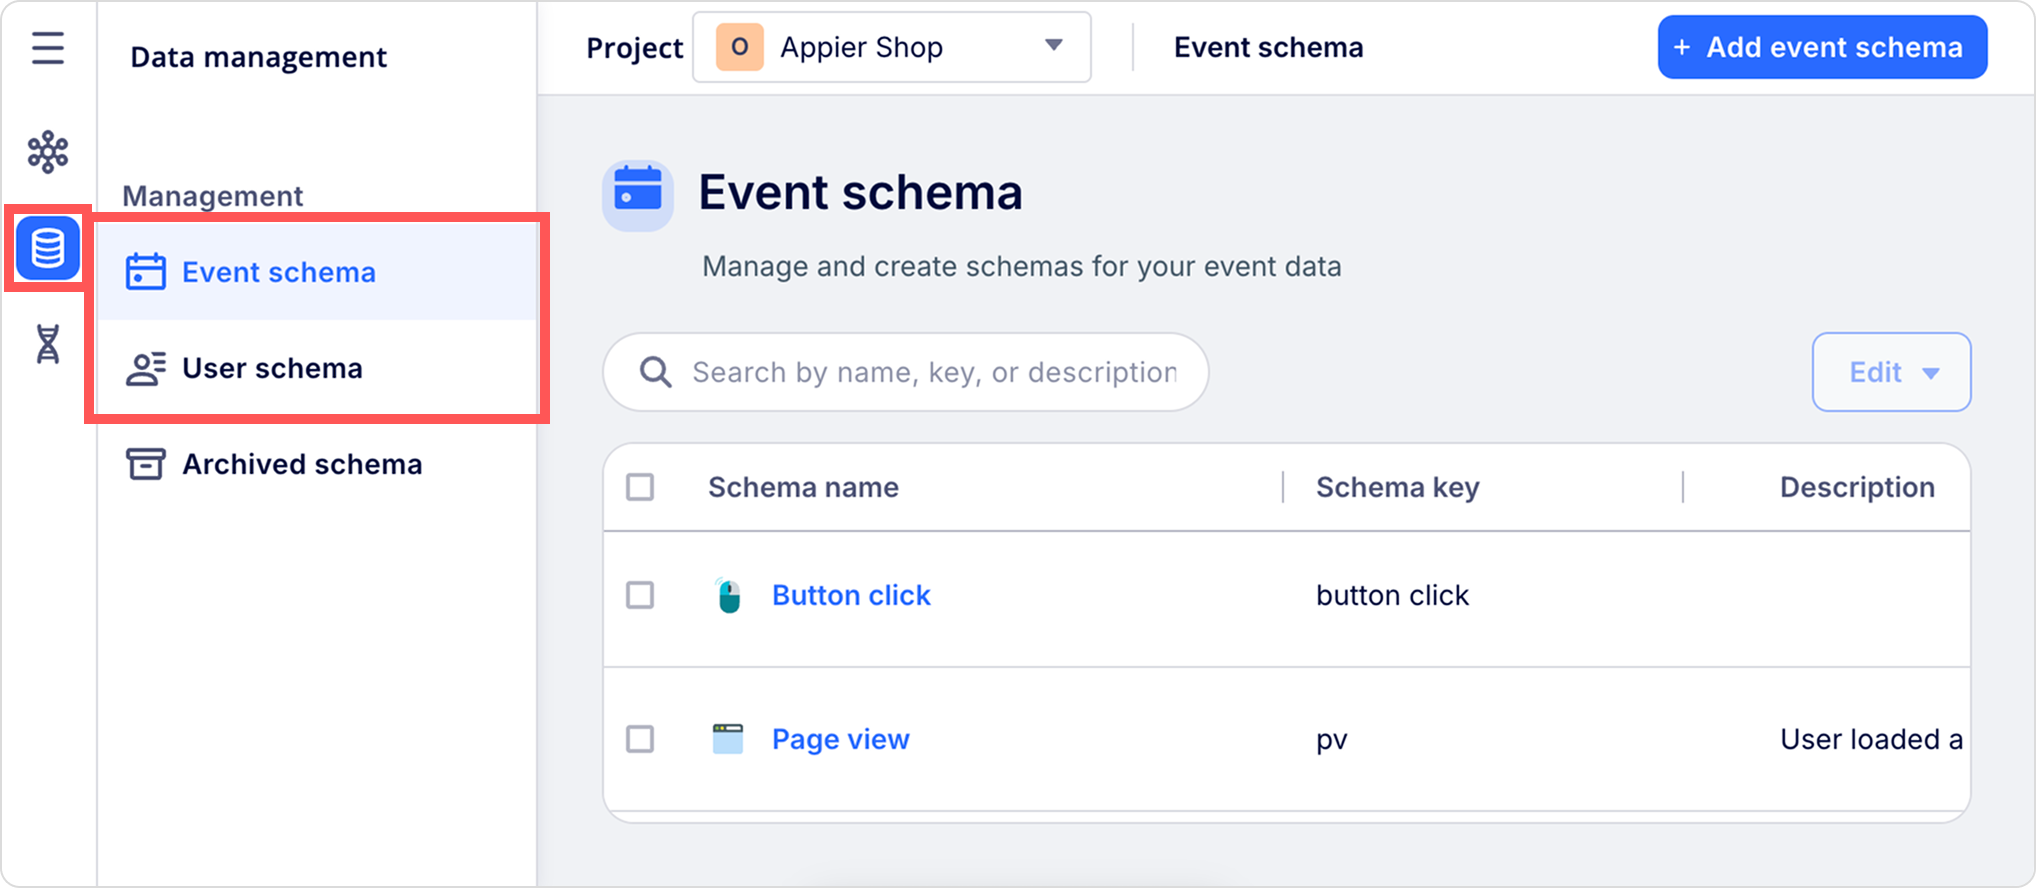
To edit an existing schema, go to Common settings > Data management, and select Event schema or User schema from the schema list.
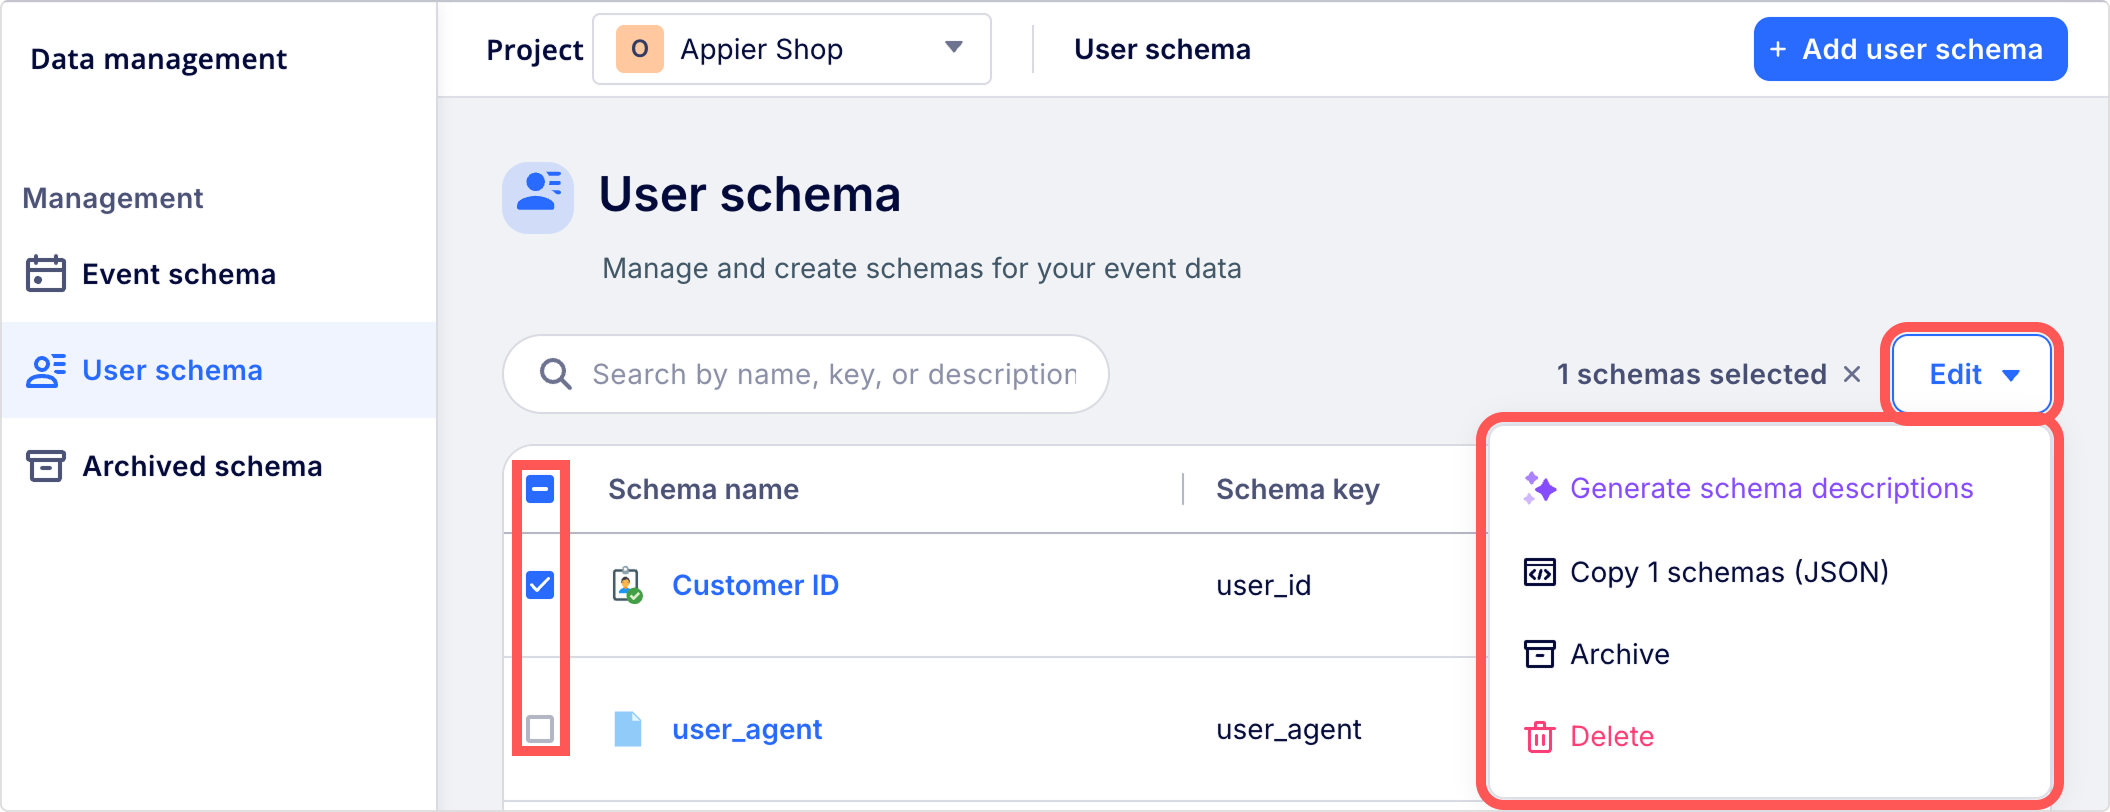
To bulk edit schemas, click the checkbox at the top to select all schemas or select the checkboxes for multiple schemas, and click the Edit dropdown to generate schema descriptions with the AI tool, copy selected schemas in JSON format, archive selected schemas, or delete selected schemas.
Managing schema visibility and privacy
Use schema-level settings to manage your data, keep your workspace organized, and control who can view and use specific data points.
- Archive a schema when it's no longer in active use but its historical data and configuration still need to be retained. To manage or restore archived schemas, go to Common settings > Data management and select the Archived schema tab.
- Deleting a schema permanently removes the field, its metadata, and its associated data. After deletion, the data is no longer accessible in reports, segments, or user profiles.
- Turn on Sensitive information (AIRIS) for fields that contain personally identifiable information (PII) or other confidential data. This setting limits access by user role, warns users in the console, and helps prevent accidental data exposure.
Generate names and descriptions
Generating schema names and descriptions is only available for accounts with AIRIS enabled.
Use the built-in AI tool to automatically generate clear, human-readable names and descriptions for your schema keys. Adding semantic context serves two purposes:
- Helps your team quickly understand and use these schemas in segments and reports.
- Ensures that the Appier AI Agent accurately interprets your data and provides reliable recommendations.
You can generate schema names and descriptions with the built-in AI tool in two ways:
Best practices
- Always review and verify if the auto-generated names and descriptions are clear, organized, and accurately matched to your actual business logic.
- When generating in bulk, use the Review priority column to quickly focus on items flagged as Must review or Review recommended. If you're not satisfied with the AI-suggested text, click the Edit dropdown and either select Regenerate or Restore original.

Generate for an individual schema
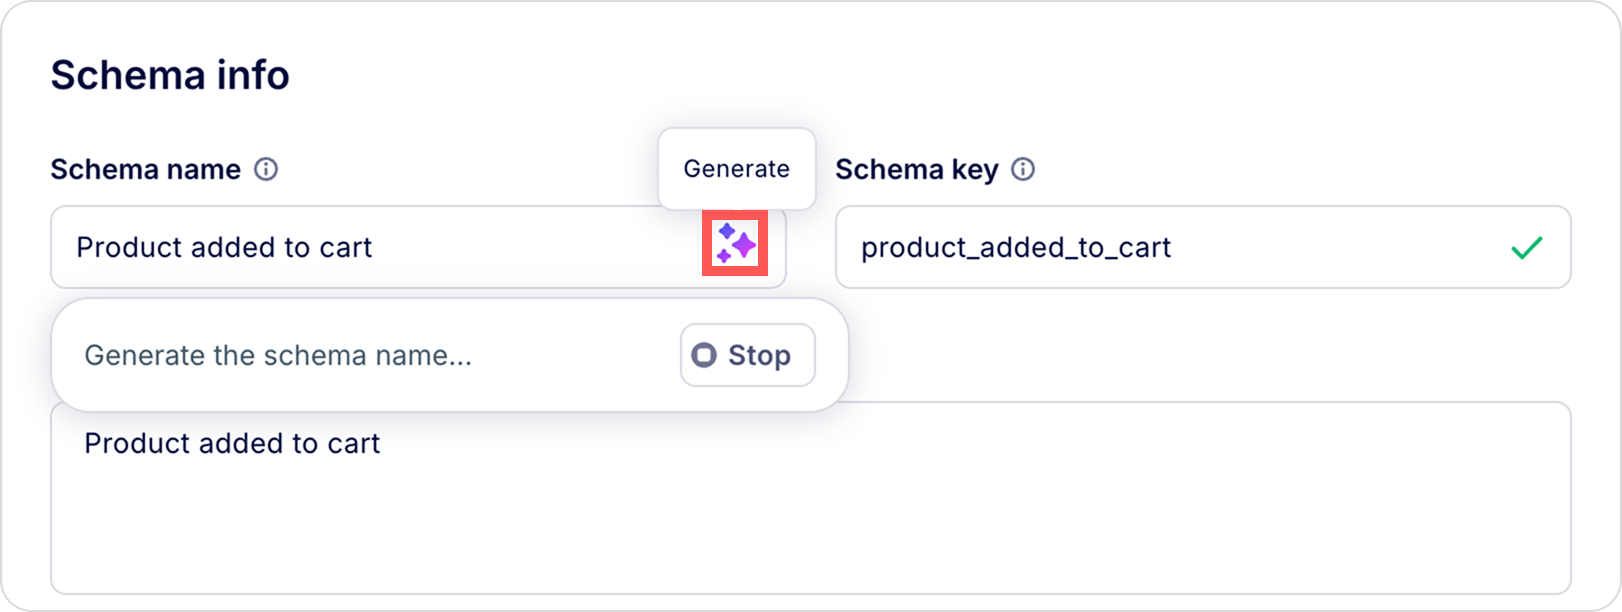
When editing a single schema, click the AI icon inside the name or description fields to automatically generate the text. Always review and verify the generated text before saving your changes.
Generate in bulk
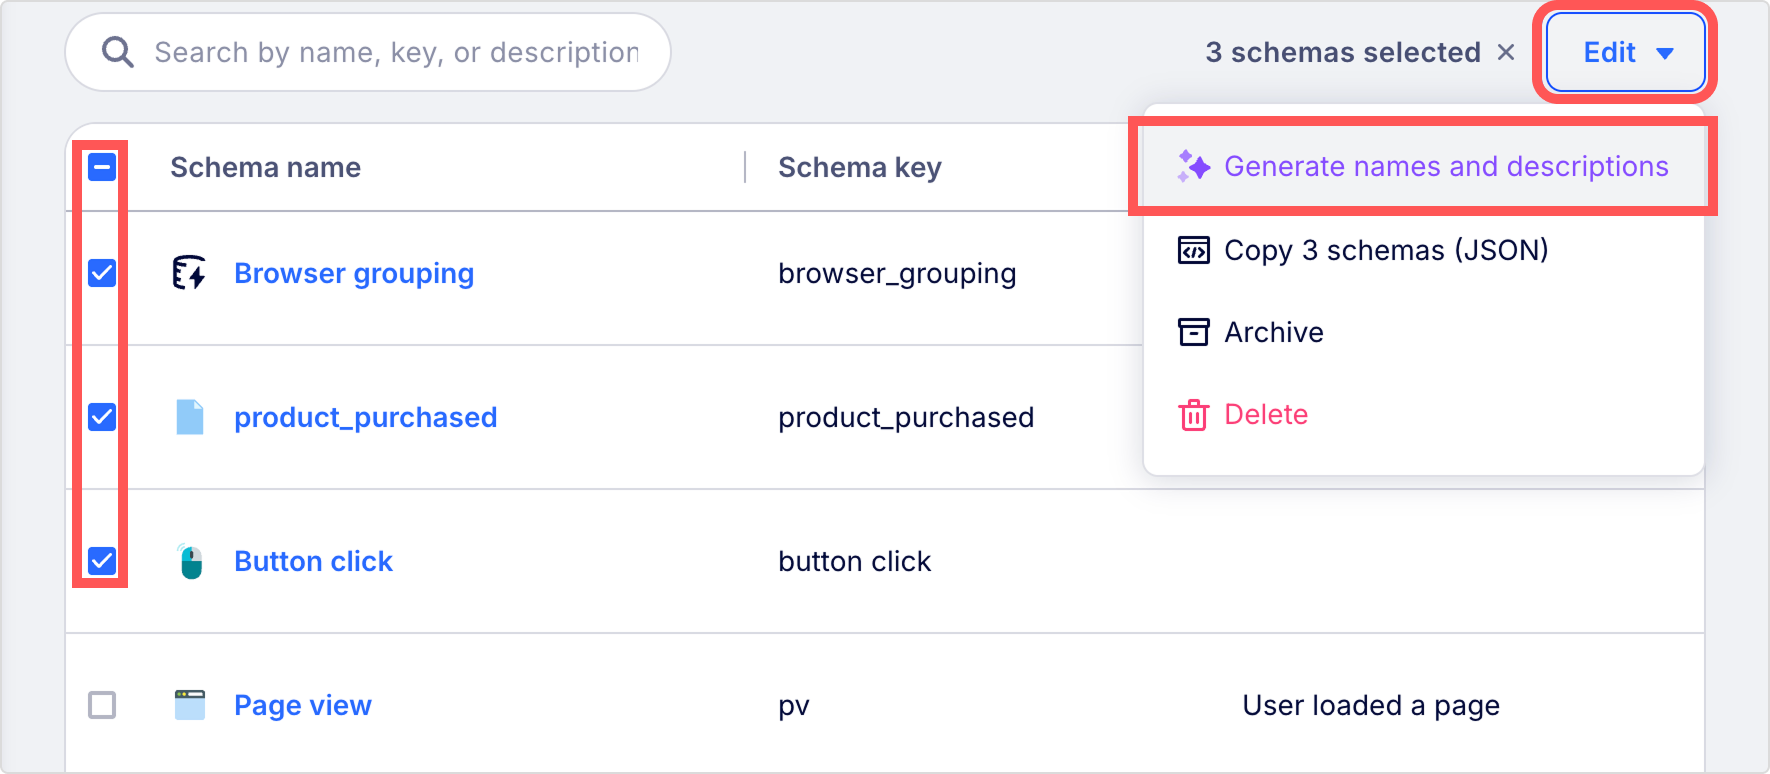
Follow these steps to update multiple schemas and their properties at once.
- On the Data management page, select Event schema or User schema, then select the checkboxes for multiple schemas.
- Click the Edit dropdown and select Generate names and descriptions.
- In the Review schema step, review the proposed name and description for each schema, editing manually if needed, and click Next.

- On the Review properties step, repeat the review process for the properties' names and descriptions that are associated with your selected schemas.
- Click Apply to save the generated names and descriptions to your workspace.
Updated 3 months ago